SharePoint and OneDrive Integration
The SharePoint integration in TurboDocx brings powerful document management capabilities to your organization's SharePoint environment. This seamless integration allows for efficient importing of templates from different SharePoint sites and User's OneDrive and effortless exporting of deliverables back to SharePoint.
Configuring SharePoint and OneDrive for Business with TurboDocx
This guide will provide you step-by-step instructions on creating a SharePoint integration that can connect to your SharePoint sites as well as OneDrive. We will be using the Microsoft Graph API to access the SharePoint and OneDrive resources.
Pre-requisites:
An Office365 Tenant with SharePoint and OneDrive for Business Enabled Access to the Admin/Azure portal and the ability to register an application.
Step 1 : Register your application in Entra ID (Azure Active Directory):
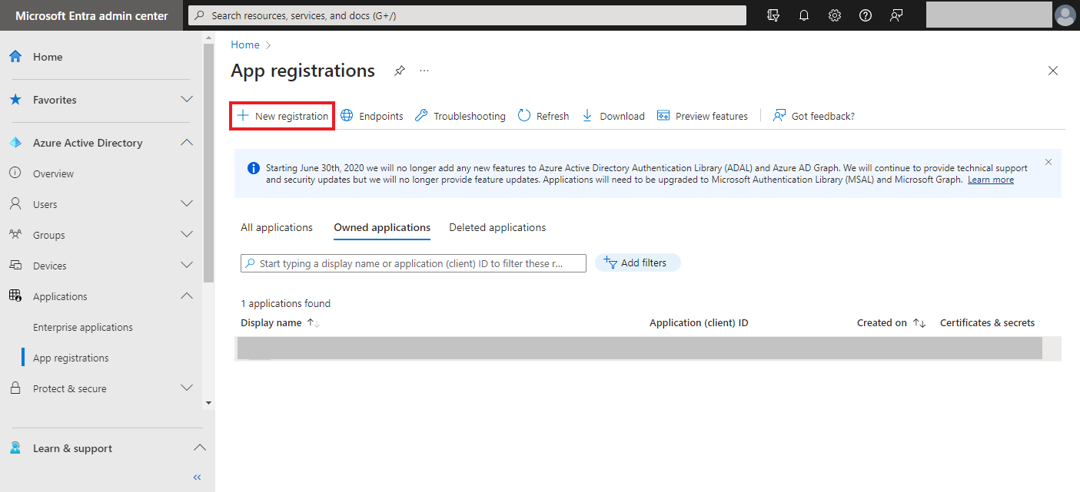
- Sign in to the SharePoint Dashboard (or Azure Admin Portal) and click on "Entra ID (Azure Active Directory)" in the respective menu. Click on the "App Registrations and then click on "New registration"
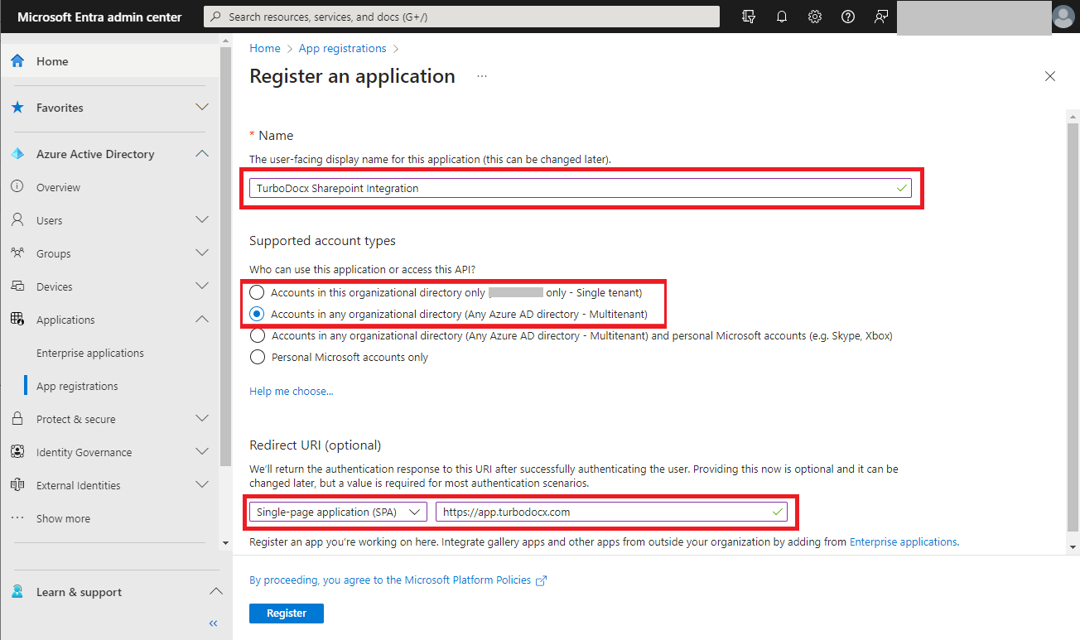
- Enter a name for the application such as "TurboDocx Sharepoint integration", select the appropriate account type, and select Single Page Application with the redirect uri: "https://app.turbodocx.com"
-
Click on the "Register Button" to create the application.
-
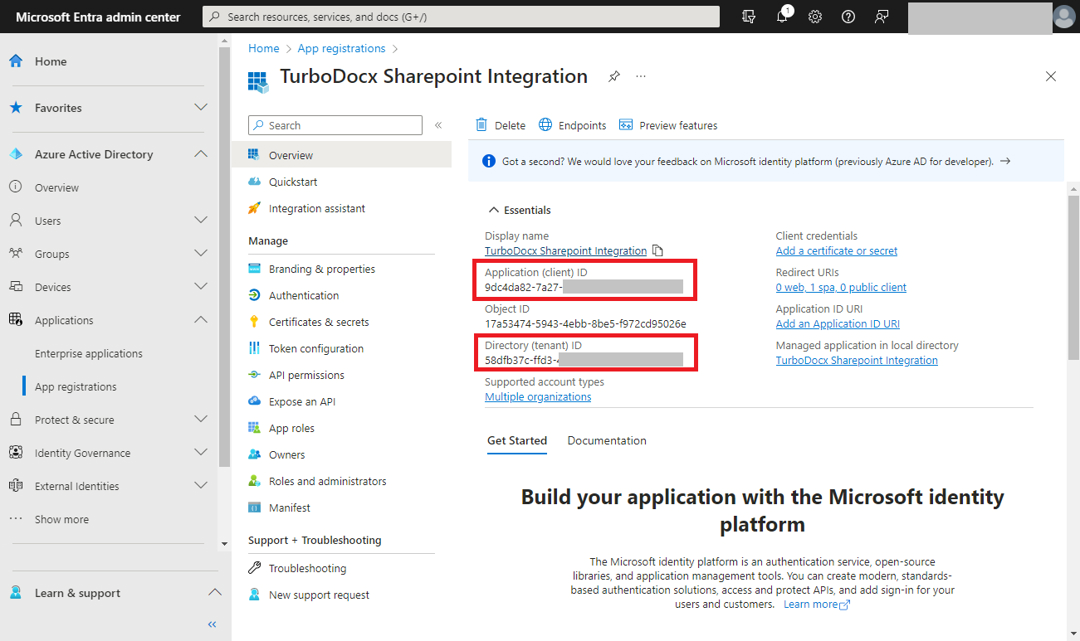
Note down the Application (Client) ID and the Directory (tenant) ID, as you will need them later.
Step 2 : Configure API Permissions:
-
In the "App registrations" menu, click on "API" permissions" in the left-hand menu.
-
Click on "Add a permission"
-
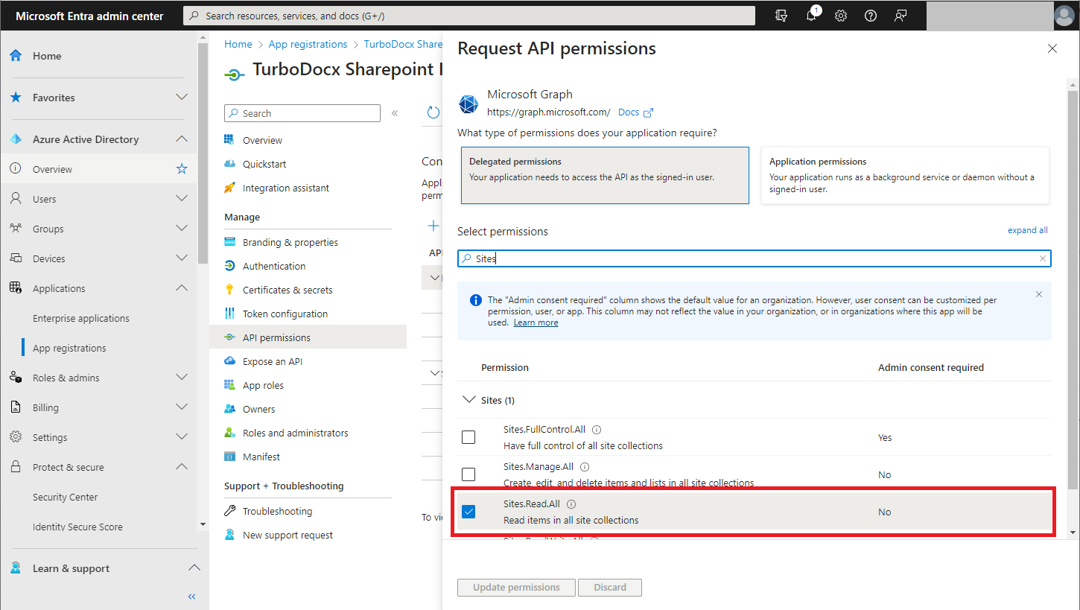
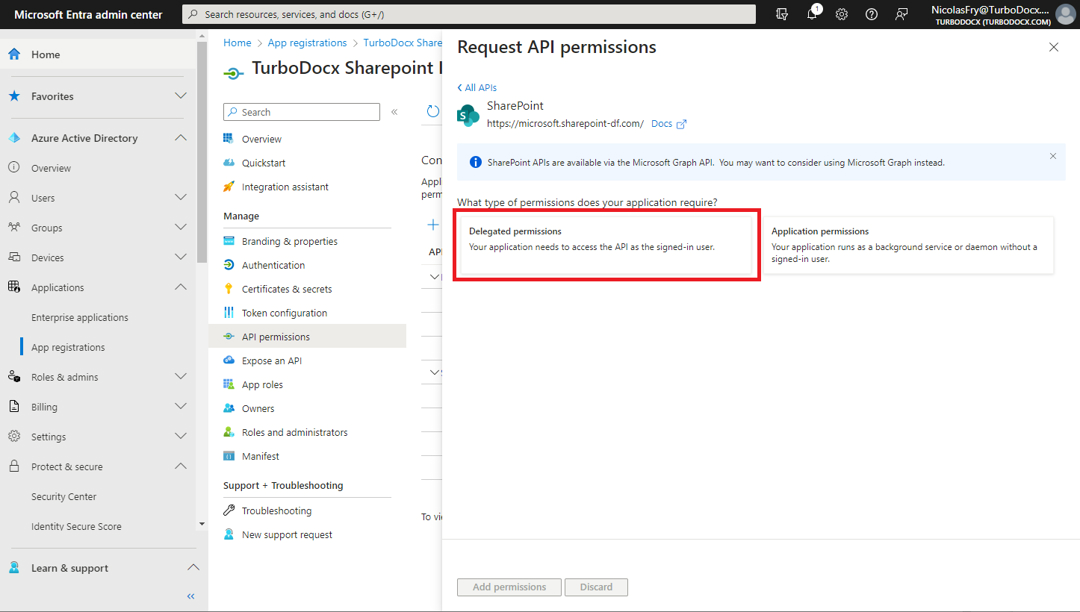
Click "Microsoft Graph" and then "Delegated permissions"

- Search for the following permissions and add them:
Sites.Read.All - This permission allows TurboDocx to read all site collections, sites, lists, and list items in SharePoint on behalf of the signed-in user.
Please note - TurboDocx does not make API calls to your SharePoint site without user interaction. This will mirror whatever permissions the user has in the SharePoint site. Files.ReadWrite.All - This permission allows TurboDocx to read and write (create, edit, and delete) all files in OneDrive for Business, SharePoint document libraries, and Microsoft Teams files on behalf of the signed-in user. With this permission, TurboDocx can access and manage files stored in OneDrive and SharePoint, including creating new files, updating existing files, moving or deleting files, and even sharing files with others.
TurboDocx does not make API calls to your SharePoint site without user interaction.Keep in mind that these are delegated permissions, which means TurboDocx can access these resources on behalf of the signed-in user.
The level of access TurboDocx will have depends on the user's actual permissions in SharePoint and OneDrive.
- After clicking save, navigate back to "Add Permission" and click SharePoint. Click "SharePoint" and then "Delegated Permissions"
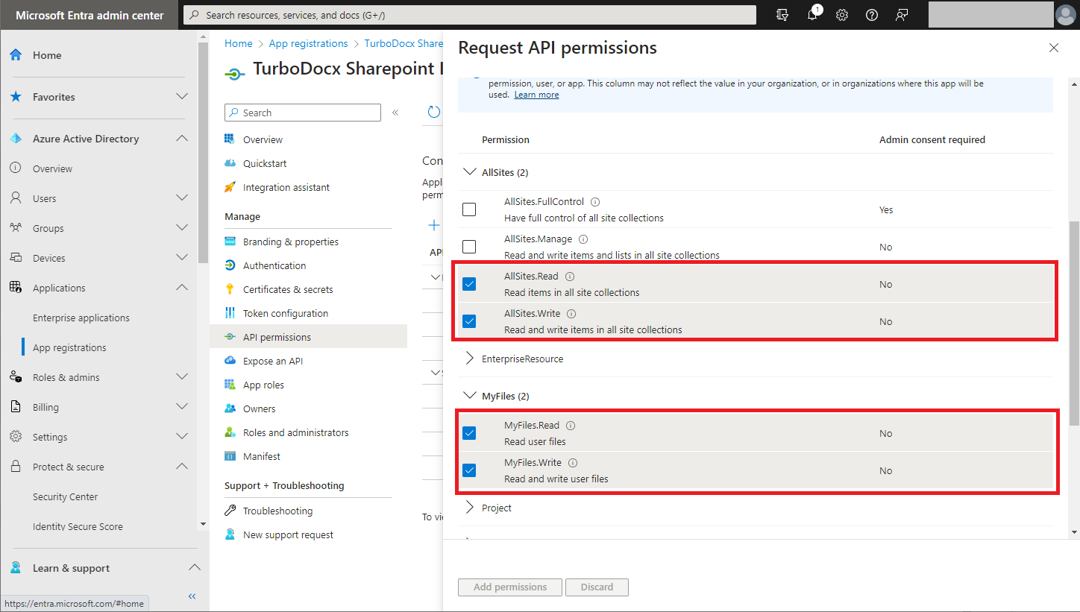
- Search for the following permissions and add them:
AllSites.Read - This permission allows TurboDocx to read all site collections, sites, lists, and list items in SharePoint on behalf of the signed-in user. With this permission, TurboDocx can access and retrieve information about the SharePoint site content, such as document libraries, lists, and list items.
AllSites.Write - This permission allows TurboDocx to write to all site collections, sites, lists, and list items in SharePoint on behalf of the signed-in user. With this permission, TurboDocx can create, edit, and delete SharePoint site content. This allows TurboDocx to save Deliverables to your SharePoint site.
MyFiles.Read - This permission allows TurboDocx to read the signed-in user's files in OneDrive for Business. With this permission, TurboDocx can access and retrieve information about the user's files, such as file names, file types, and file metadata. MyFiles.Write - This permission allows TurboDocx to write to the signed-in user's files in OneDrive for Business. With this permission, TurboDocx can create, edit, and delete the user's files
TurboDocx does not make API calls to your SharePoint site without user interaction. This user's access will mirror whatever permissions the user has in the SharePoint site.
Keep in mind that these are delegated permissions, which means TurboDocx can access these resources on behalf of the signed-in user. The level of access TurboDocx will have depends on the user's actual permissions in SharePoint and OneDrive.
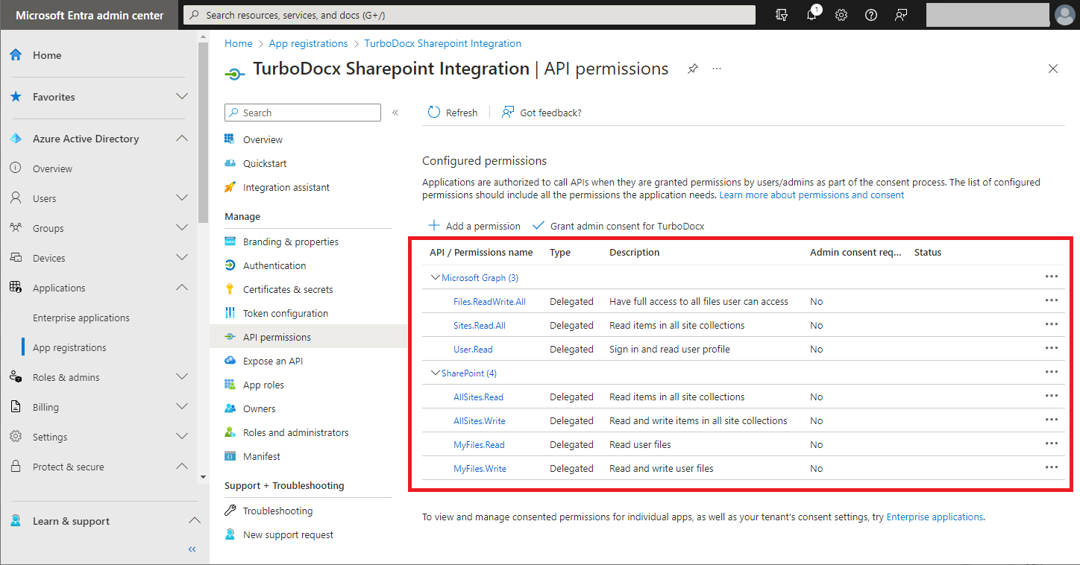
- The finished permission sets should look like the below:
Step 3: Determine the default site that TurboDocx will open and get the path
-
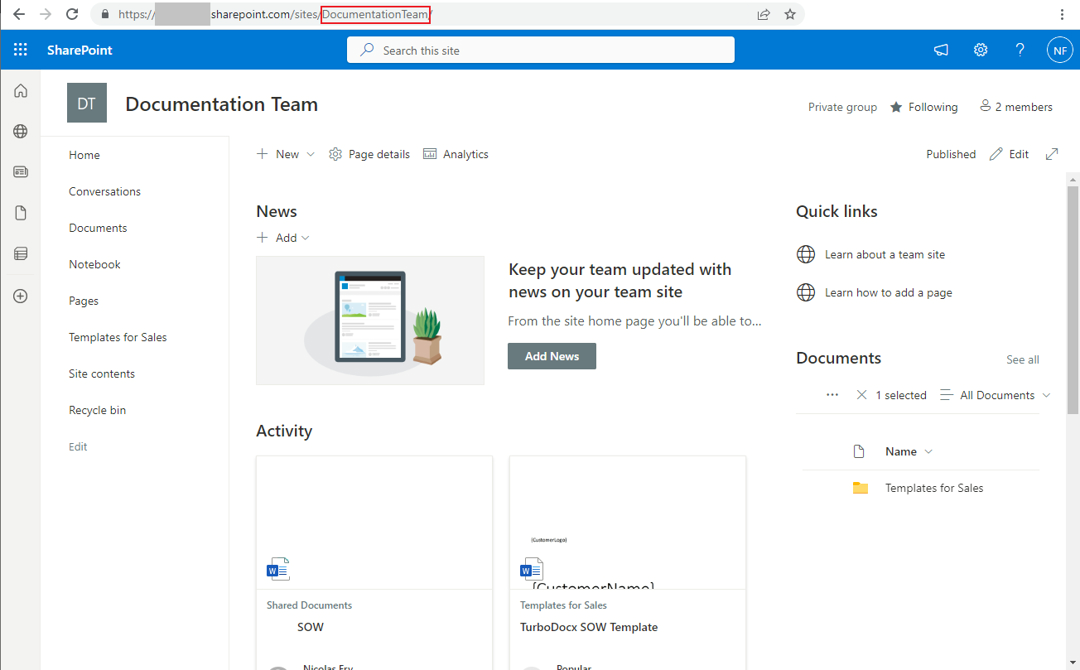
The easiest way to do this is to navigate to your Site and find the path you want users to see first.
-
Take note of the URL path and notate it for future use. In this case it is "DocumentationTeam"
Step 4: Login to your TurboDocx Tenant and go to Tenant Settings
-
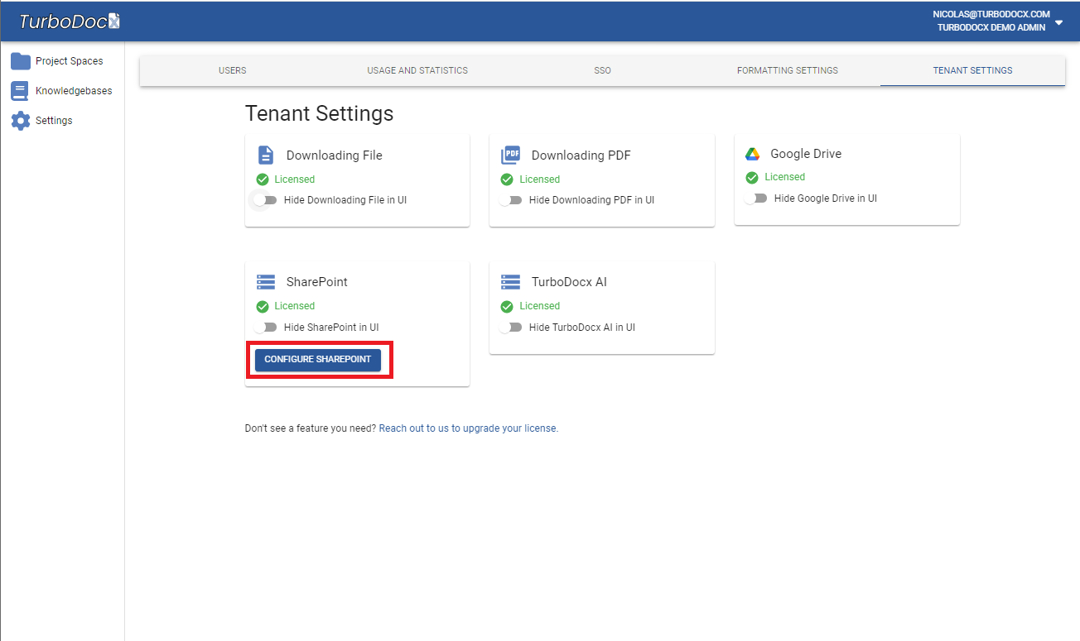
As an admin within your TurboDocx tenant, navigate to the settings tab on the left-hand side-nav and click "Tenant Settings" in the top right corner.
-
If Hide SharePoint in the UI is selected, unselect this to get the SharePoint configuration button.
-
Click "Configure SharePoint"
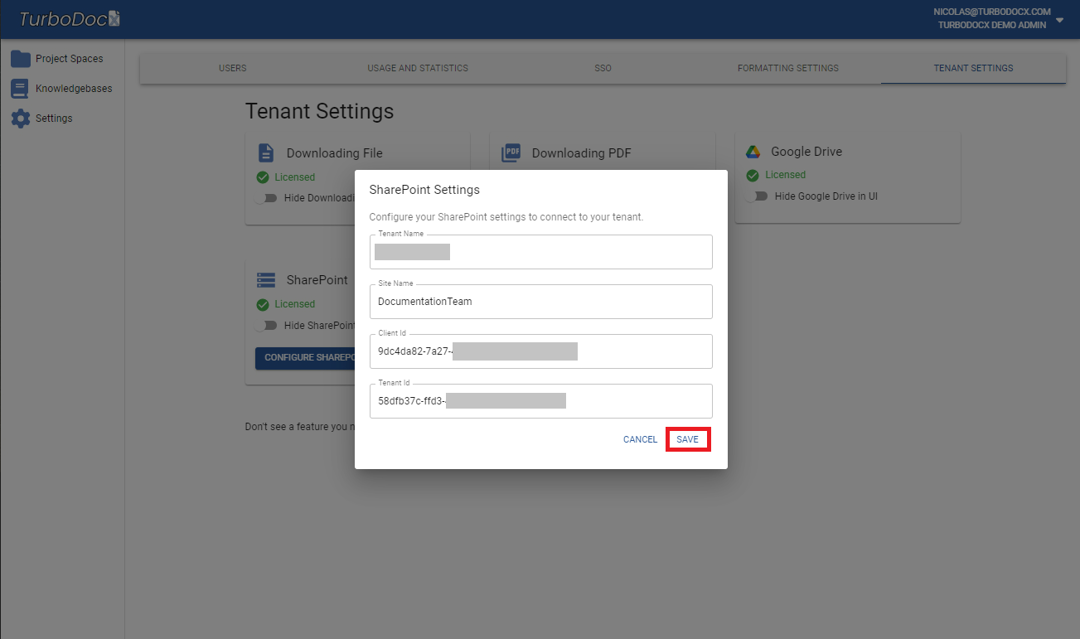
- Fill out the following fields with the information you have noted from previous steps and click "Save":
Tenant Name - This is the name of the SharePoint tenant are connecting to. This can be found by looking in the browser bar and it should resemble "TenantName.SharePoint.com" Site Name - This is the name of the default site your users will land on when first opening the SharePoint file picker. This is noted from the previous step.
Client ID - This is the Application (client) ID noted from the previous step in the EntraID (AzureAD) console.
Tenant ID - This is the Directory (tenant) ID noted from the previous step in the EntraID (AzureAD) console.
- Test importing and Exporting templates using the steps noted in the following sections.
Importing Templates
One of the primary benefits of the SharePoint integration in TurboDocx is the ability to directly import templates from your SharePoint document libraries. This feature removes the need to manually upload templates to TurboDocx, streamlining the process and saving you both time and effort. By simply connecting your SharePoint tenant to TurboDocx, you can effortlessly access and import your templates.
The integration offers a seamless browsing experience, enabling you to navigate through your SharePoint document libraries and folders to choose the desired templates for import. Whether you have pre-existing templates or wish to import templates created using other applications such as Microsoft Word or Office 365, the SharePoint integration simplifies the process.
Upon selecting the templates, TurboDocx securely imports them into your TurboDocx account, ready for customization and document generation. This ensures that your templates are readily available within TurboDocx, eliminating the need for manual file transfers or duplicate storage.

Exporting Deliverables
The SharePoint integration also enables you to export deliverables generated by TurboDocx back to your SharePoint and One Drive for business accounts. Once you have personalized and generated documents based on your templates, you can seamlessly export them to your SharePoint storage for easy access and sharing.
Exporting deliverables to SharePoint and One Drive for Business ensures that your documents are stored securely in the cloud, providing a reliable backup and making them accessible from any device with an internet connection. By leveraging the familiar SharePoint interface, you can organize your deliverables into folders, share them with collaborators, and control access permissions as needed.