Turn Your HubSpot Data into Professional Documents & Presentations
Say goodbye to copy-pasting customer information! TurboDocx's HubSpot integration automatically pulls your real CRM data to create personalized documents, proposals, and presentations. No more "John Doe" placeholder text — use actual customer names, deals, and details.
What You Can Create
- 📊 Client Proposals: Use real deal data to create compelling, personalized proposals
- 📄 Contact Reports: Generate comprehensive reports with actual customer information
- 📋 Meeting Summaries: Create professional meeting notes using your HubSpot data
- 💼 Sales Presentations: Build custom presentations with live customer data
- 📝 Follow-up Documents: Generate personalized follow-ups using contact details
- 🔄 Automated Reports: Create recurring reports with fresh data from HubSpot
Before You Begin
Don't worry! We've made this guide so detailed that any team member can follow it. Think of it as cooking instructions, but for software — and just as tasty! 😄
To use the HubSpot integration, you'll need:
- A HubSpot account with Private App Access (free or paid — we don't judge!)
- Administrative access to create a HubSpot app
- About 10 minutes and a cup of coffee ☕
- This guide (which you're already reading — you're ahead of the game!)
This process involves creating something called a "private app" in HubSpot. Think of it as giving TurboDocx secure access to your HubSpot data — and only the data you want to share.
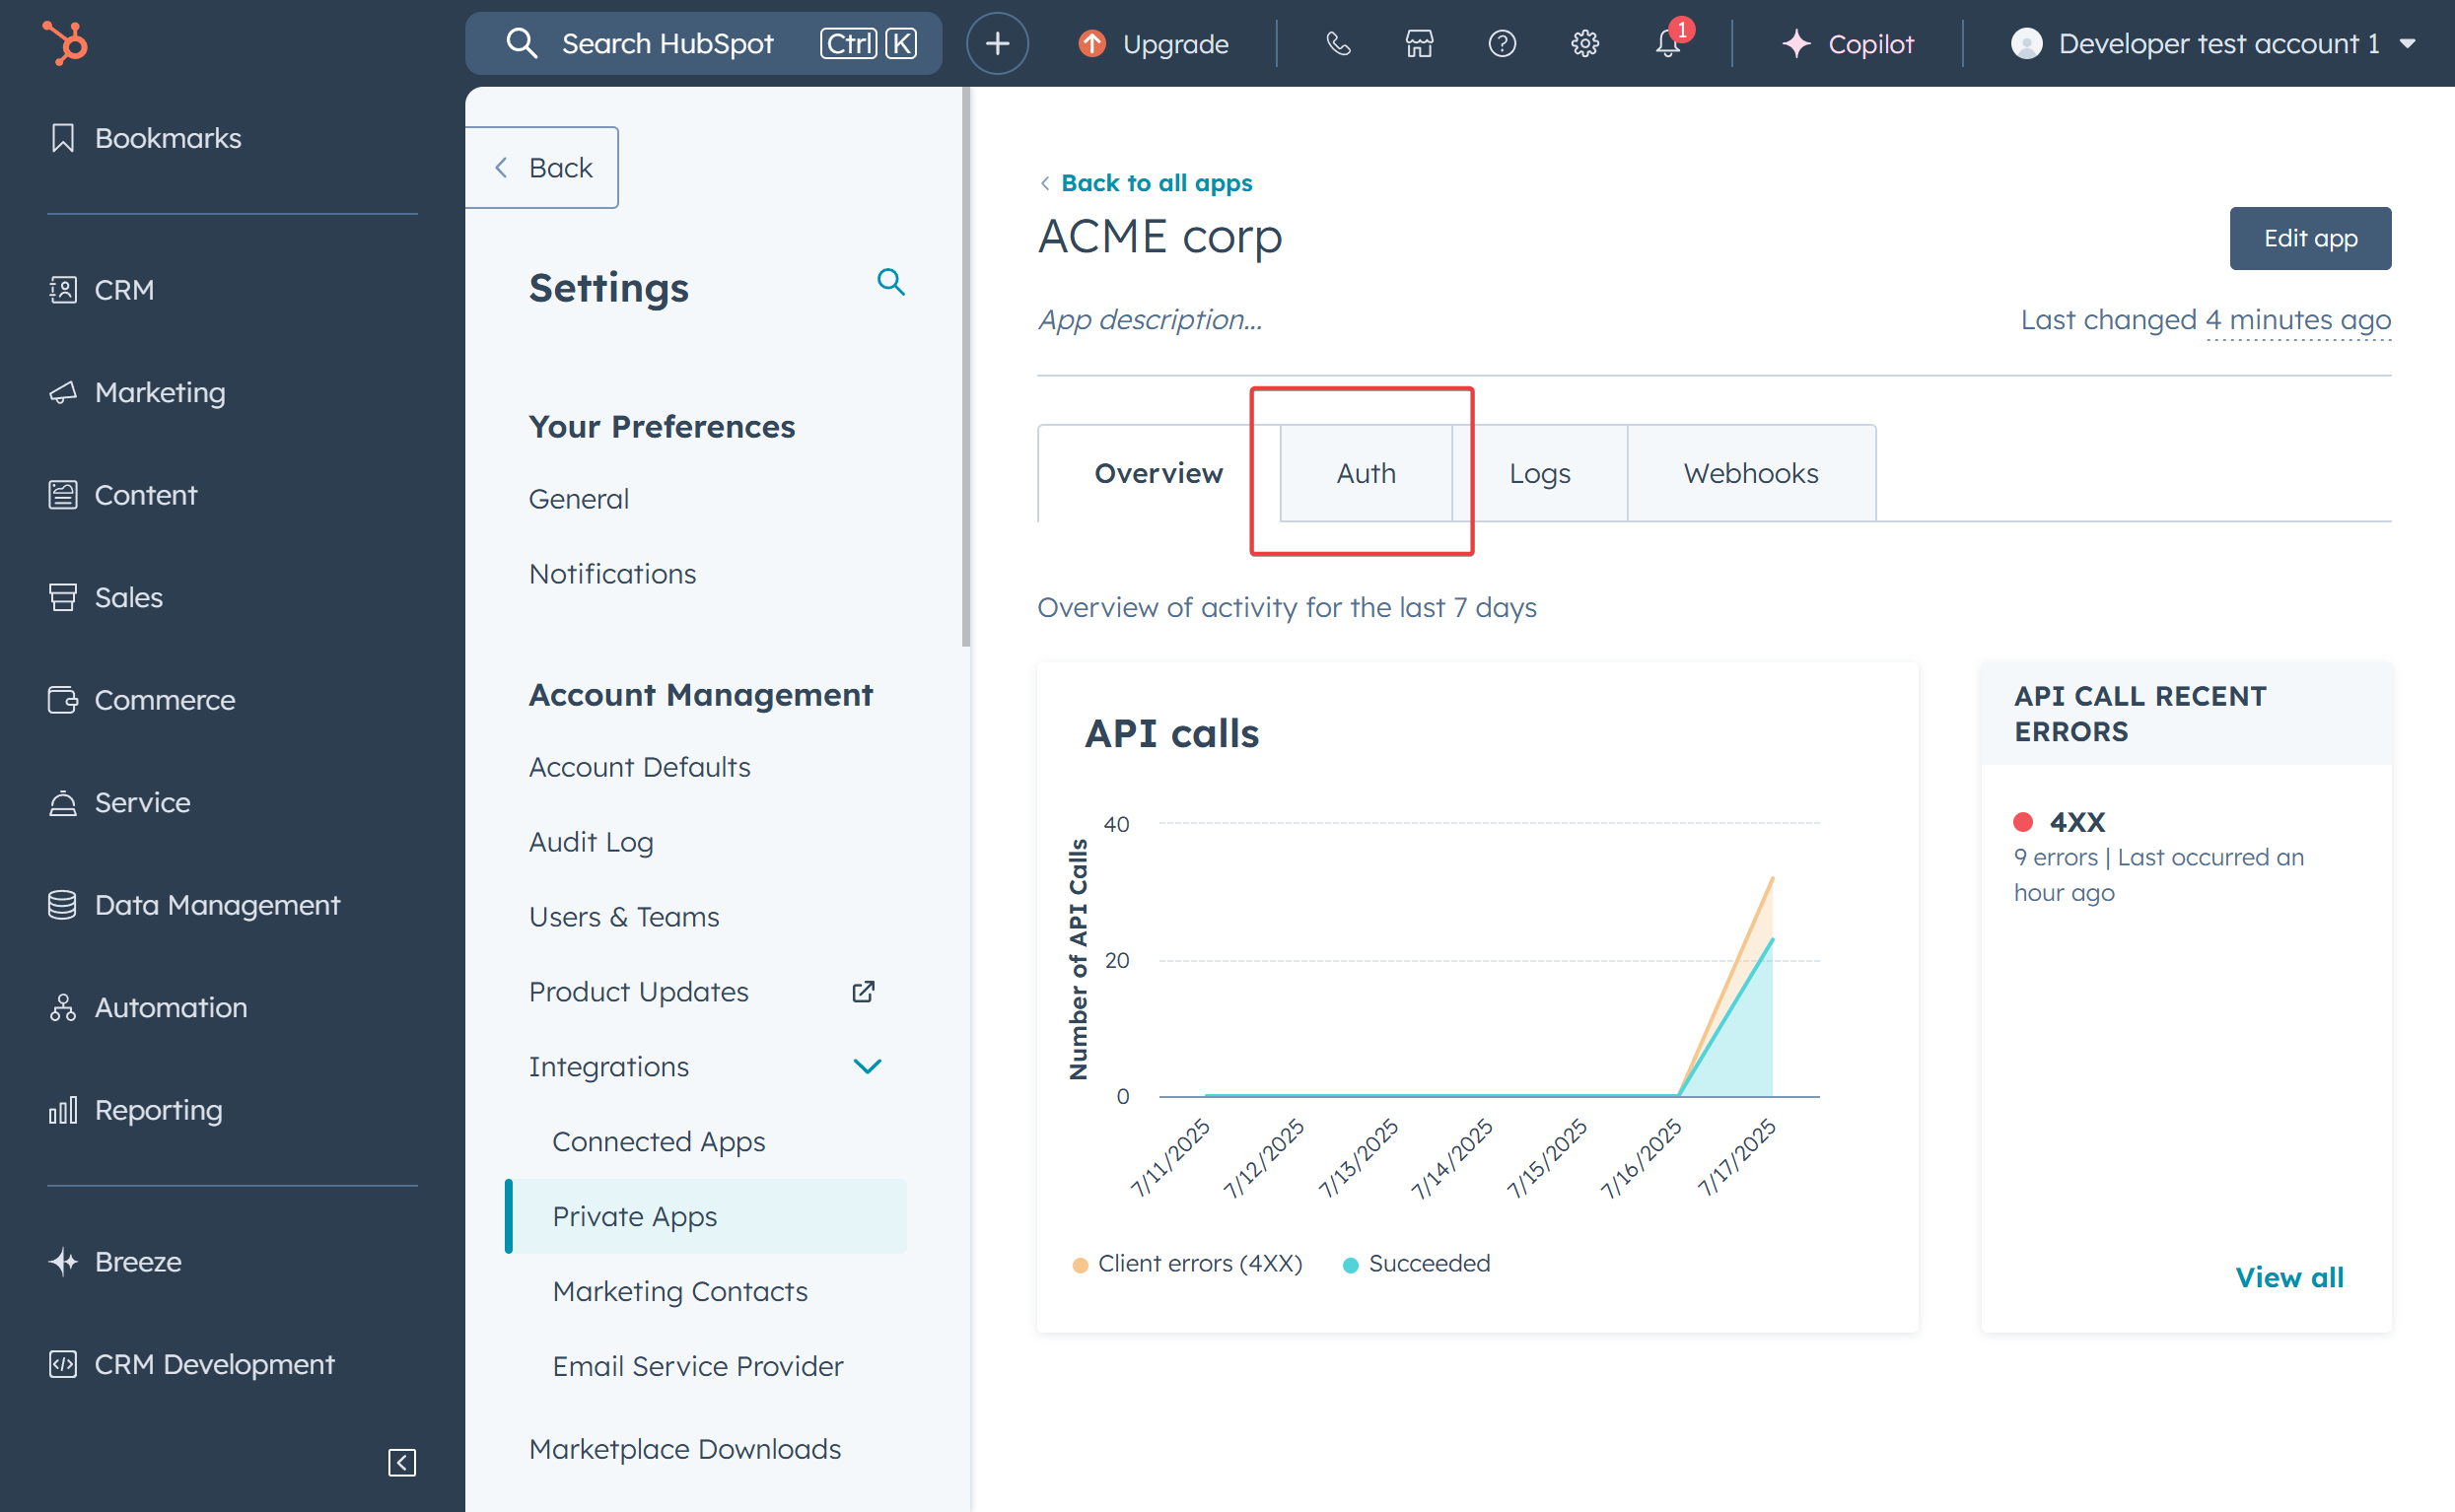
Step 1: Creating Your HubSpot Private App
The first step is creating a HubSpot private app. Think of this as getting a library card — it gives TurboDocx permission to temporarily read your HubSpot data.
Navigate to HubSpot Developer Settings
- Open your web browser and go to hubspot.com
- Use Chrome, Firefox, Safari, or Edge
- Log into your HubSpot account
- Use your normal email and password
- If you forgot your password, there's a "Forgot Password?" link (we've all been there!)
- Find the Settings gear in the top right corner
- It looks like a little wheel with teeth ⚙️
- If you can't find it, it's probably hiding next to your profile picture
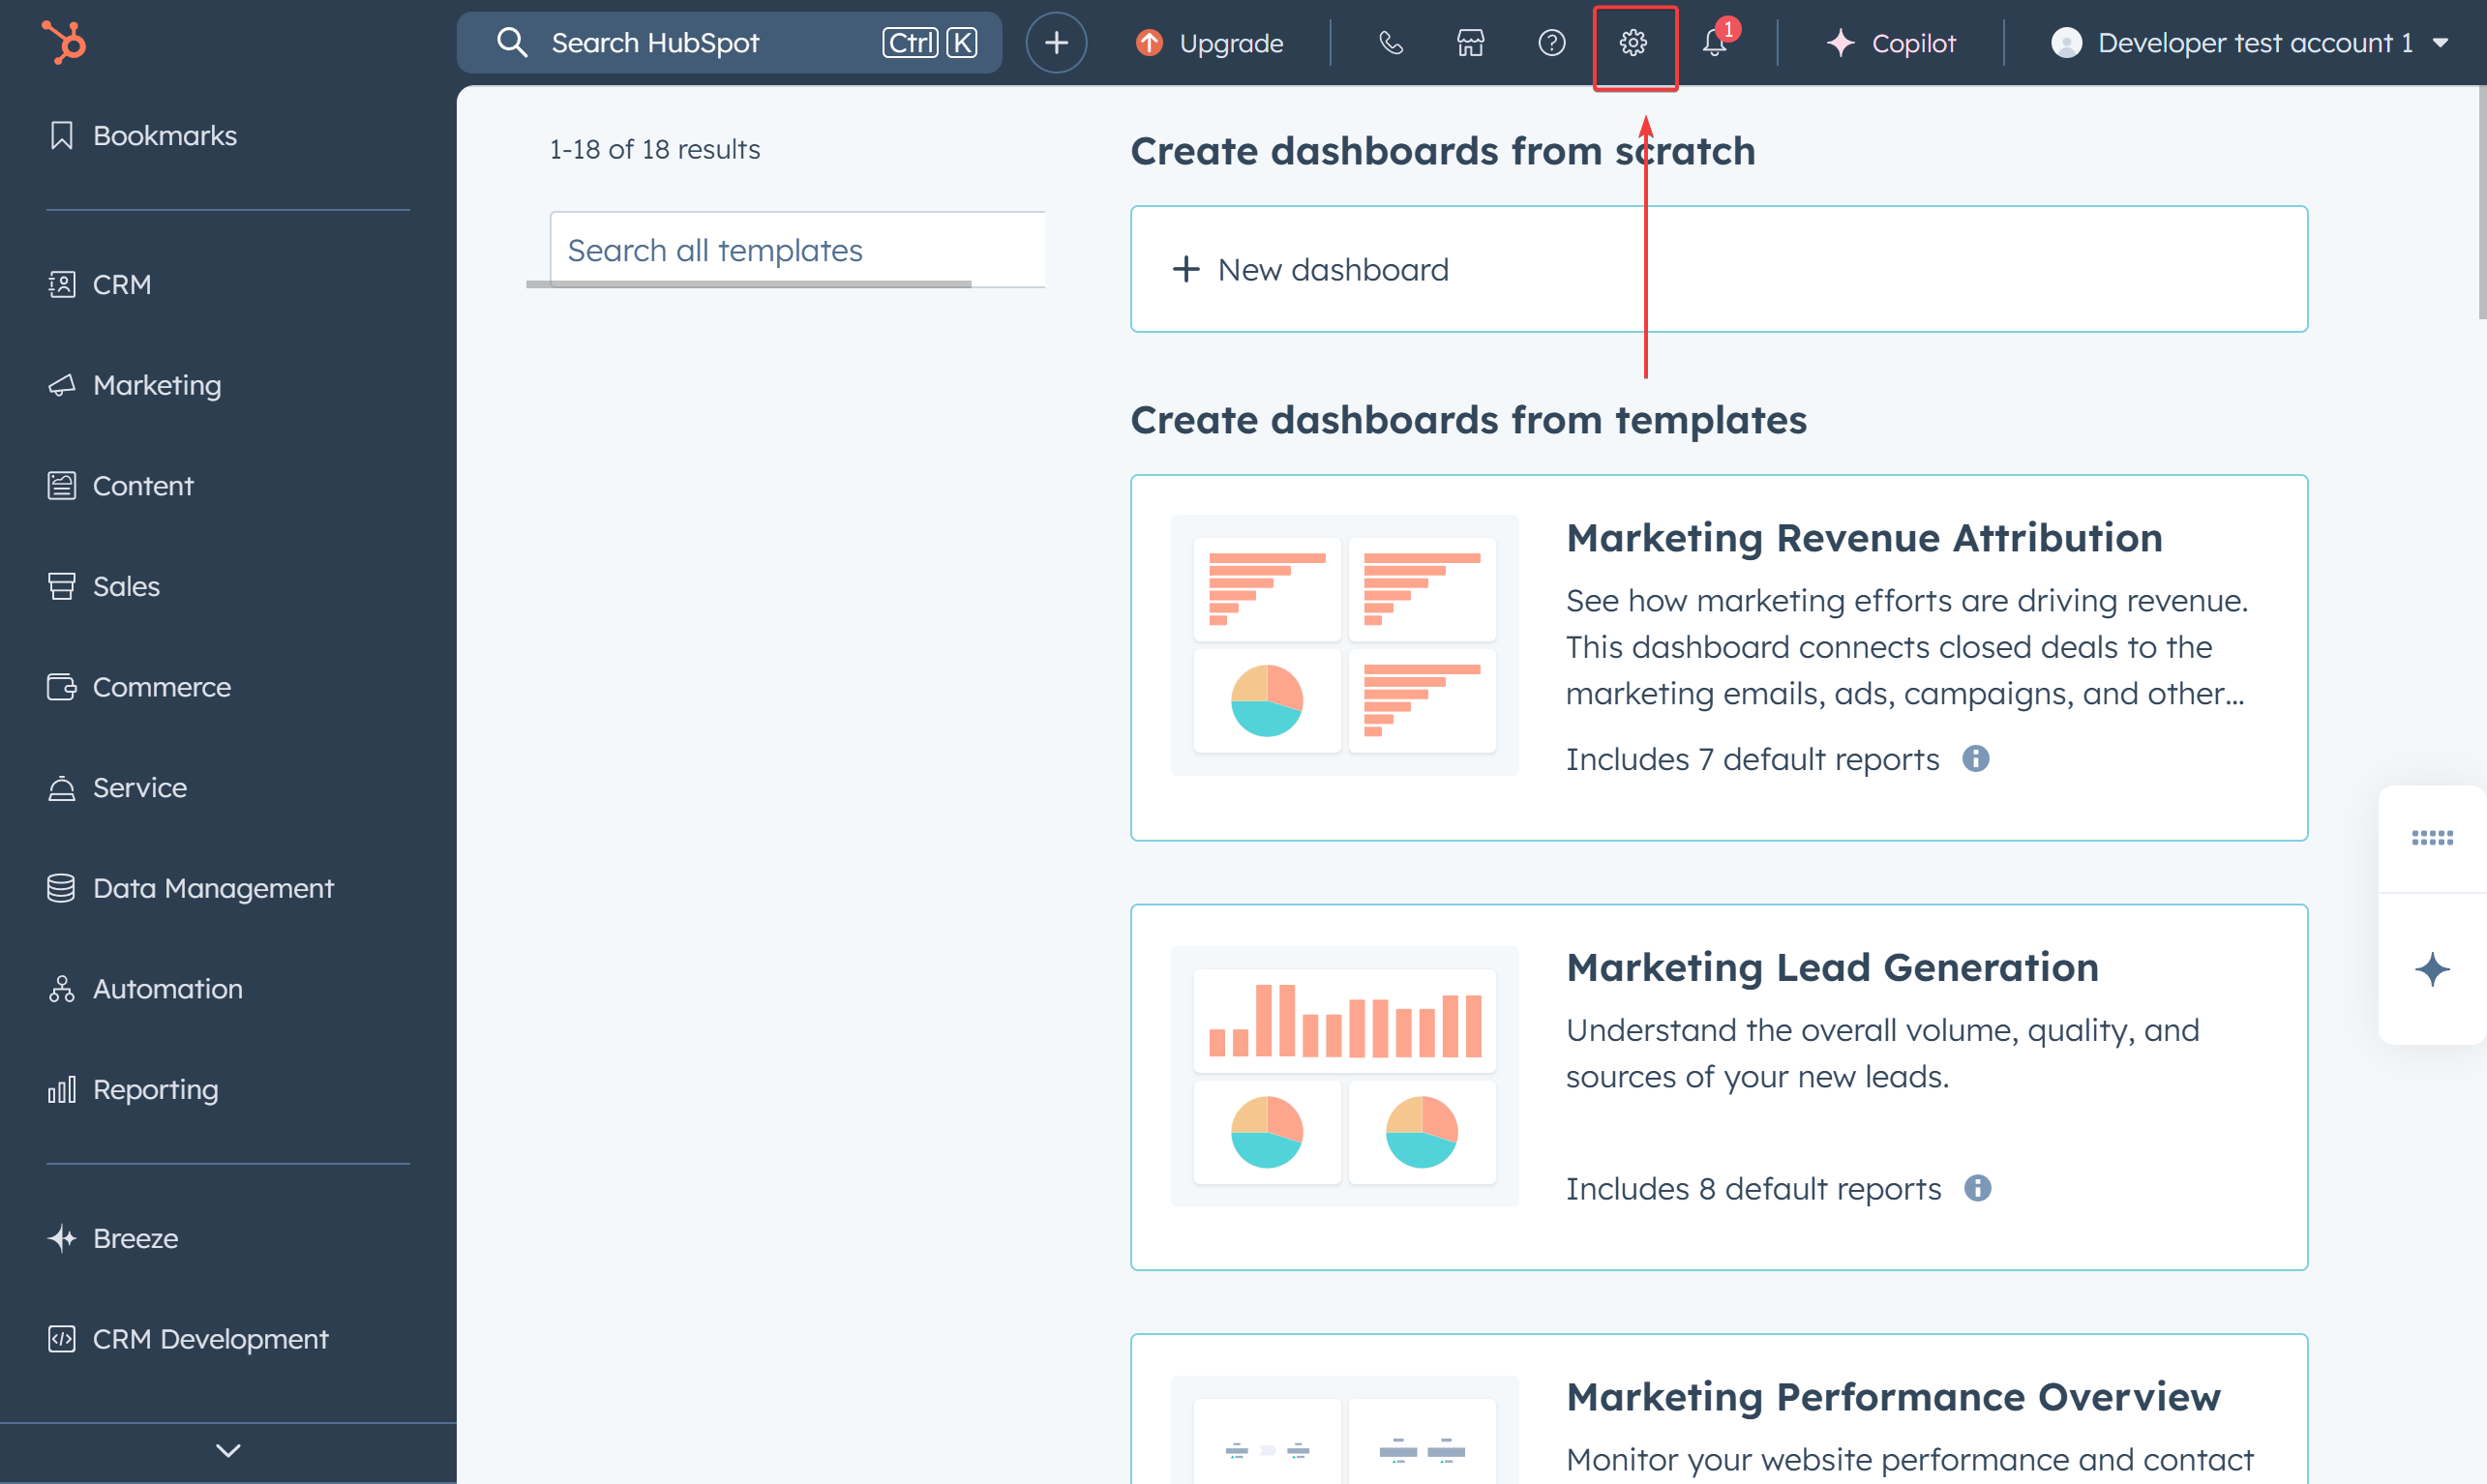
- Click on the Settings gear
- A menu will appear
- A menu will appear
Navigate to Integrations
- Look for "Integrations" in the left sidebar
- It's usually about halfway down the list
- If you don't see it, try scrolling down slowly (no need to rush!)
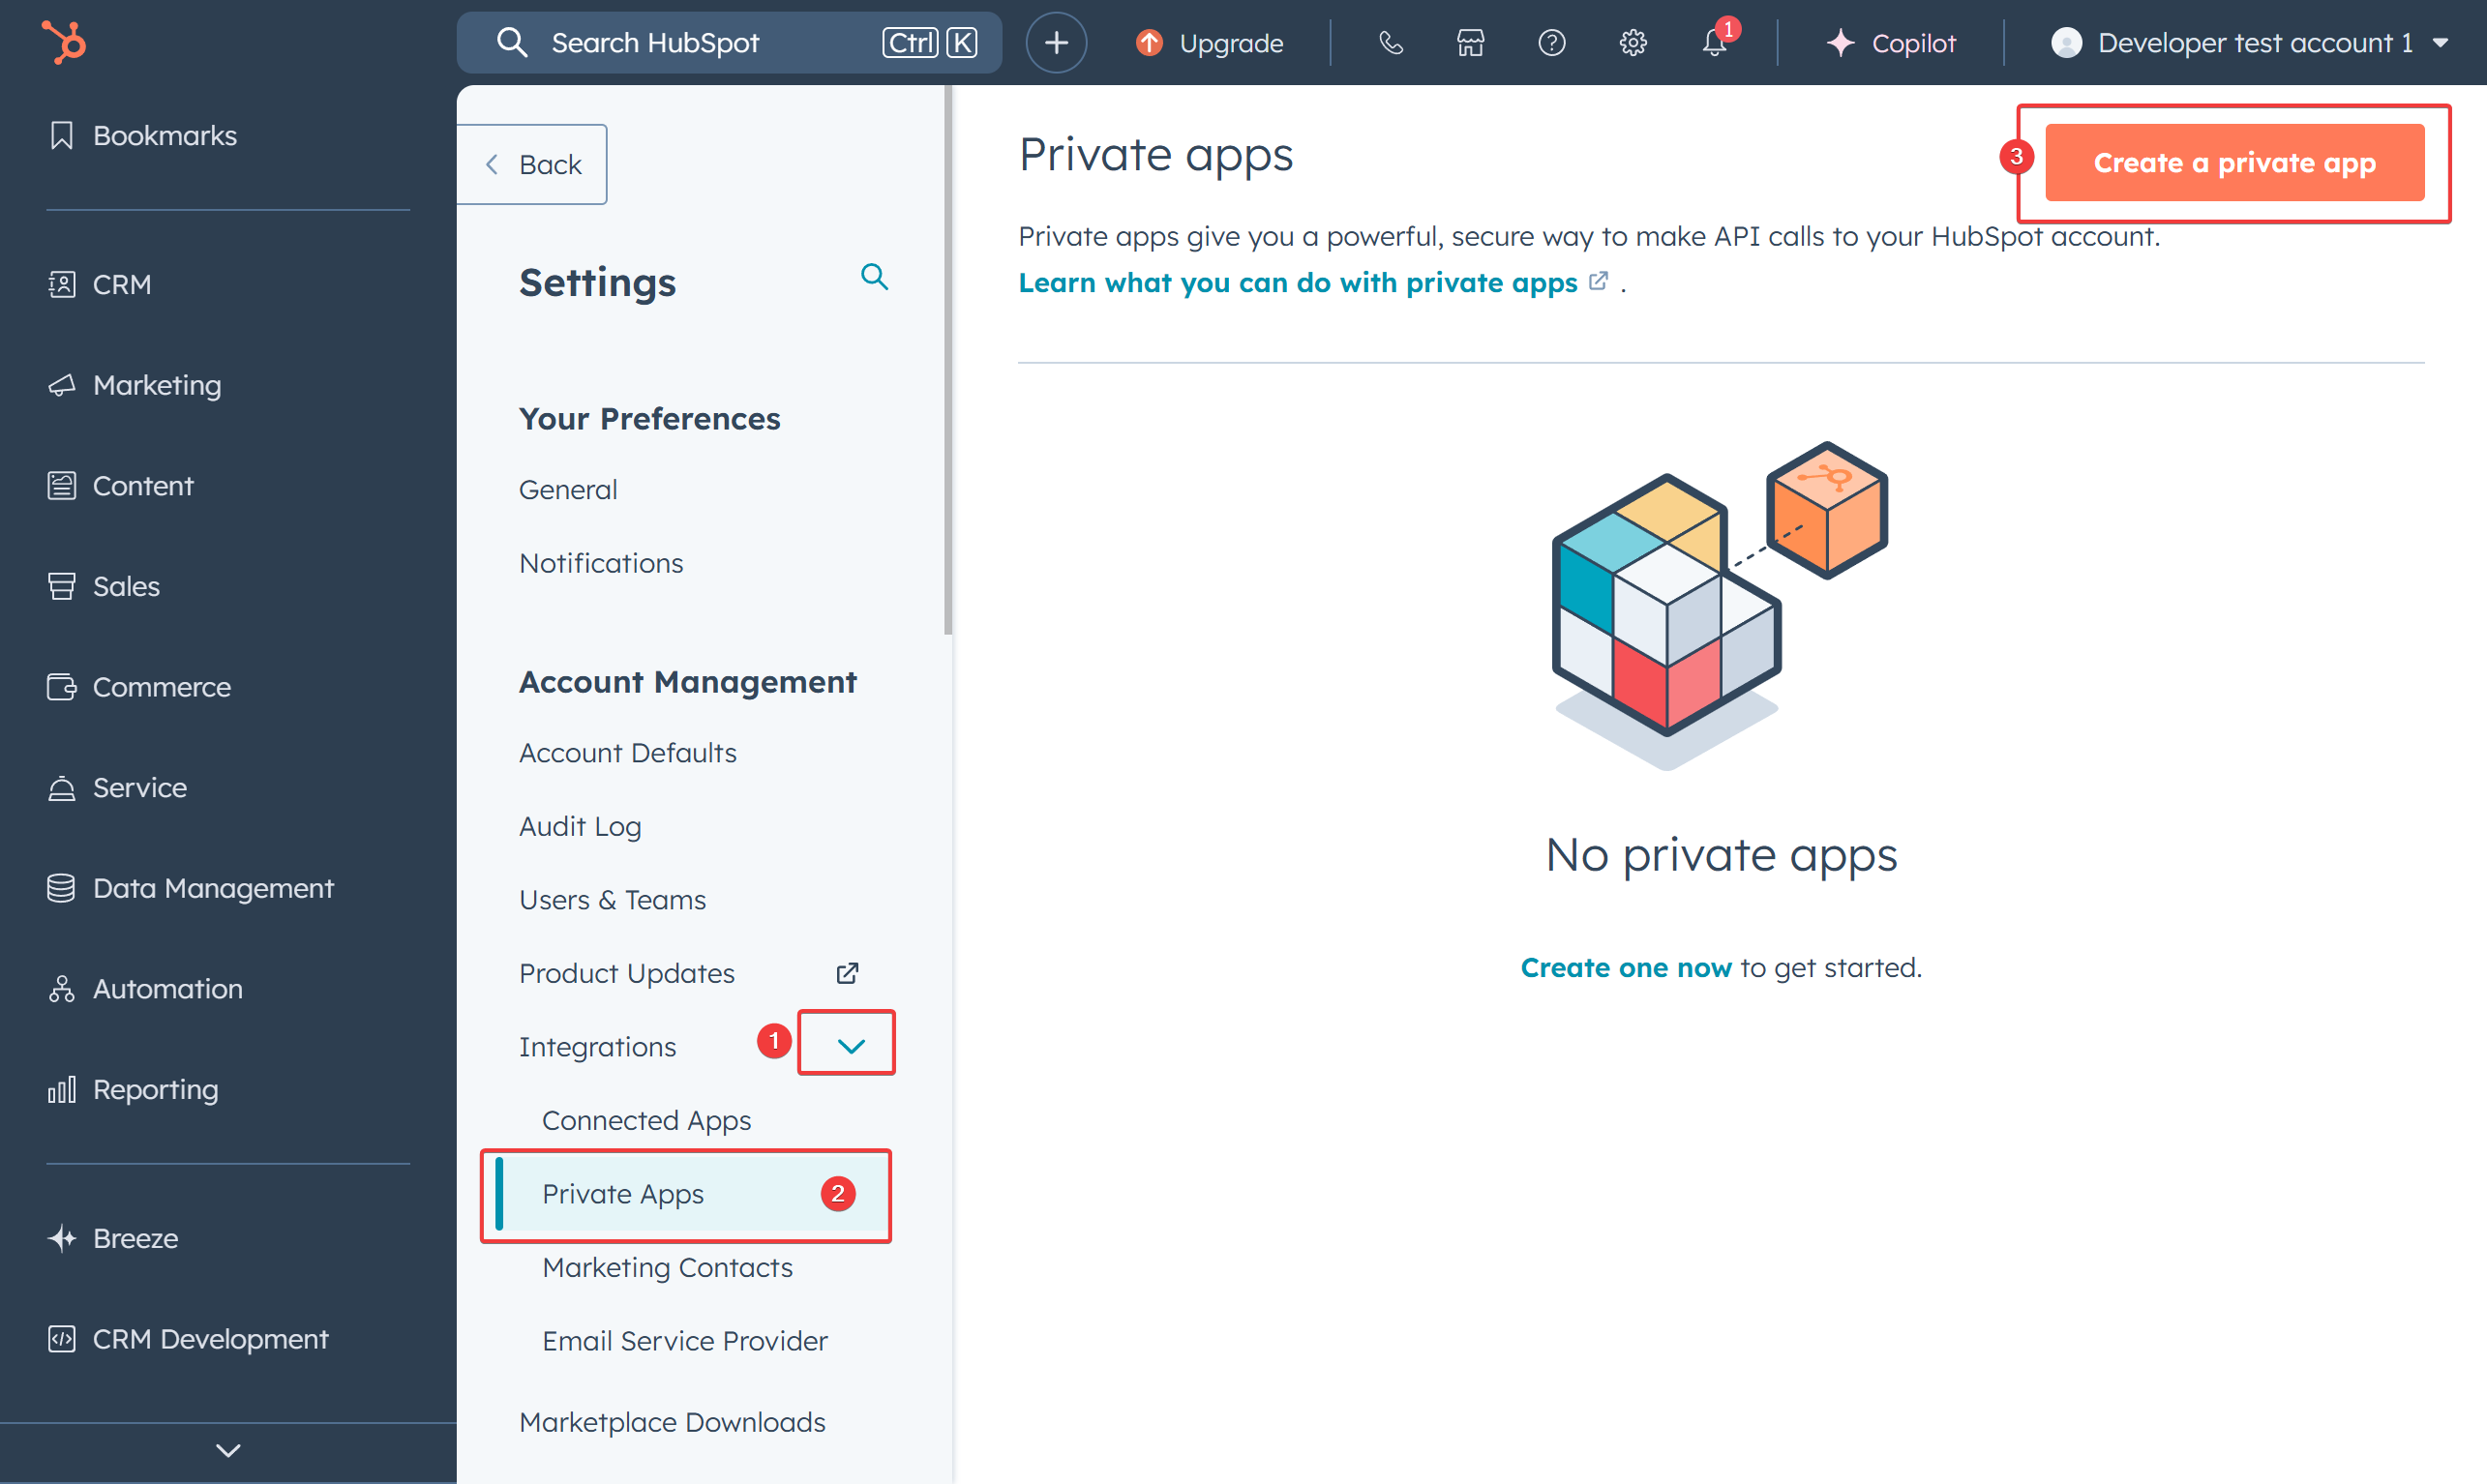
- Click on "Integrations"
- The menu will expand to show more options
- Find and click "Private Apps"
- It might be hiding under the Integrations section
- Think of it as a secret menu item at your favorite restaurant
Create Your Private App
- Click "Create a private app"
- Usually a big, friendly blue button
- If there's no button, you might need admin permissions (time to find your BFF at your IT department!)
- Fill in the basic information:
- App name: Type something memorable like "TurboDocx Integration" or "TurboDocx Document Generator"
- Description: Add a simple description like "This connects my HubSpot data to TurboDocx for document and presentation generation"
- Logo: Optional - it's up to you!
![]()
Choose an app name you'll remember six months from now. "App123" might seem clever today, but future you will not be amused! 😏
Configure App Permissions (The Important Part!)
- Click on the "Scopes" tab
- This is where you tell HubSpot what data TurboDocx can access
- It’s like setting clear boundaries — you choose exactly what TurboDocx can read from your CRM.
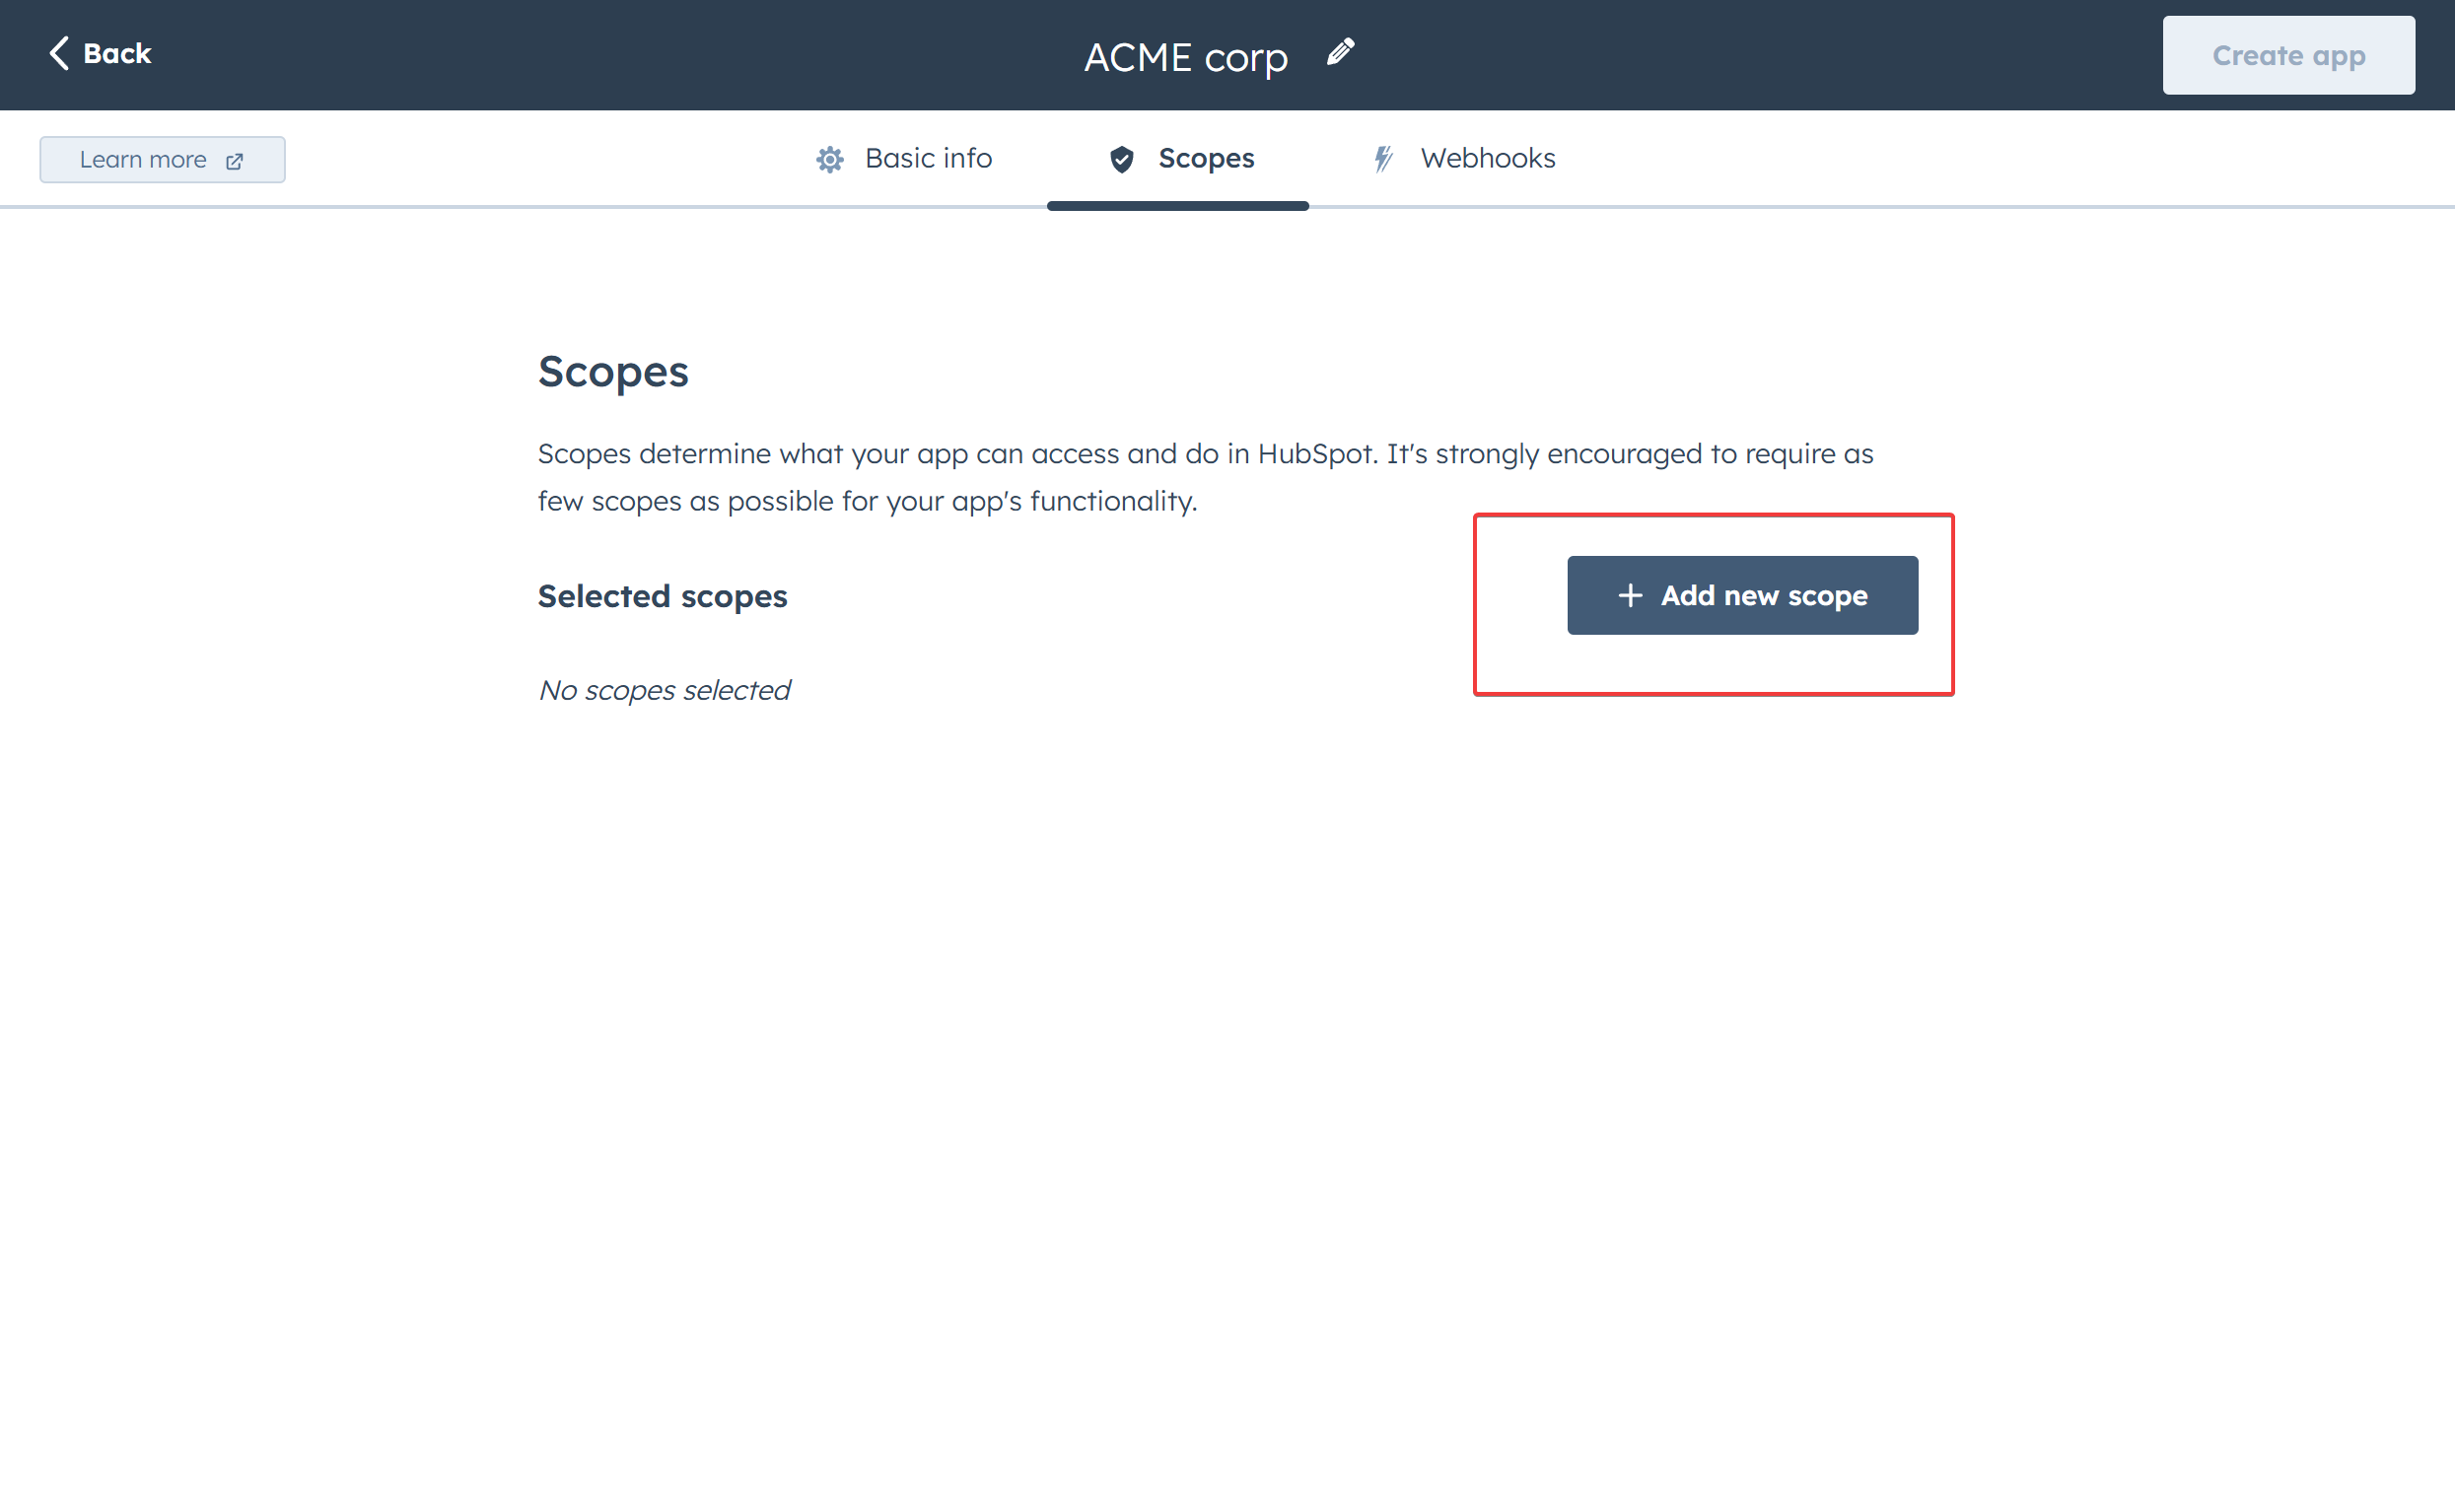
- Add the required scopes (permissions)
- Each scope is like giving TurboDocx permission to read a specific type of data
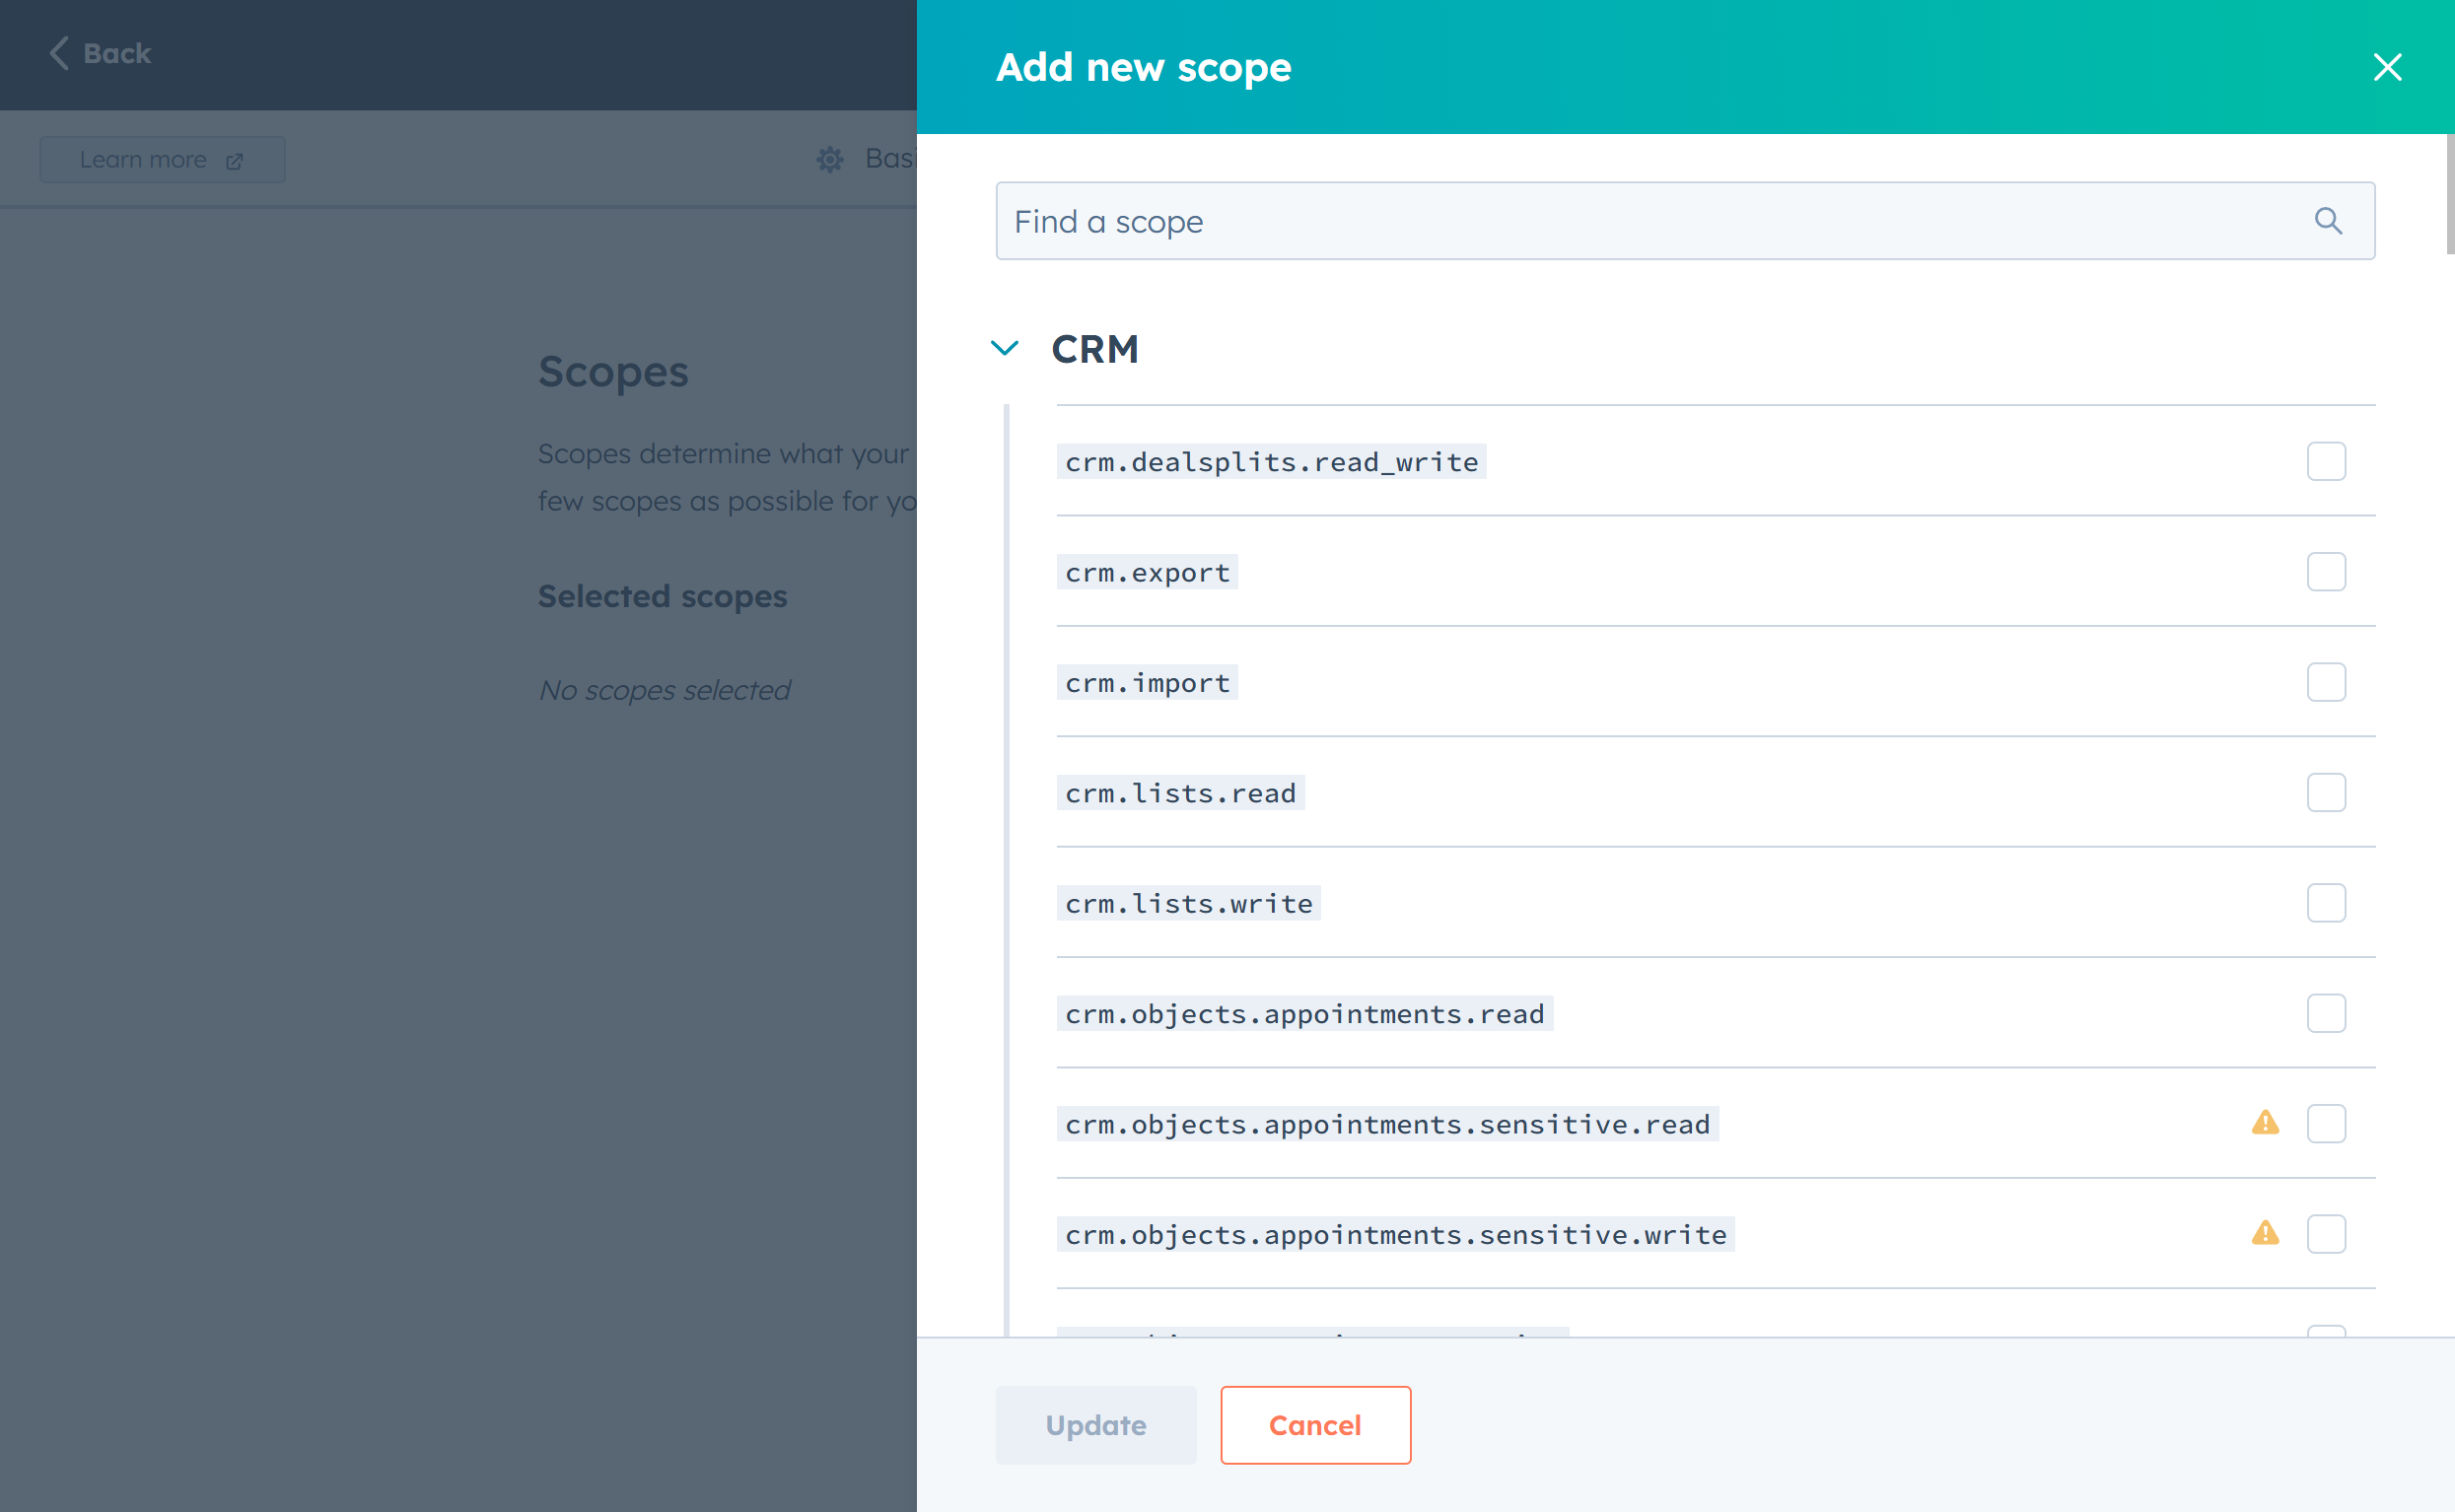
You'll be adding about 50 different permissions. It's like checking off a very long grocery list — but necessary for the feast ahead! 🛒
Here's the complete list of scopes to add (copy each one EXACTLY):
CRM Lists:
crm.lists.read
CRM Objects (the big list):
crm.objects.appointments.readcrm.objects.carts.readcrm.objects.commercepayments.readcrm.objects.companies.readcrm.objects.contacts.readcrm.objects.courses.readcrm.objects.custom.readcrm.objects.deals.readcrm.objects.feedback_submissions.readcrm.objects.goals.readcrm.objects.invoices.readcrm.objects.leads.readcrm.objects.line_items.readcrm.objects.listings.readcrm.objects.marketing_events.readcrm.objects.orders.readcrm.objects.owners.readcrm.objects.partner-clients.readcrm.objects.partner-services.readcrm.objects.products.readcrm.objects.quotes.readcrm.objects.services.readcrm.objects.subscriptions.readcrm.objects.users.read
CRM Pipelines:
crm.pipelines.orders.read
CRM Schemas:
crm.schemas.appointments.readcrm.schemas.carts.readcrm.schemas.commercepayments.readcrm.schemas.companies.readcrm.schemas.contacts.readcrm.schemas.courses.readcrm.schemas.custom.readcrm.schemas.deals.readcrm.schemas.invoices.readcrm.schemas.line_items.readcrm.schemas.listings.readcrm.schemas.orders.readcrm.schemas.quotes.readcrm.schemas.services.readcrm.schemas.subscriptions.read
Sales & Communication:
sales-email-read
Scheduler:
scheduler.meetings.meeting-link.read
Settings:
settings.currencies.readsettings.security.security_health.readsettings.users.readsettings.users.teams.read
Tax:
tax_rates.read
How to Add Each Scope
For each scope in the list above:
- Find the search box (it might say "Search for scopes")
- Click inside the search box
- Type the scope name exactly (every dot and dash matters!)
- Look for the dropdown that appears below
- Click on the matching result
- Repeat for the next scope
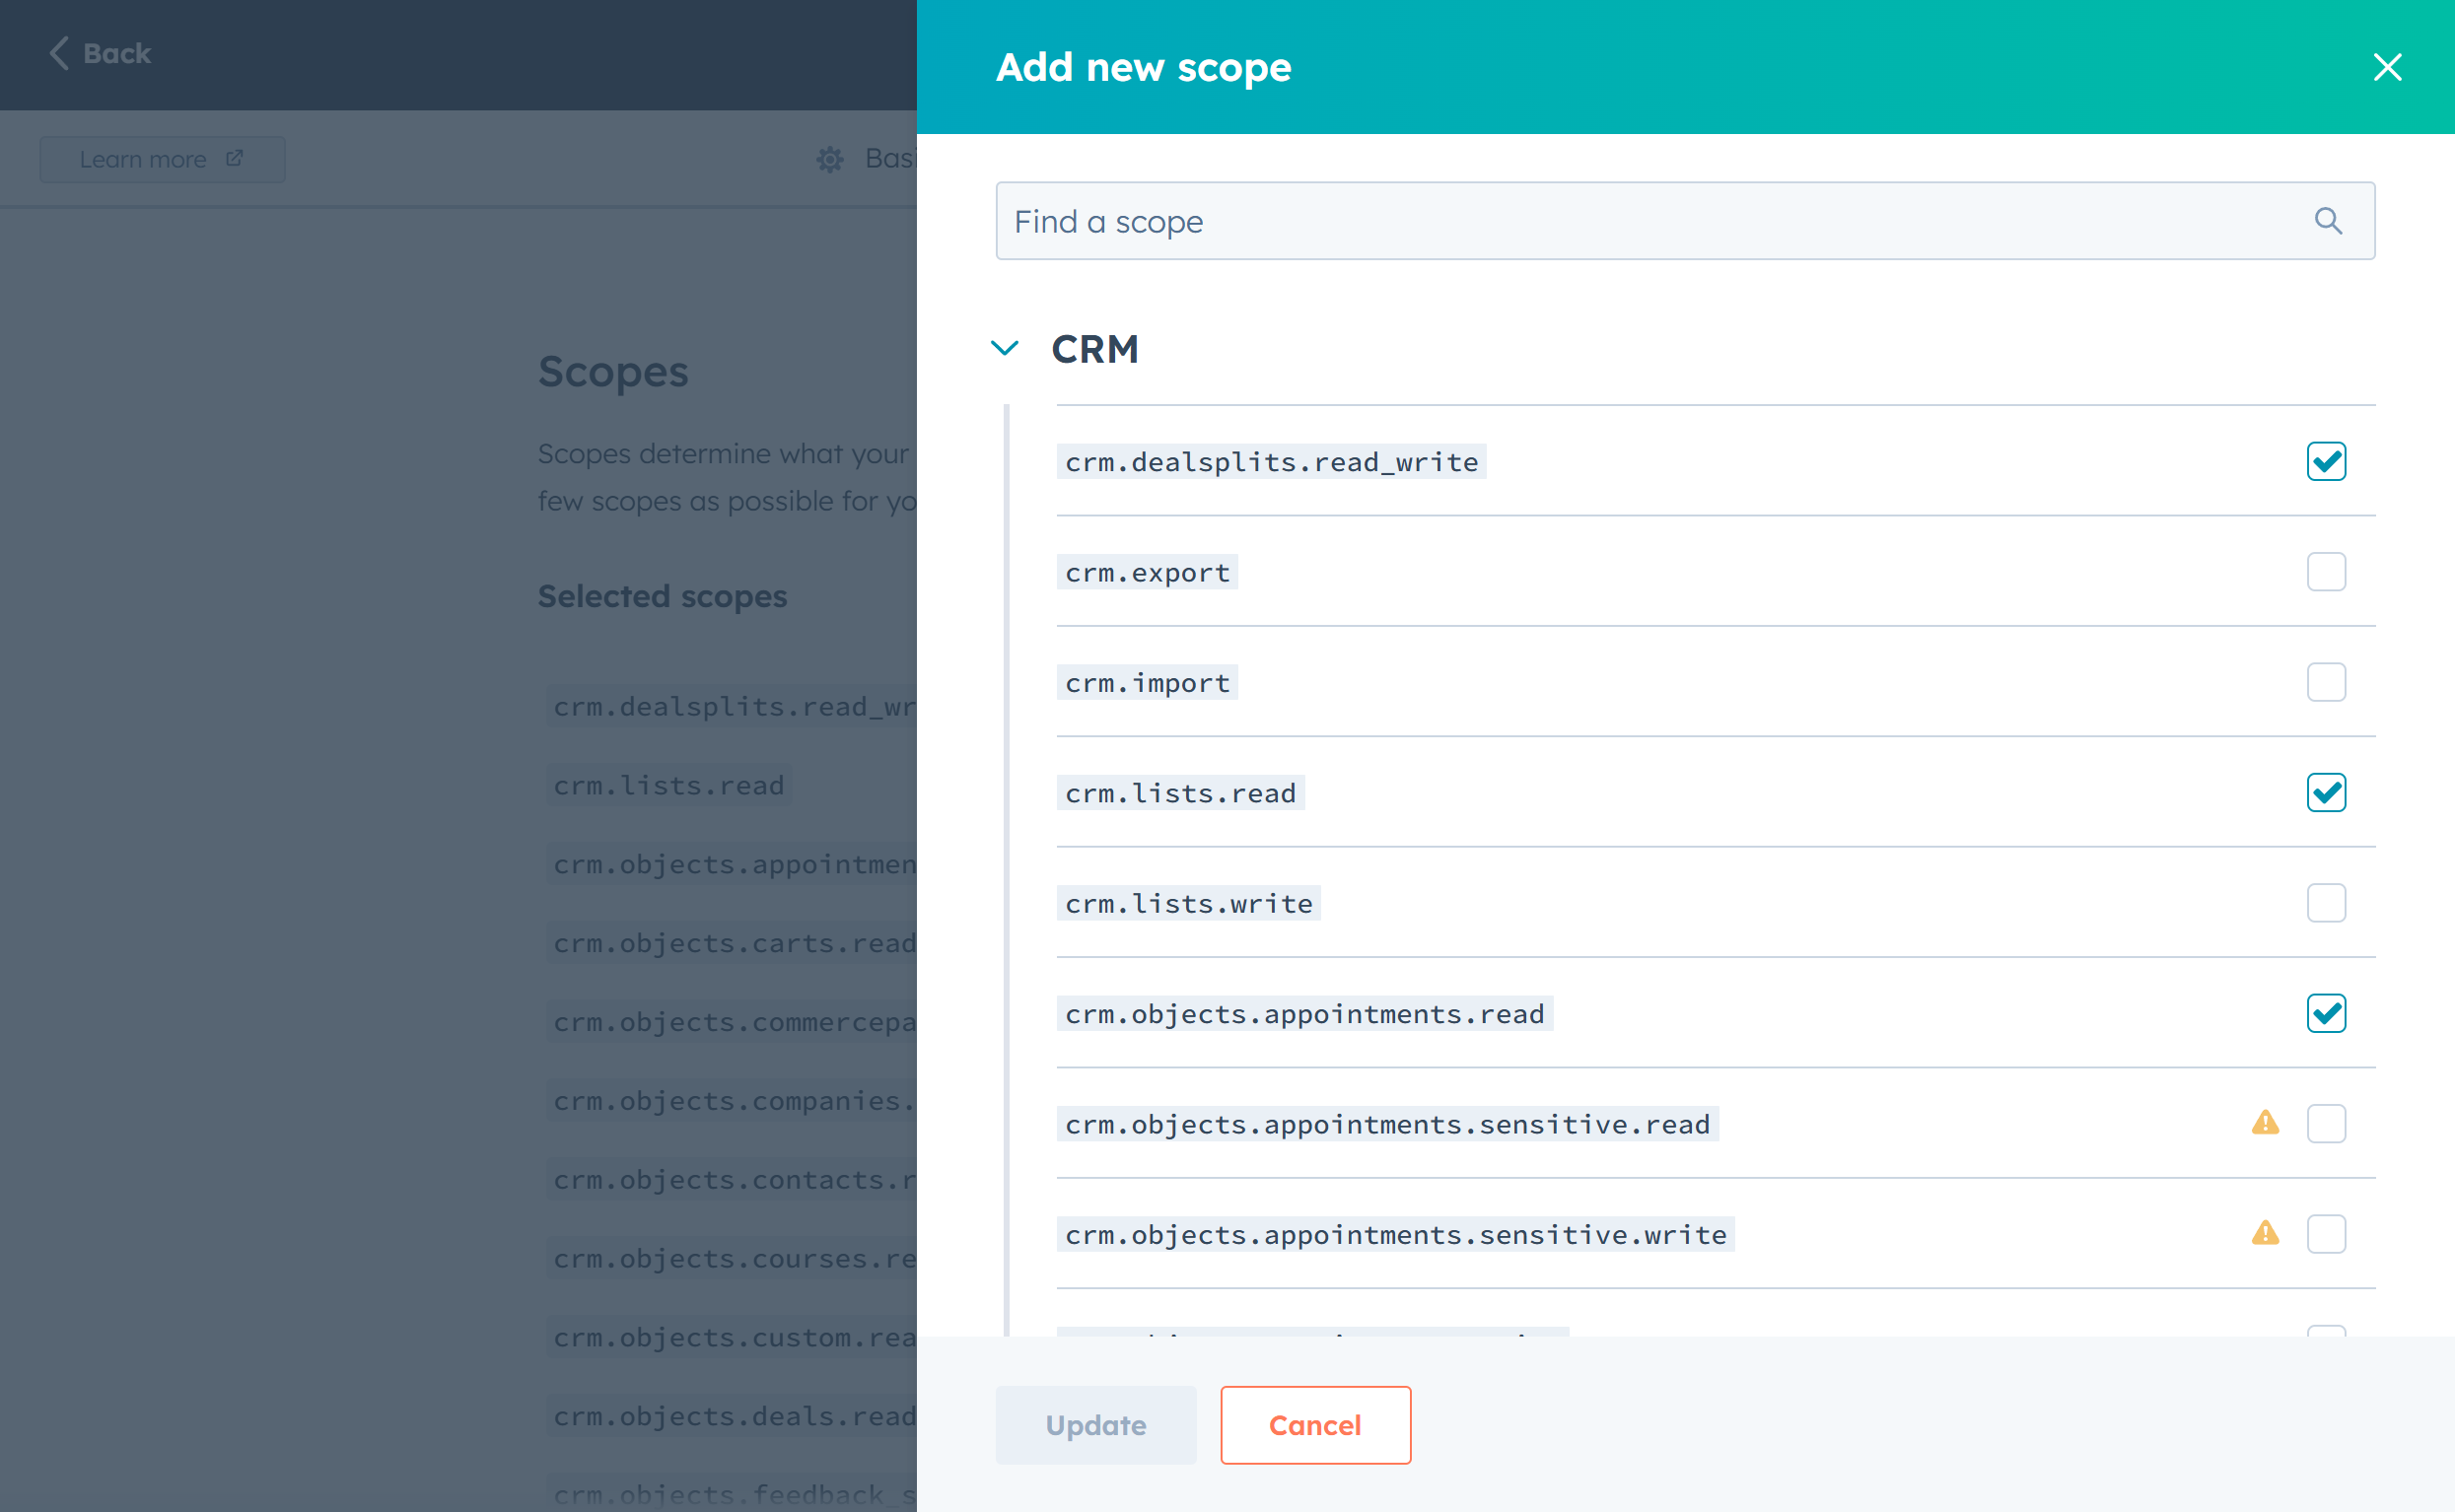
Yes, it’s a few extra clicks — but it’s easy. Just check the boxes and you’ll be on your way to automatic documents in no time. Think of it like flipping switches to power things up. ⚡
Create Your App
- Click "Create app" when you're done adding scopes
- Take a moment to admire your handiwork first!
- You'll see the Access Token (needed for later)
- This is super important!
- leave this page open to use this key later
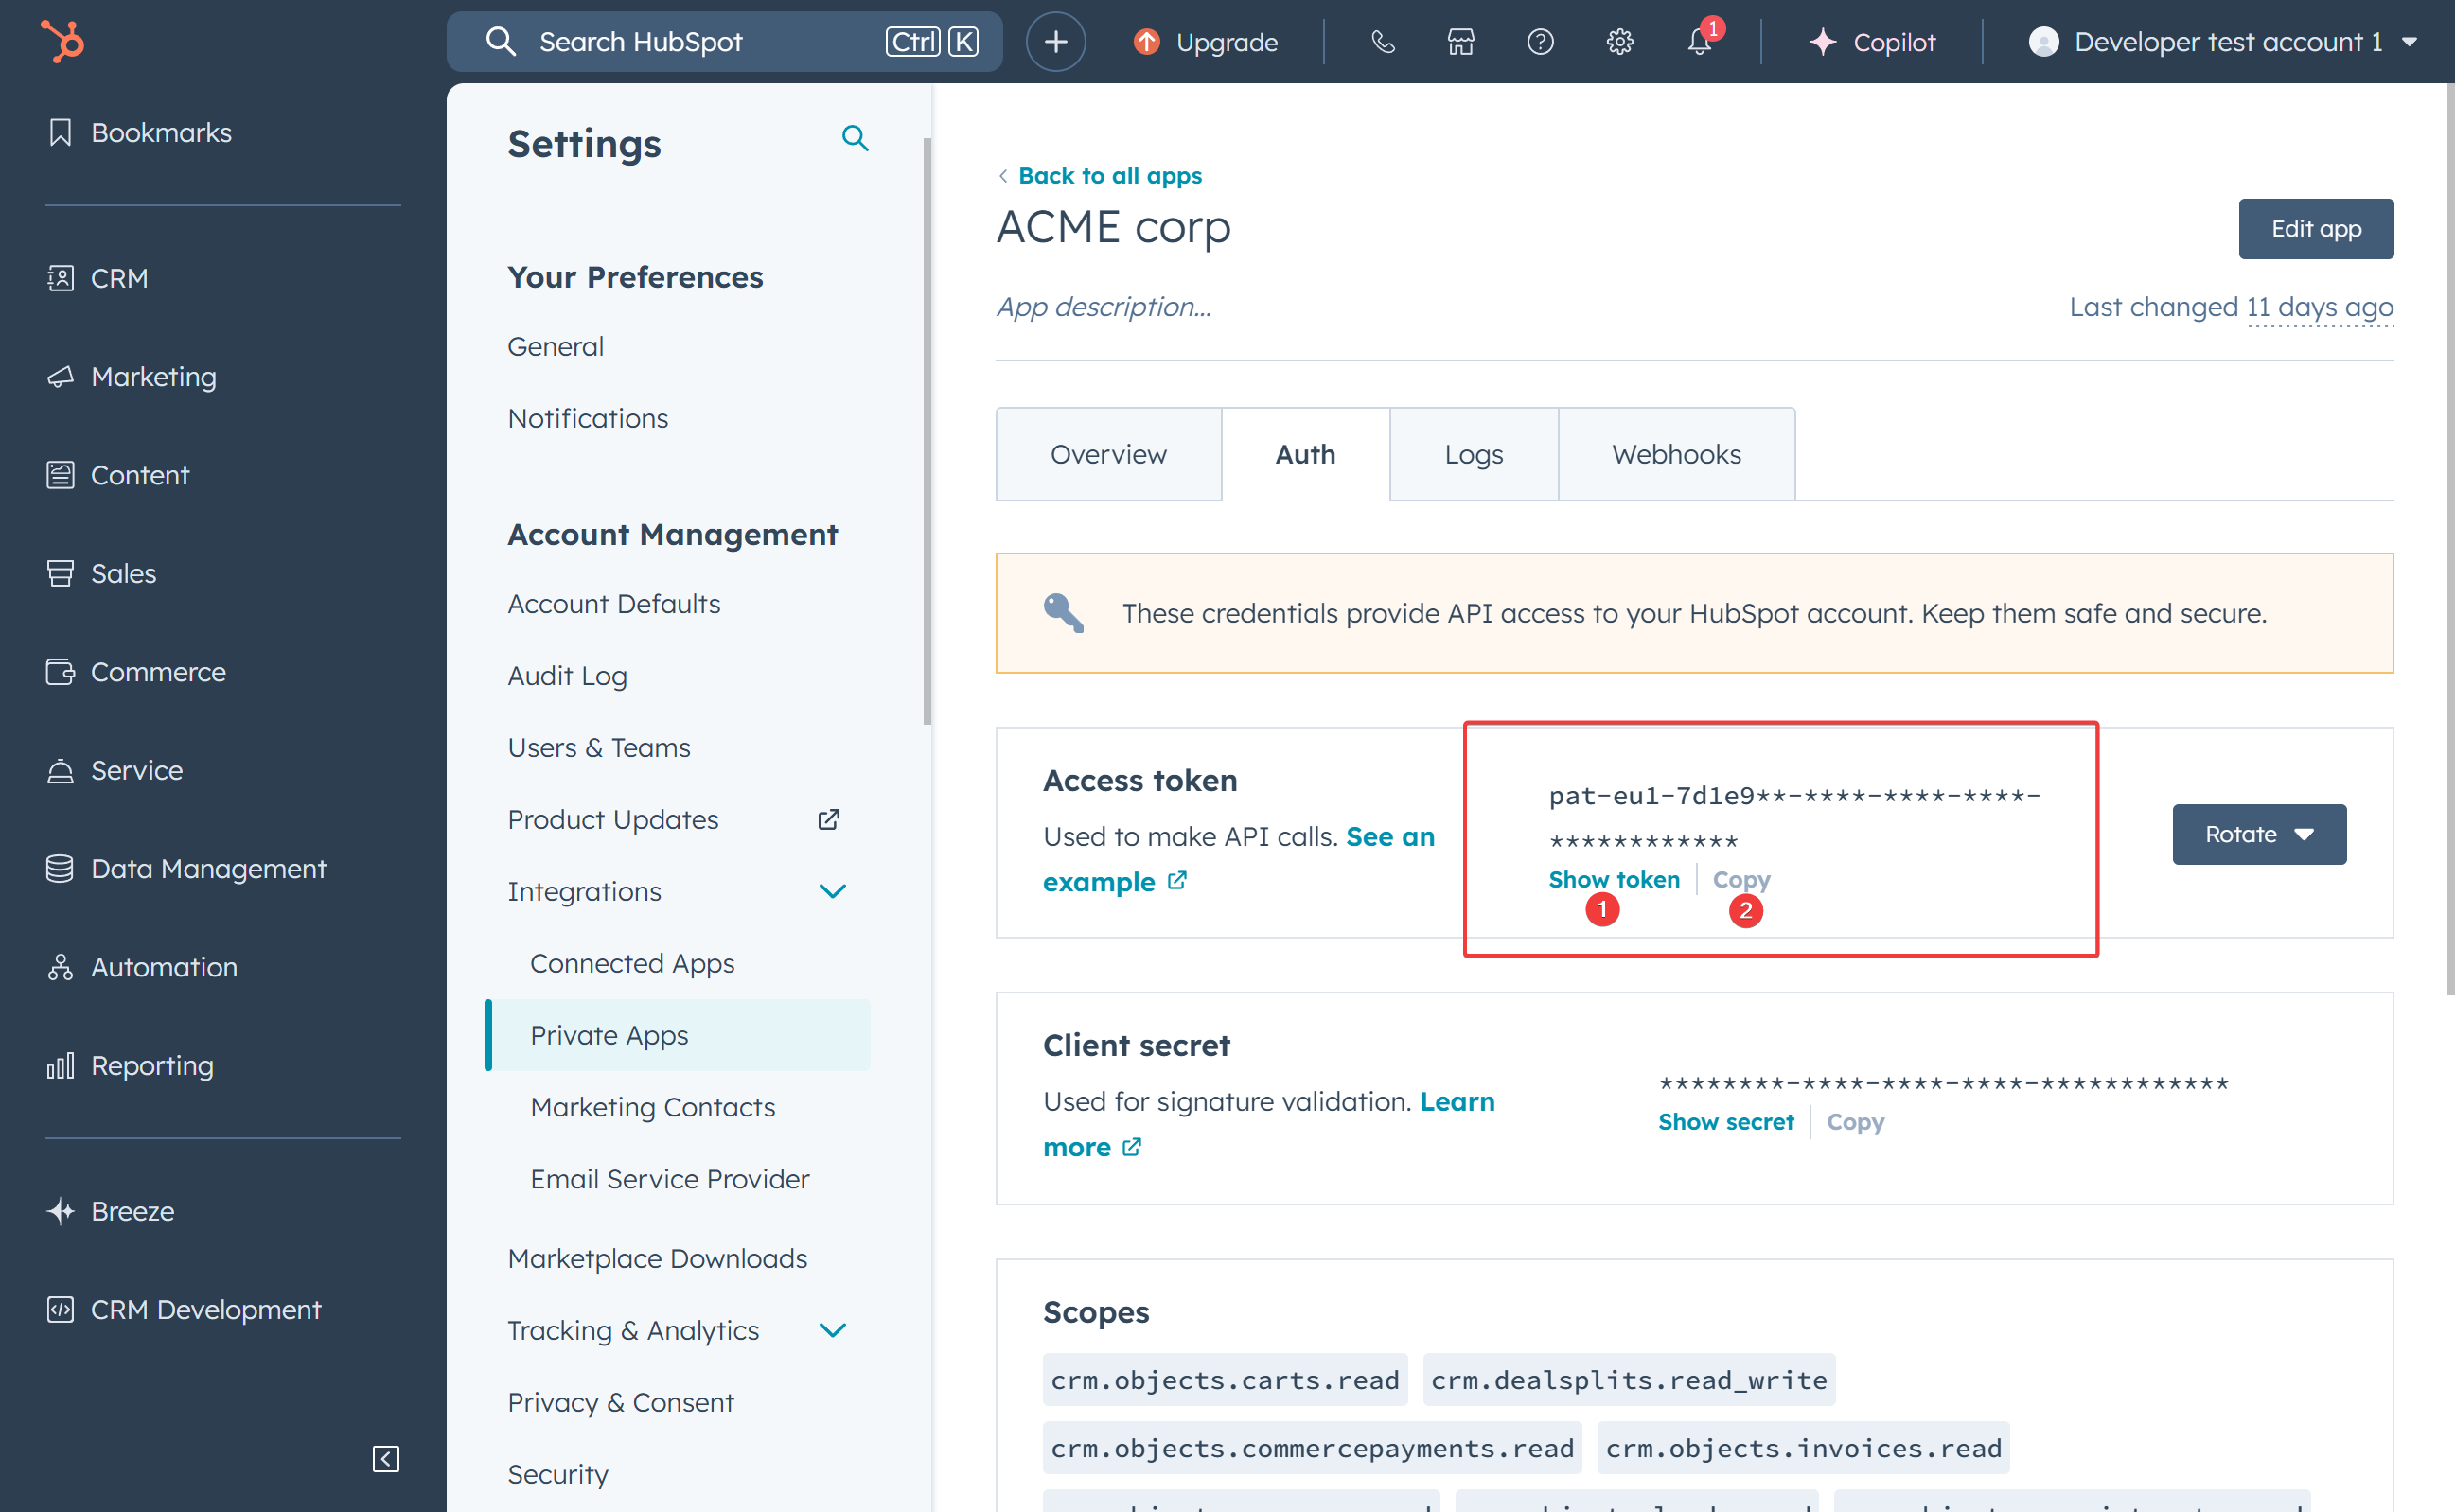
This token is kind of like a temporary library card — it lets TurboDocx read only the data you’ve approved. But just like a password, you don’t want it ending up in the wrong hands.
Keep it private, and if it ever gets shared by accident, no worries — you can always generate a fresh one right here.
Step 2: Configuring TurboDocx
Now we'll connect your shiny new HubSpot app to TurboDocx. This is like introducing two friends who are perfect for each other!
Navigate to TurboDocx Settings
- Go to your TurboDocx dashboard
- Log in if you haven't already
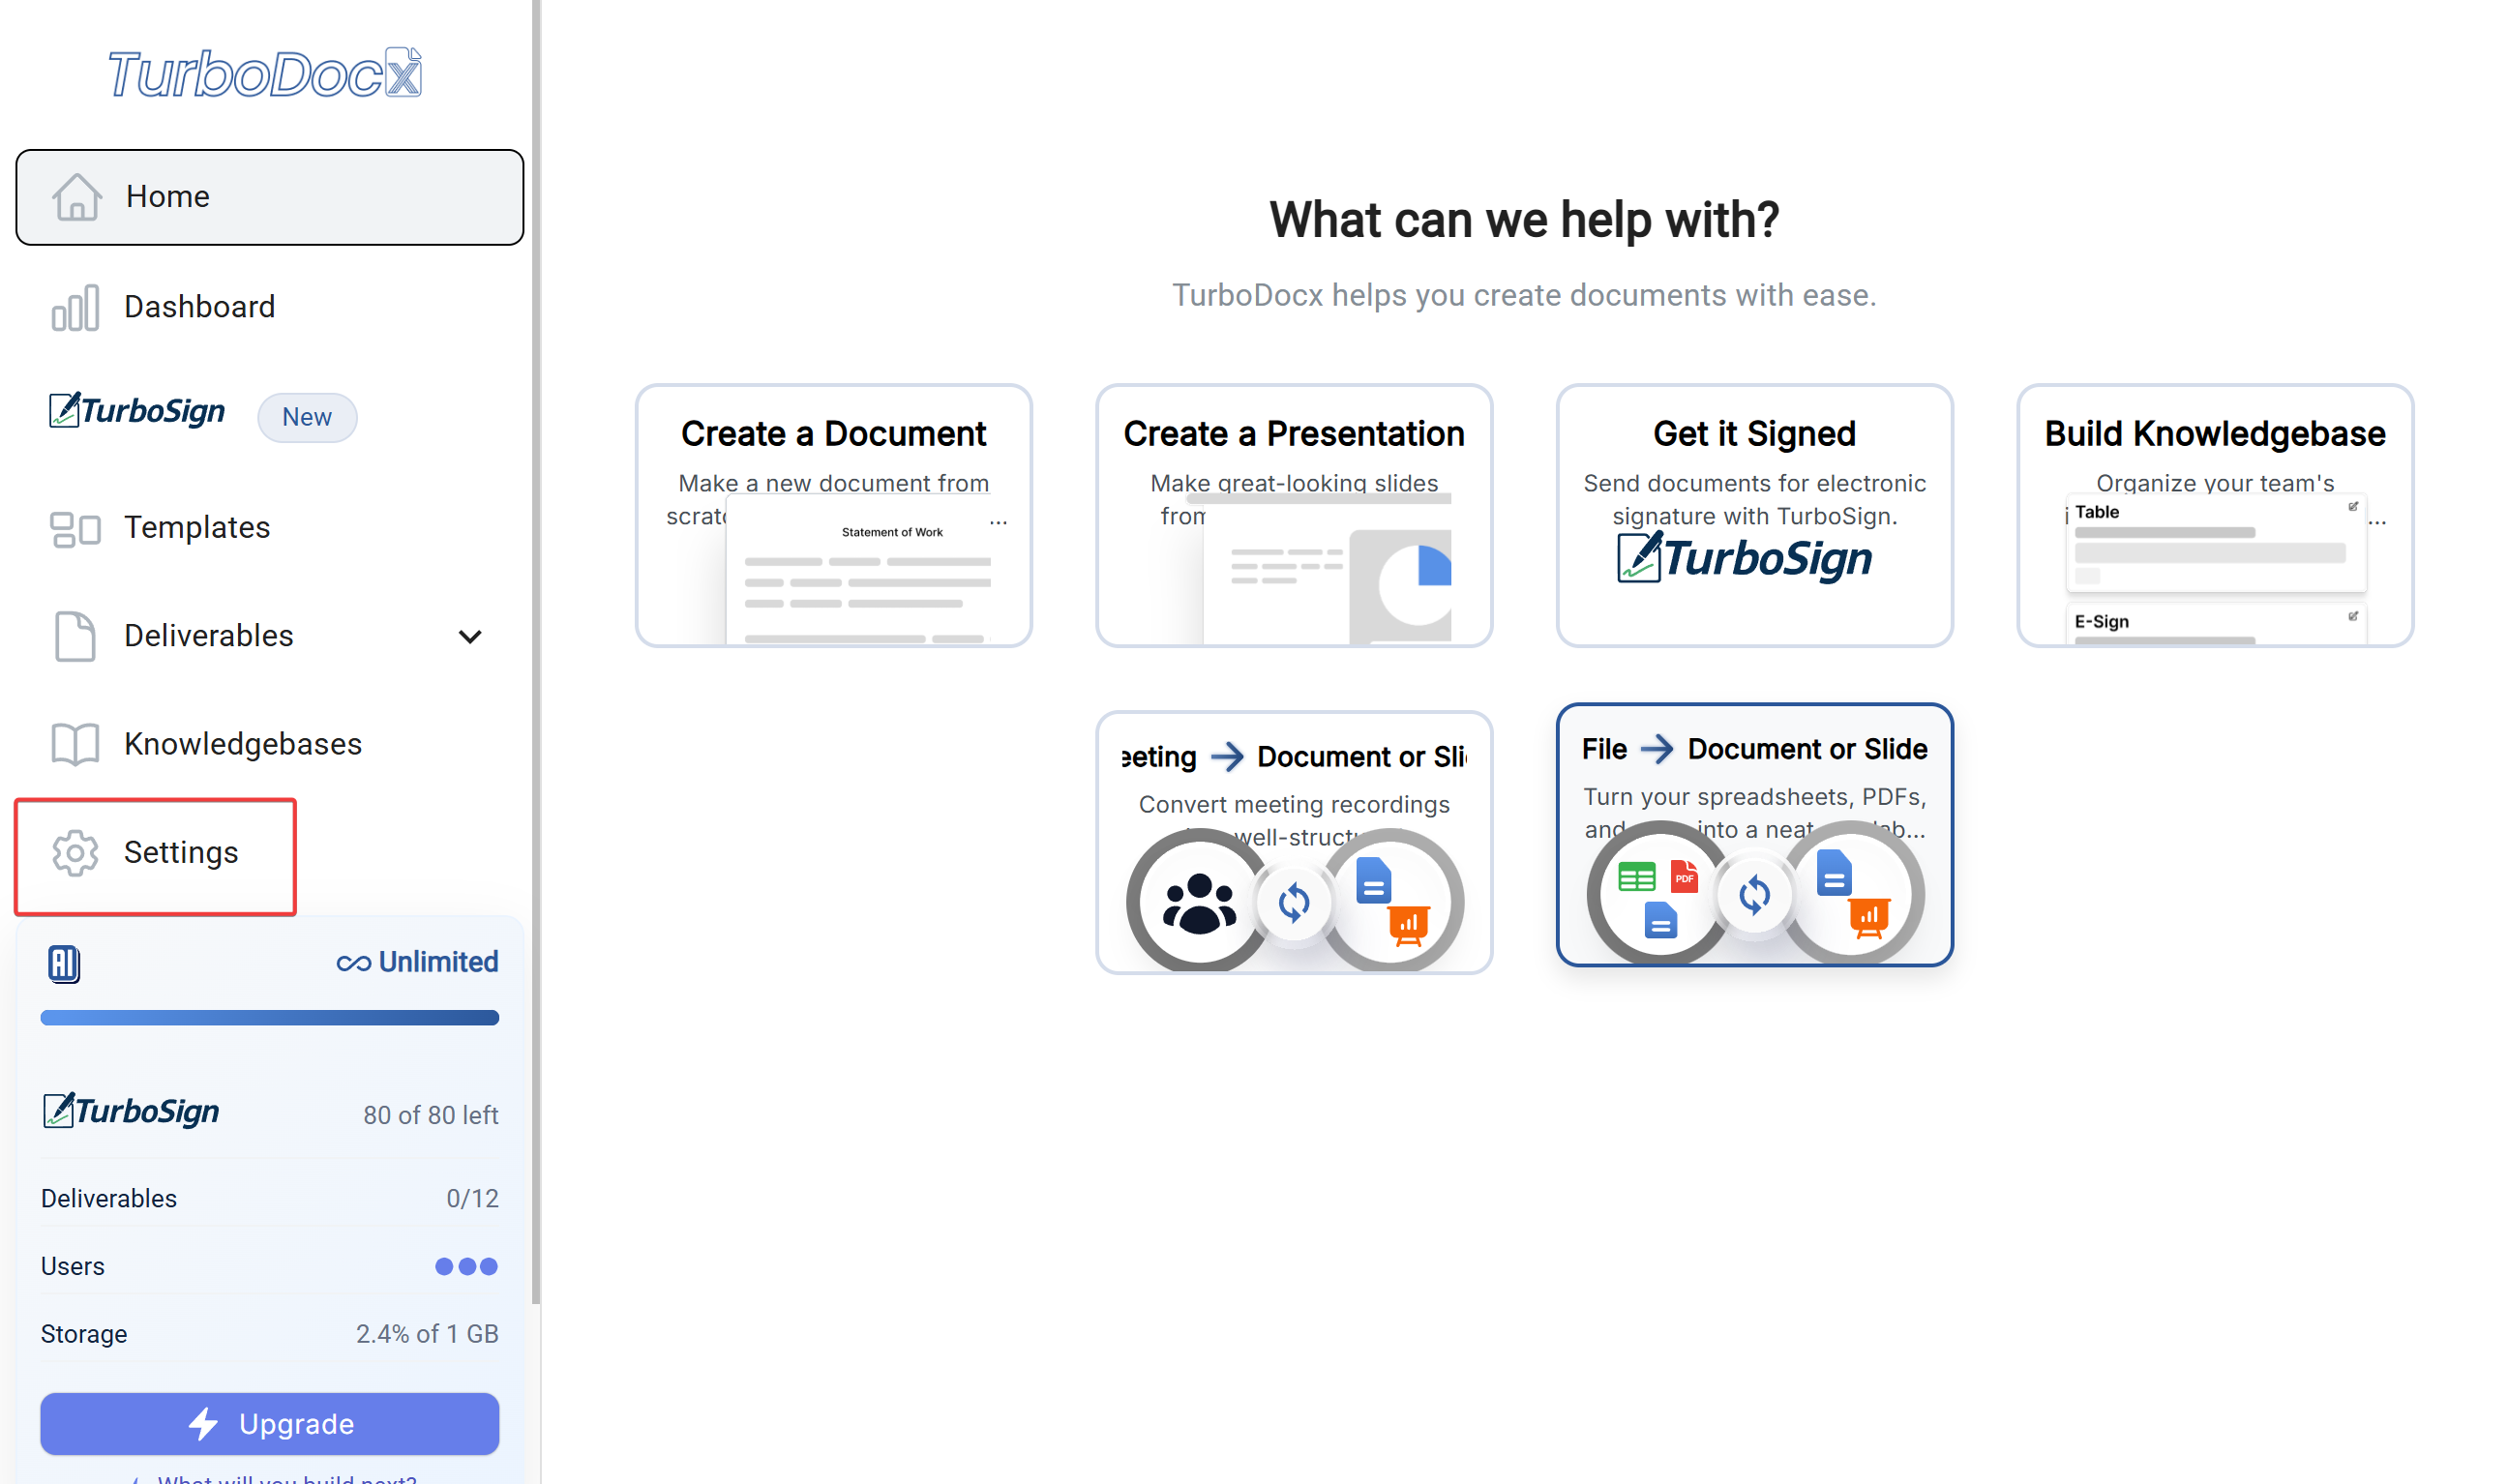
- Click on "Settings"
- Look for the gear icon or "Settings" text
- Usually in the top menu or sidebar
- Click on "Organization Settings"
- This might be in a dropdown or separate tab
- If you can't find it, try looking for "Integrations" or "Connected Apps"

Configure HubSpot Integration
- Find the HubSpot section
- Look for the HubSpot logo or "HubSpot Integration"
- It might be in a list with other integrations

- Click "Configure HubSpot"
- A popup or form will appear
- This is where the magic happens! ✨
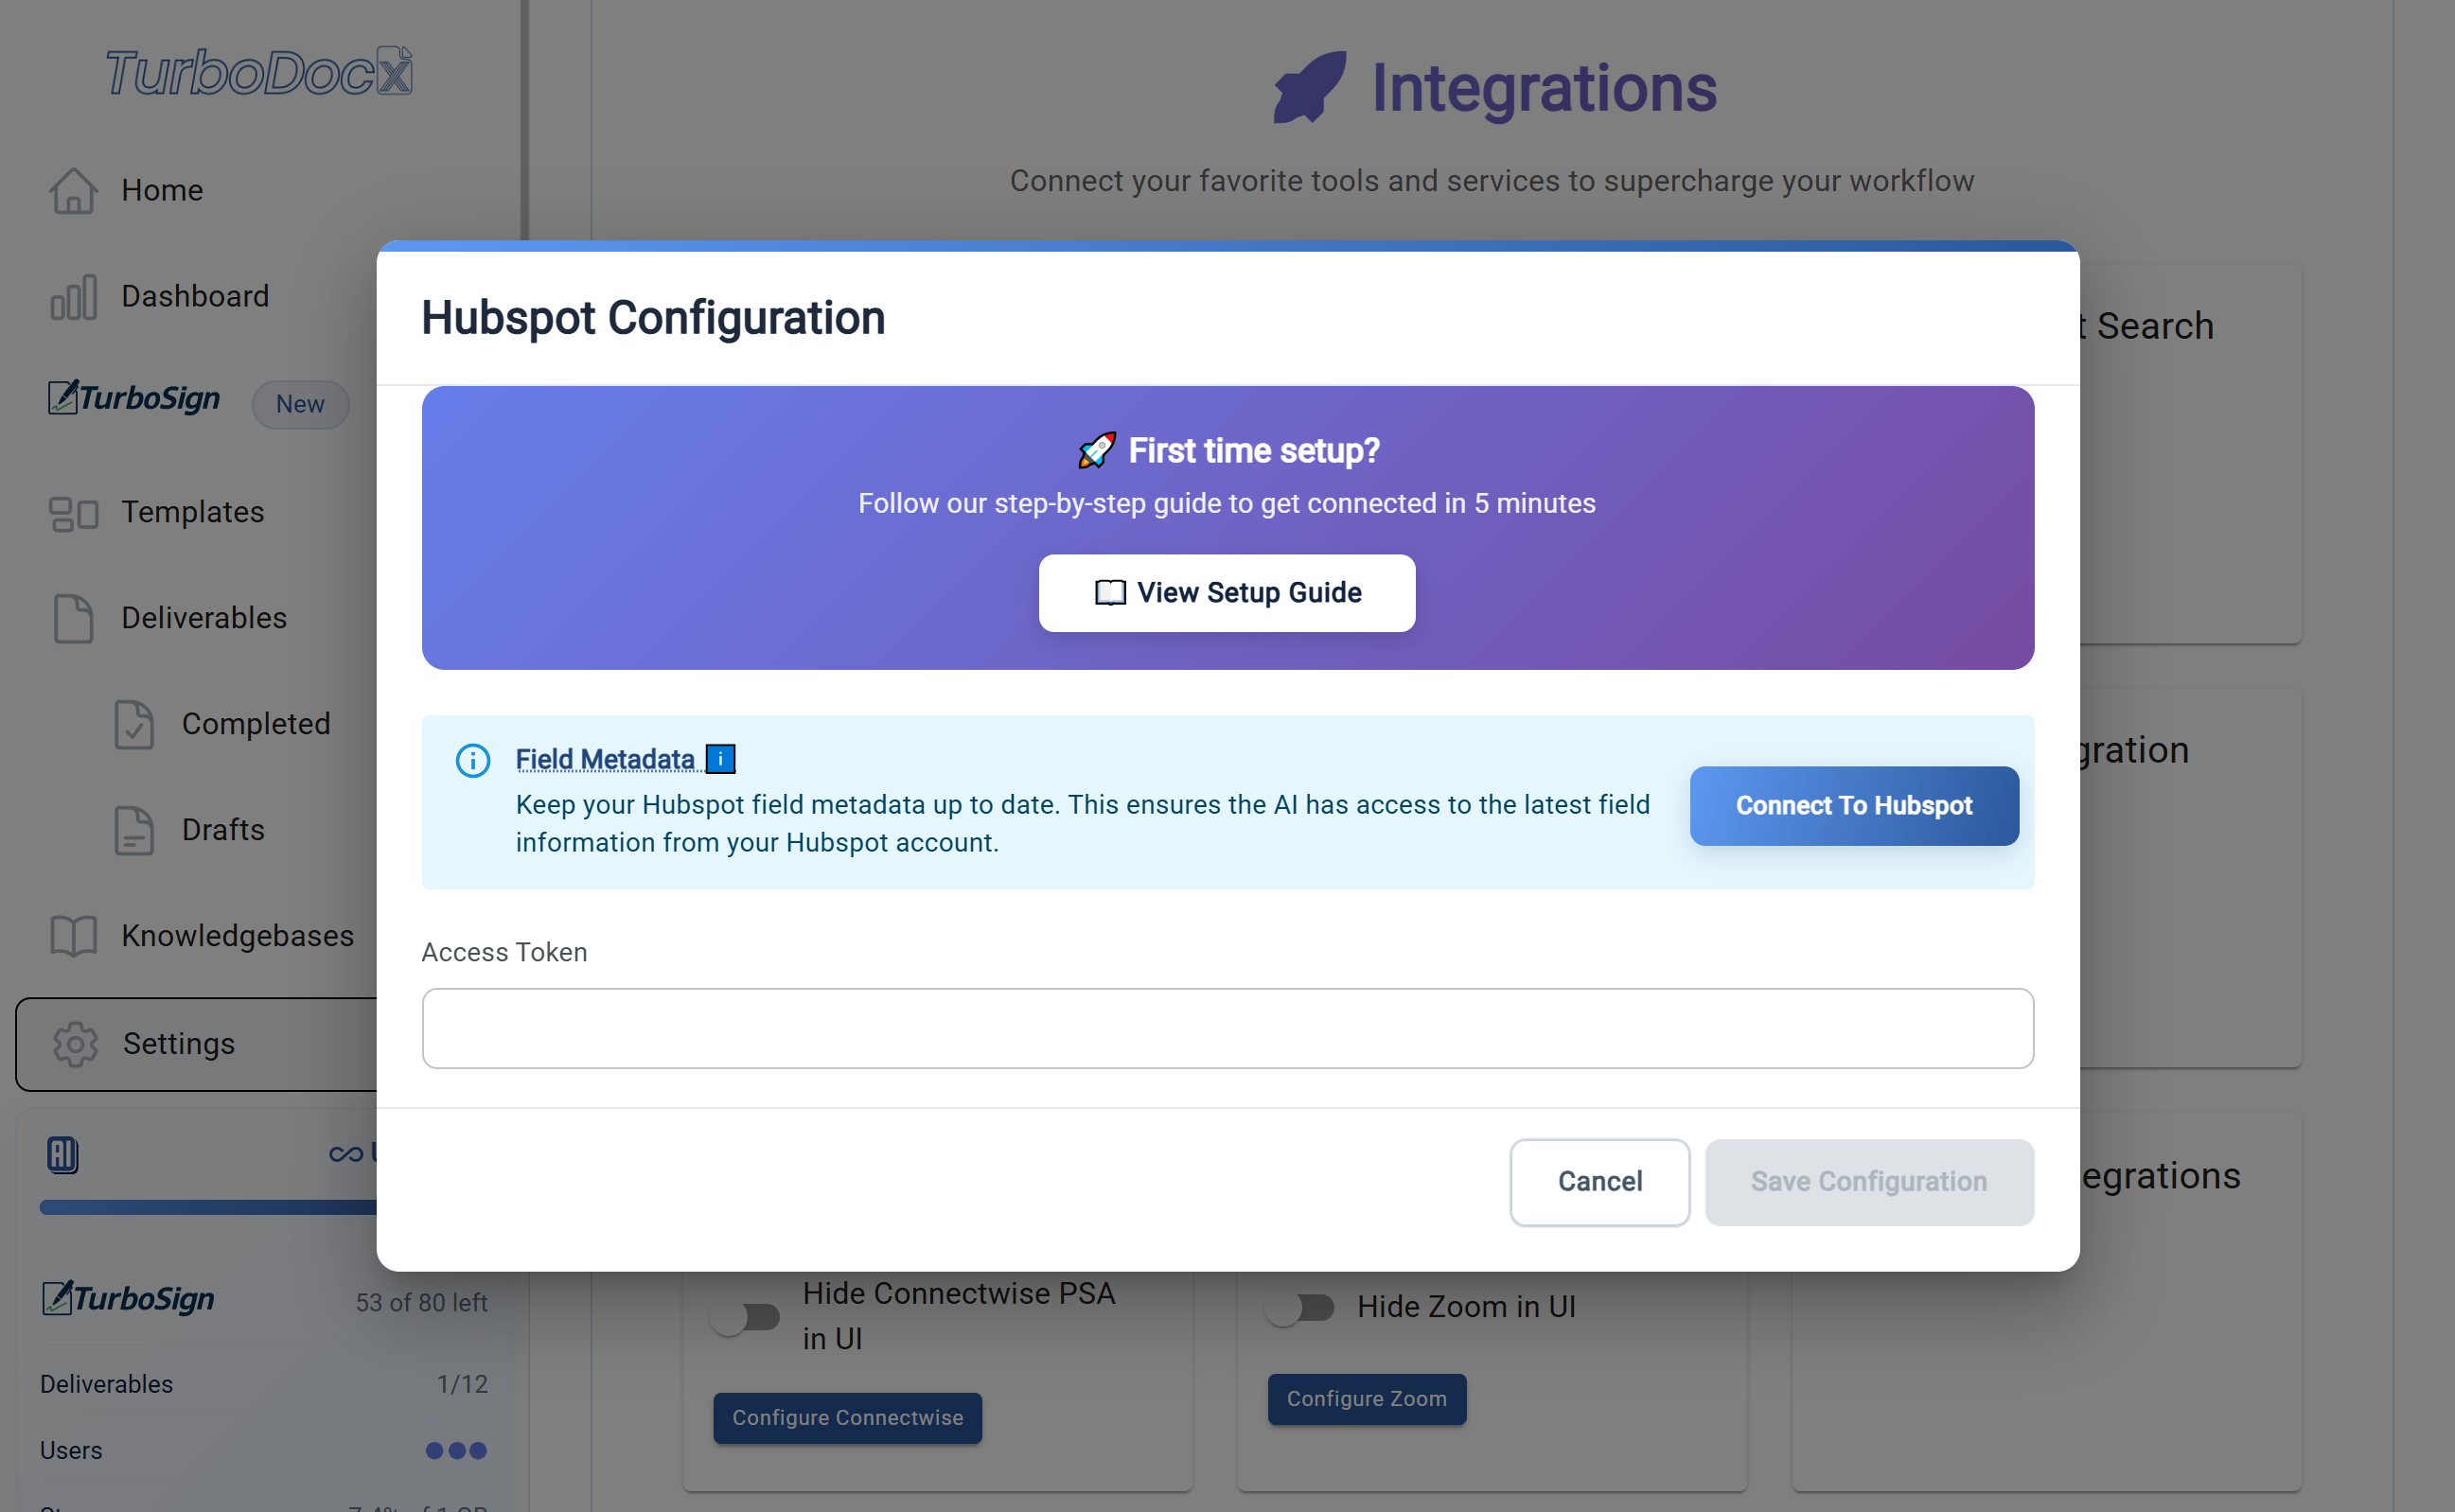
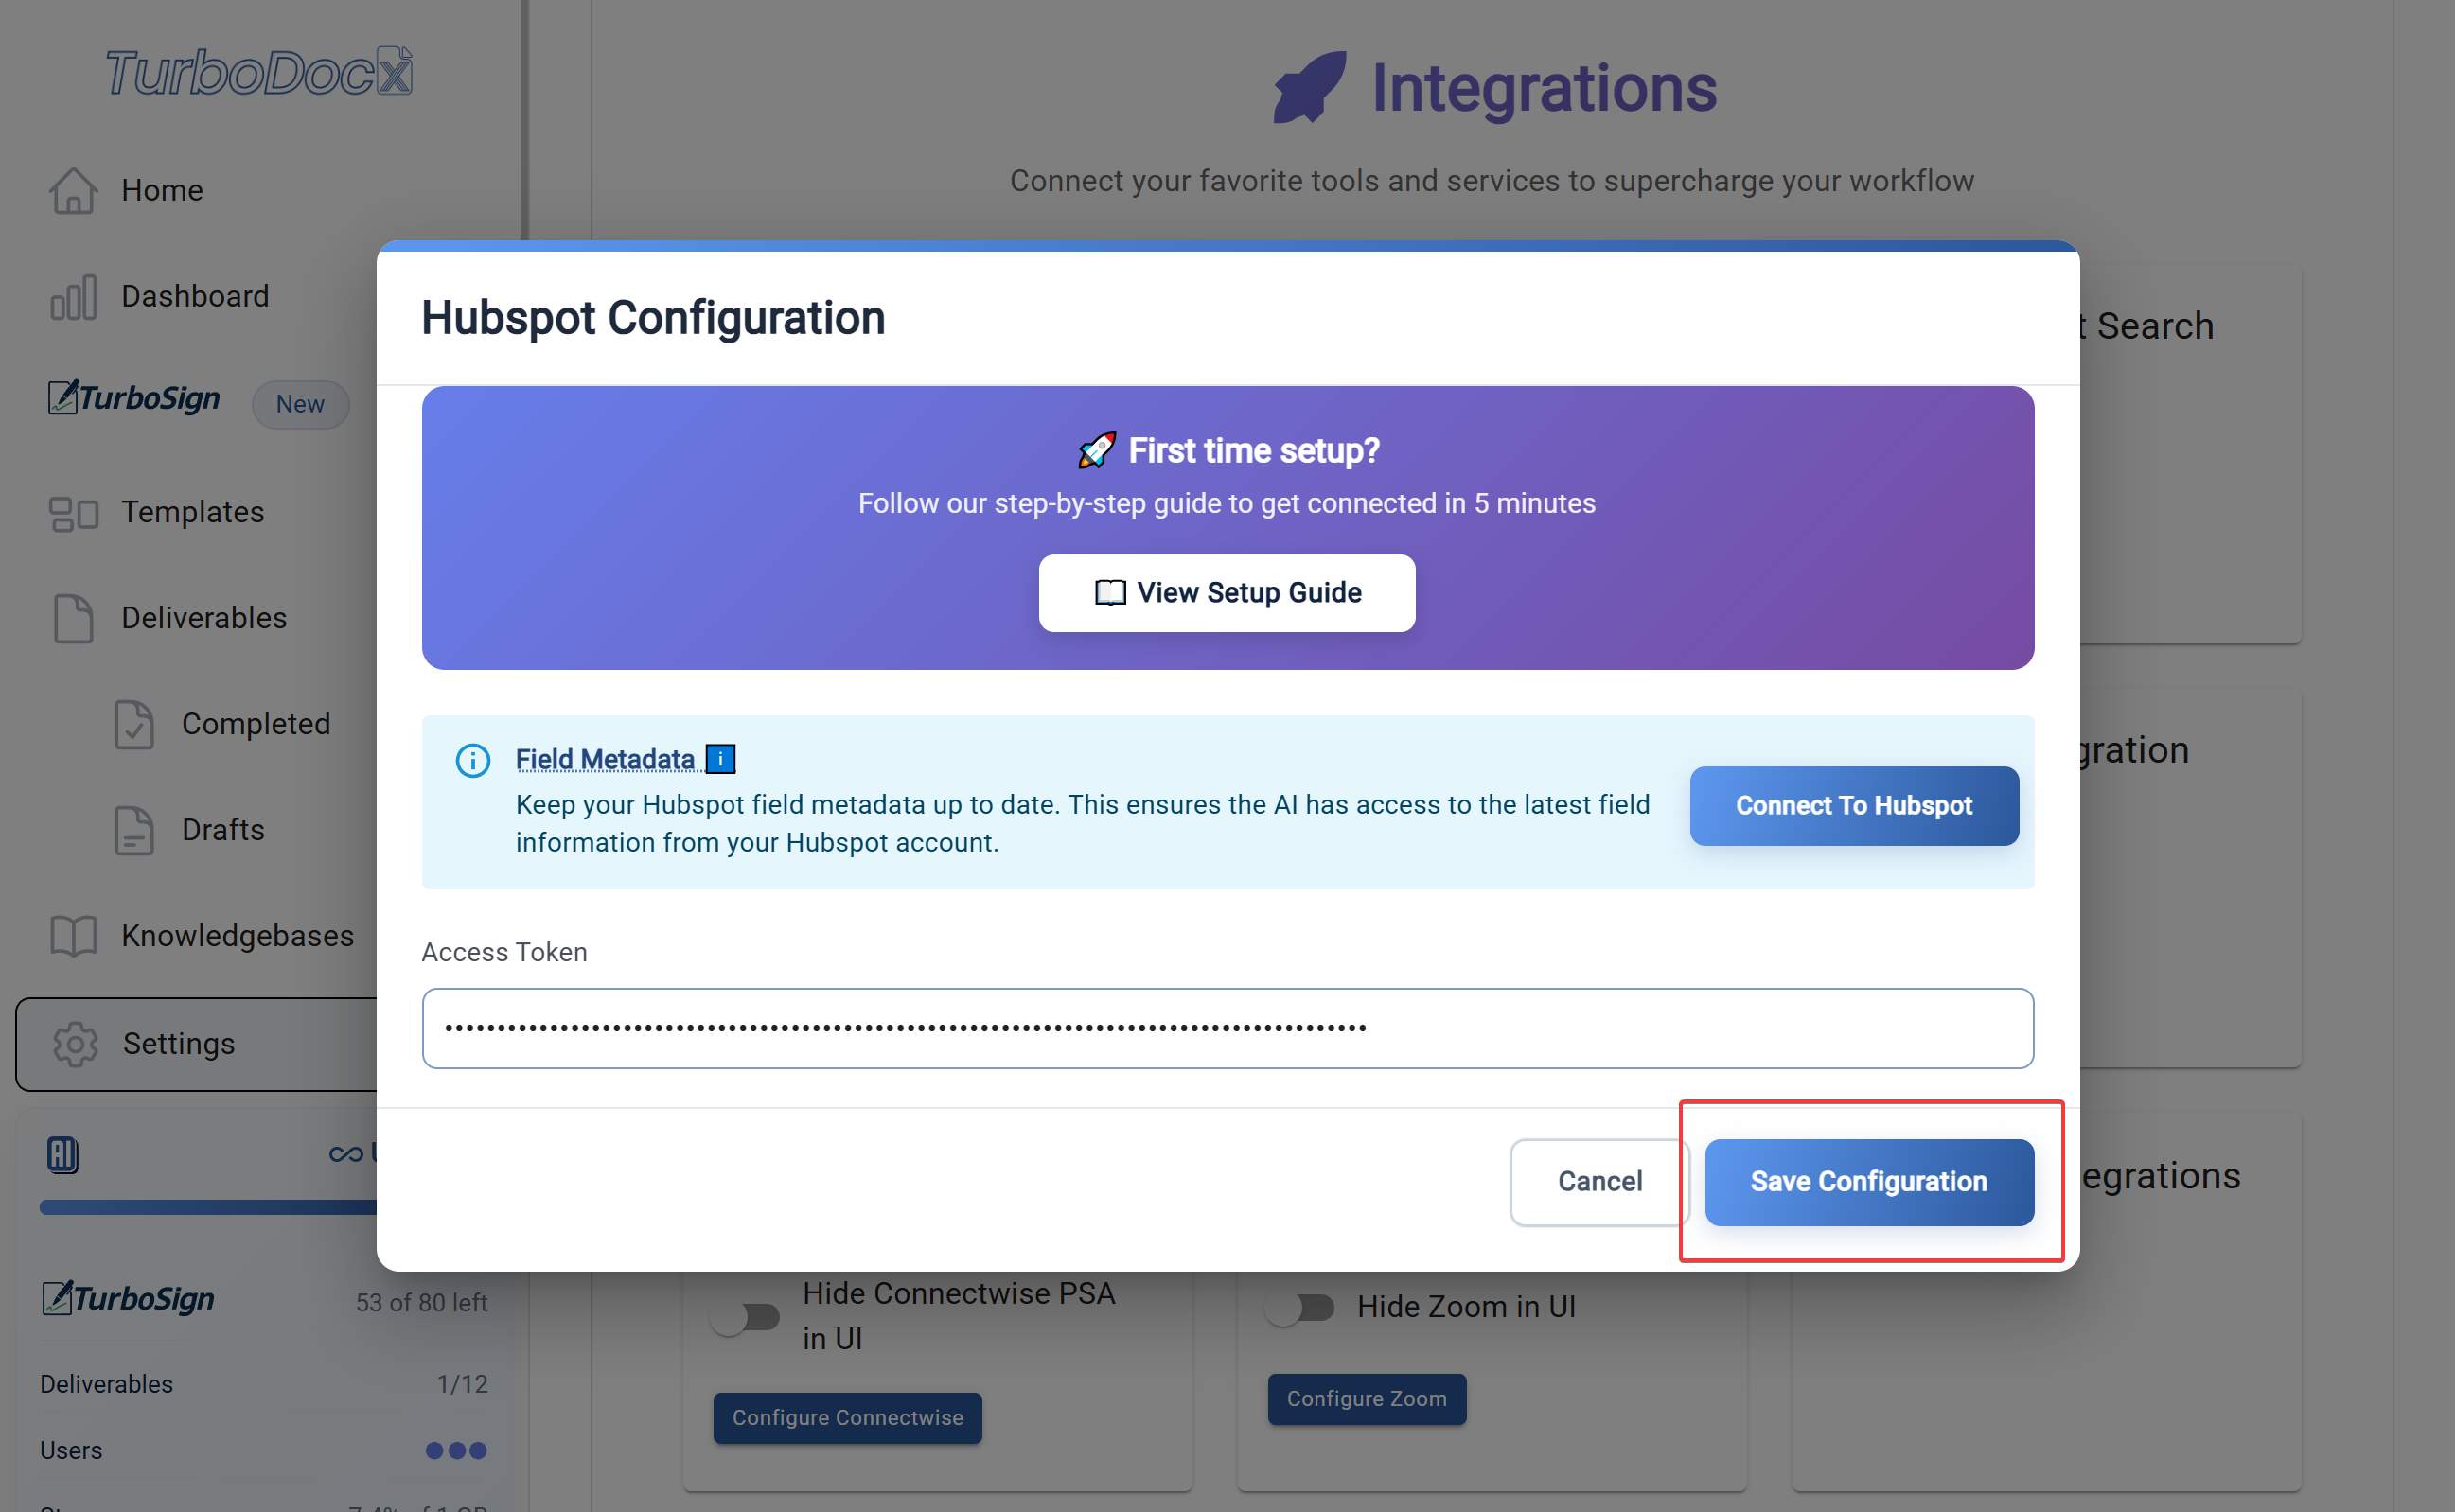
- Enter your Access Token
- Copy the Access Token from your HubSpot private app page and paste it here
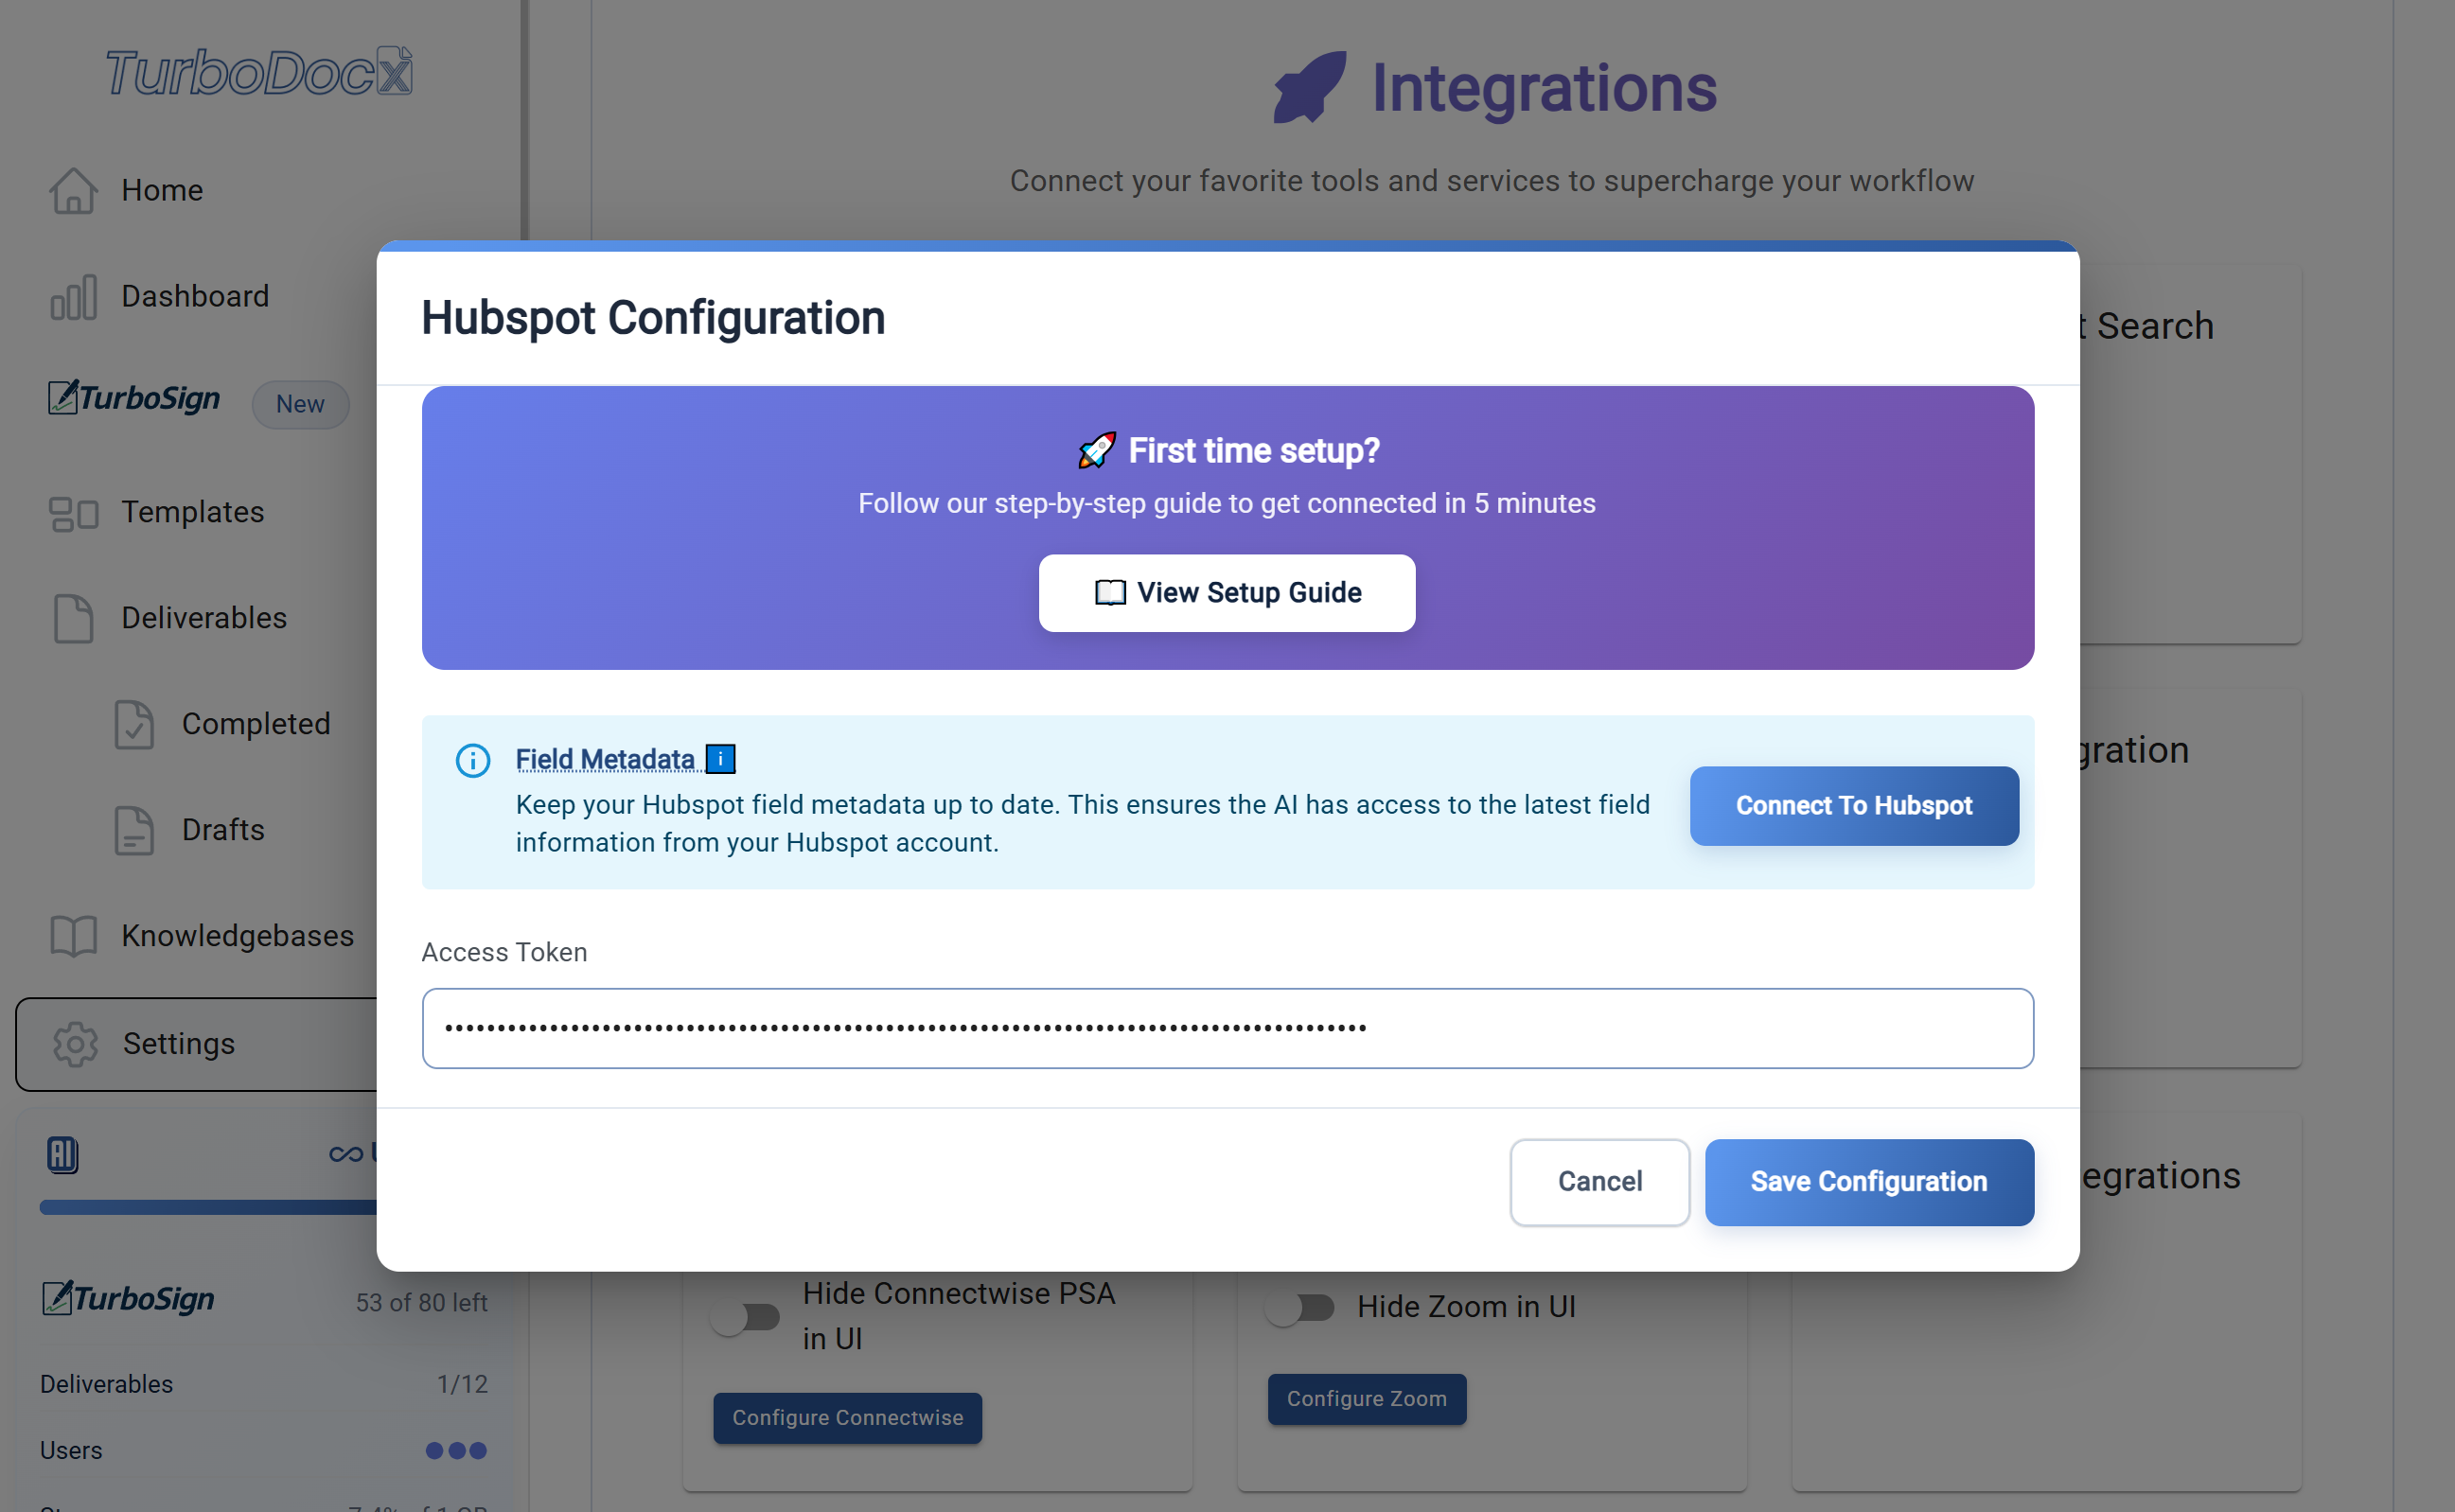
- Click "Save Configuration"
- Cross your fingers (optional, but recommended!)
Sync Your HubSpot Data
- Click "Refresh Fields"
- This button appears after the connection test succeeds
- It downloads all your custom HubSpot fields and data
- It also tests if your access token works

- Wait for the field sync
- This can take 1-3 minutes
- Time to check your email or practice your victory dance! 💃
If you've made it this far, you deserve a pat on the back! You've successfully connected HubSpot to TurboDocx. That's no small feat — you're basically a tech wizard now! 🧙♂️
Step 3: Using Your HubSpot Integration
Time to put your new integration to work! This is where the magic happens — turning your HubSpot data into beautiful documents.
Creating Your First Document
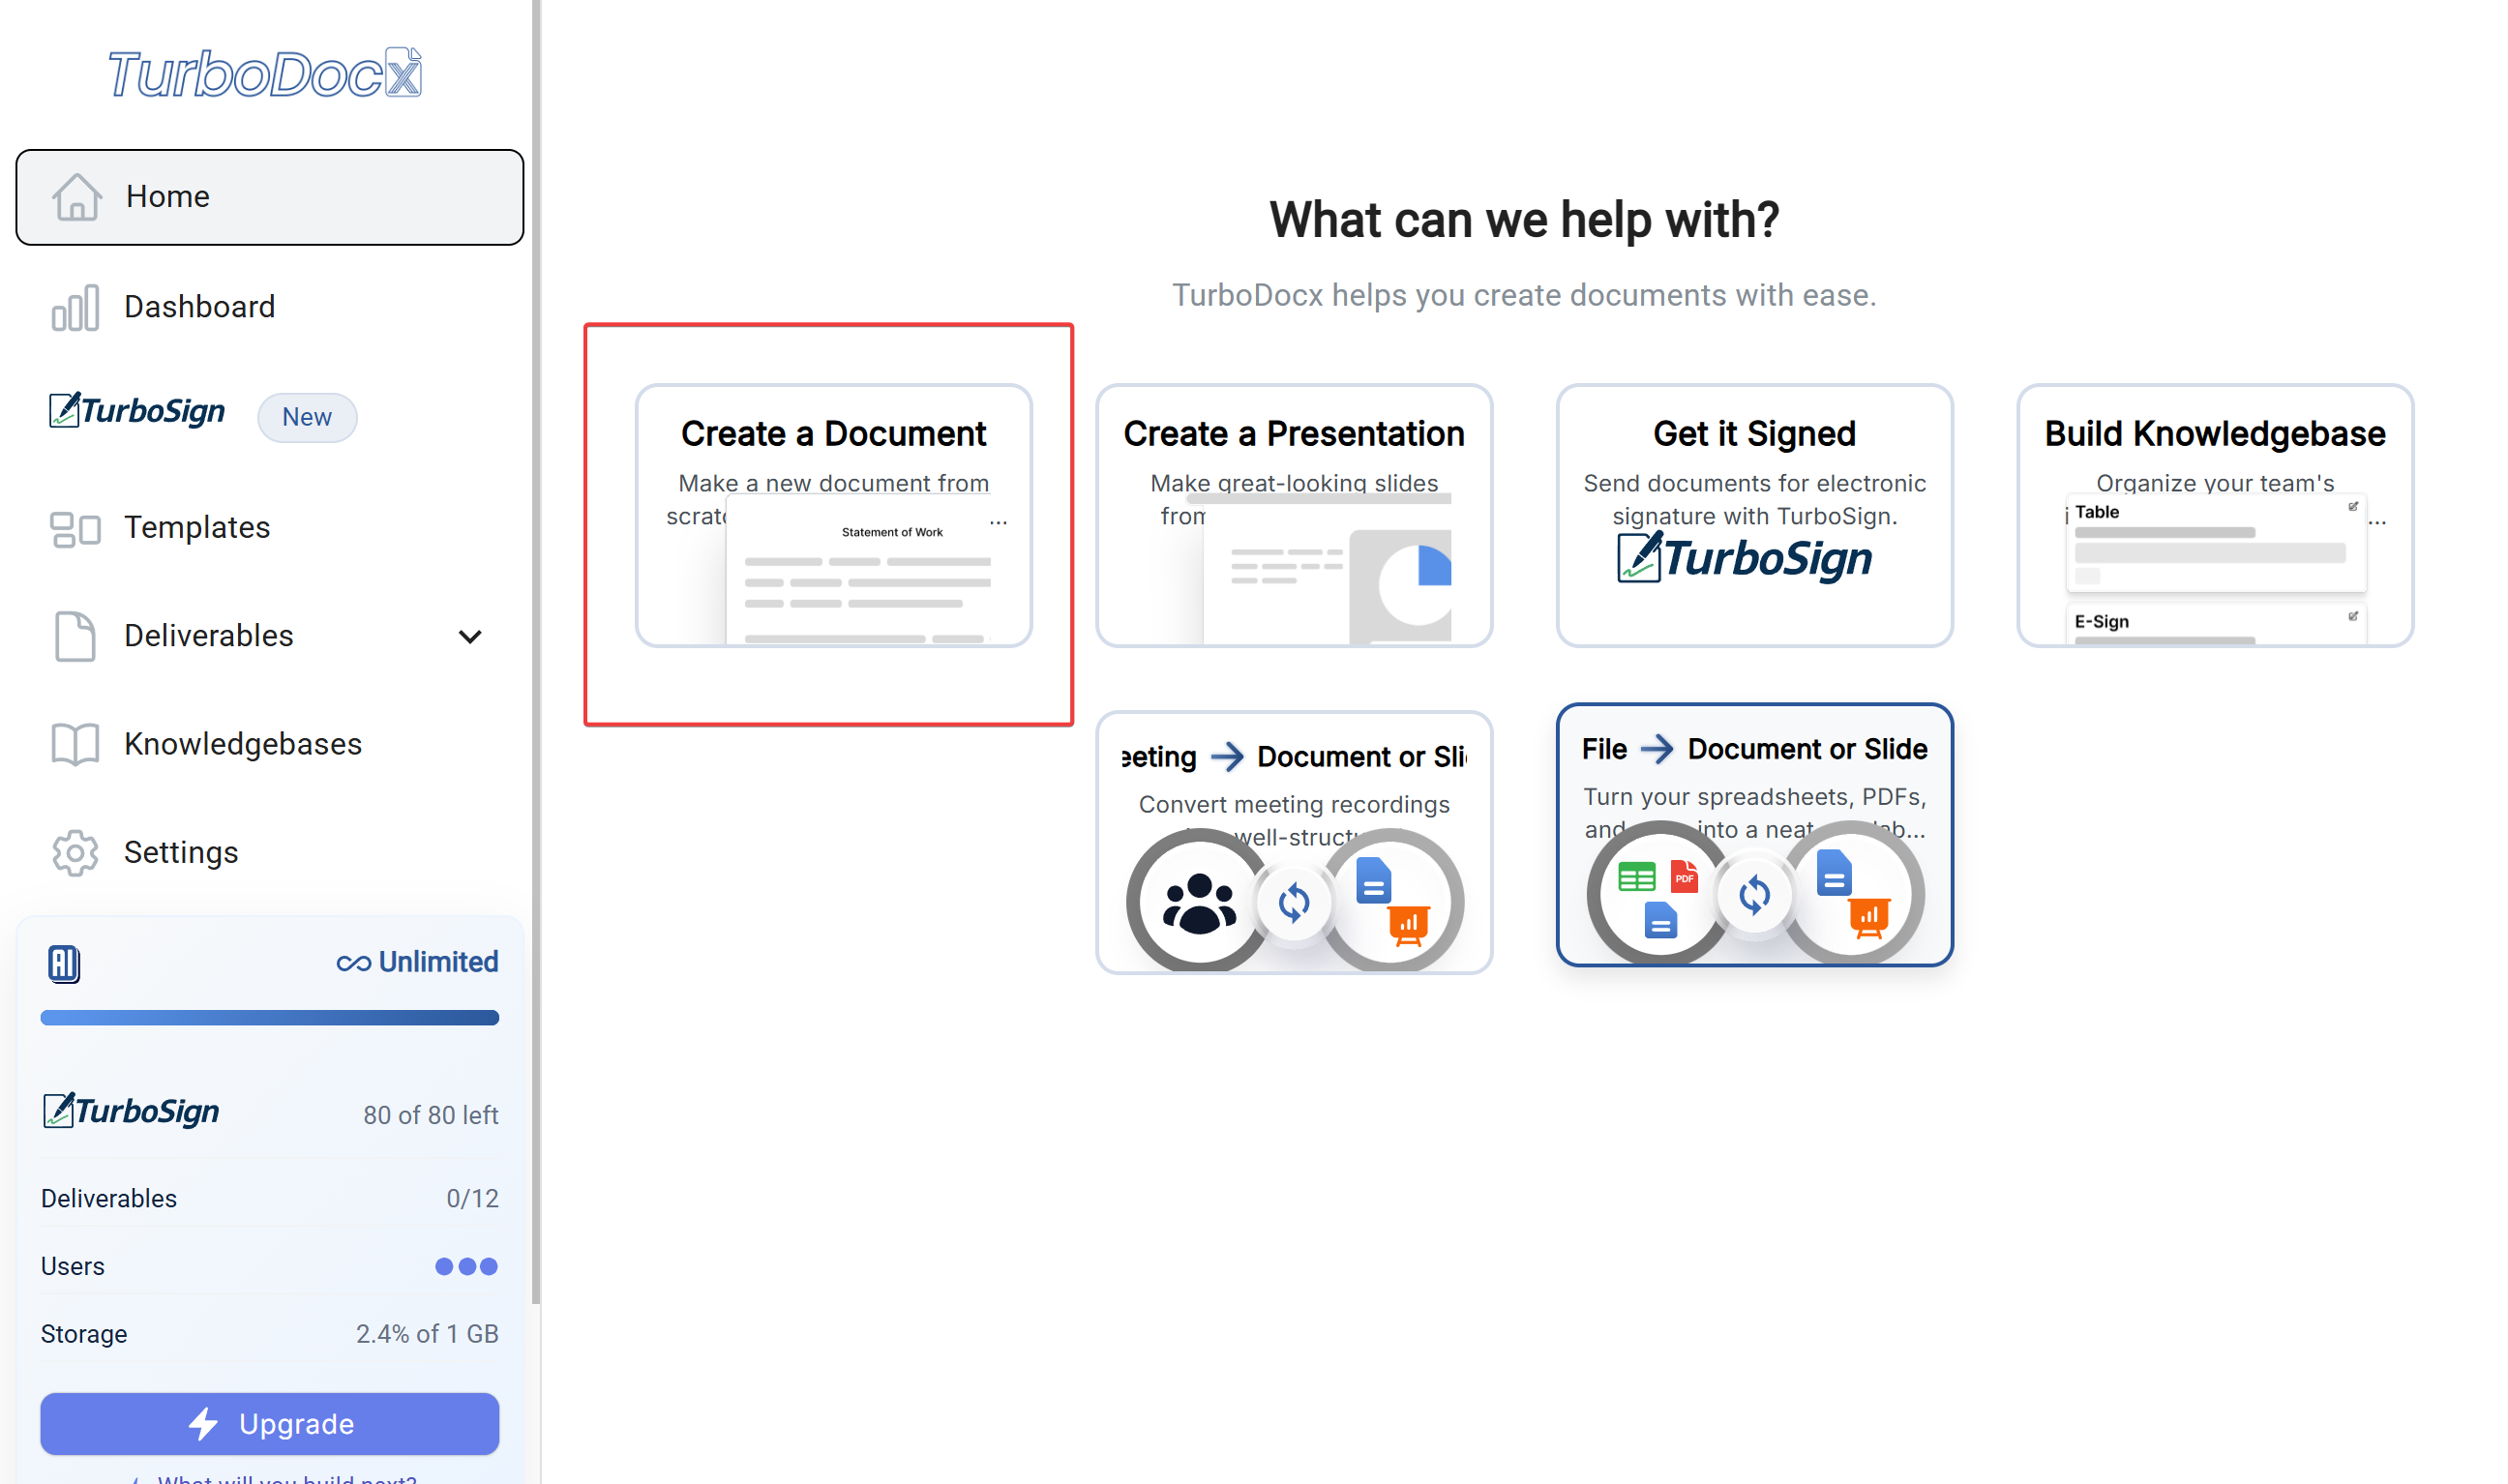
- Go to document generation
- Look for "Create Document", "New Document", or similar
- This is usually on your main dashboard
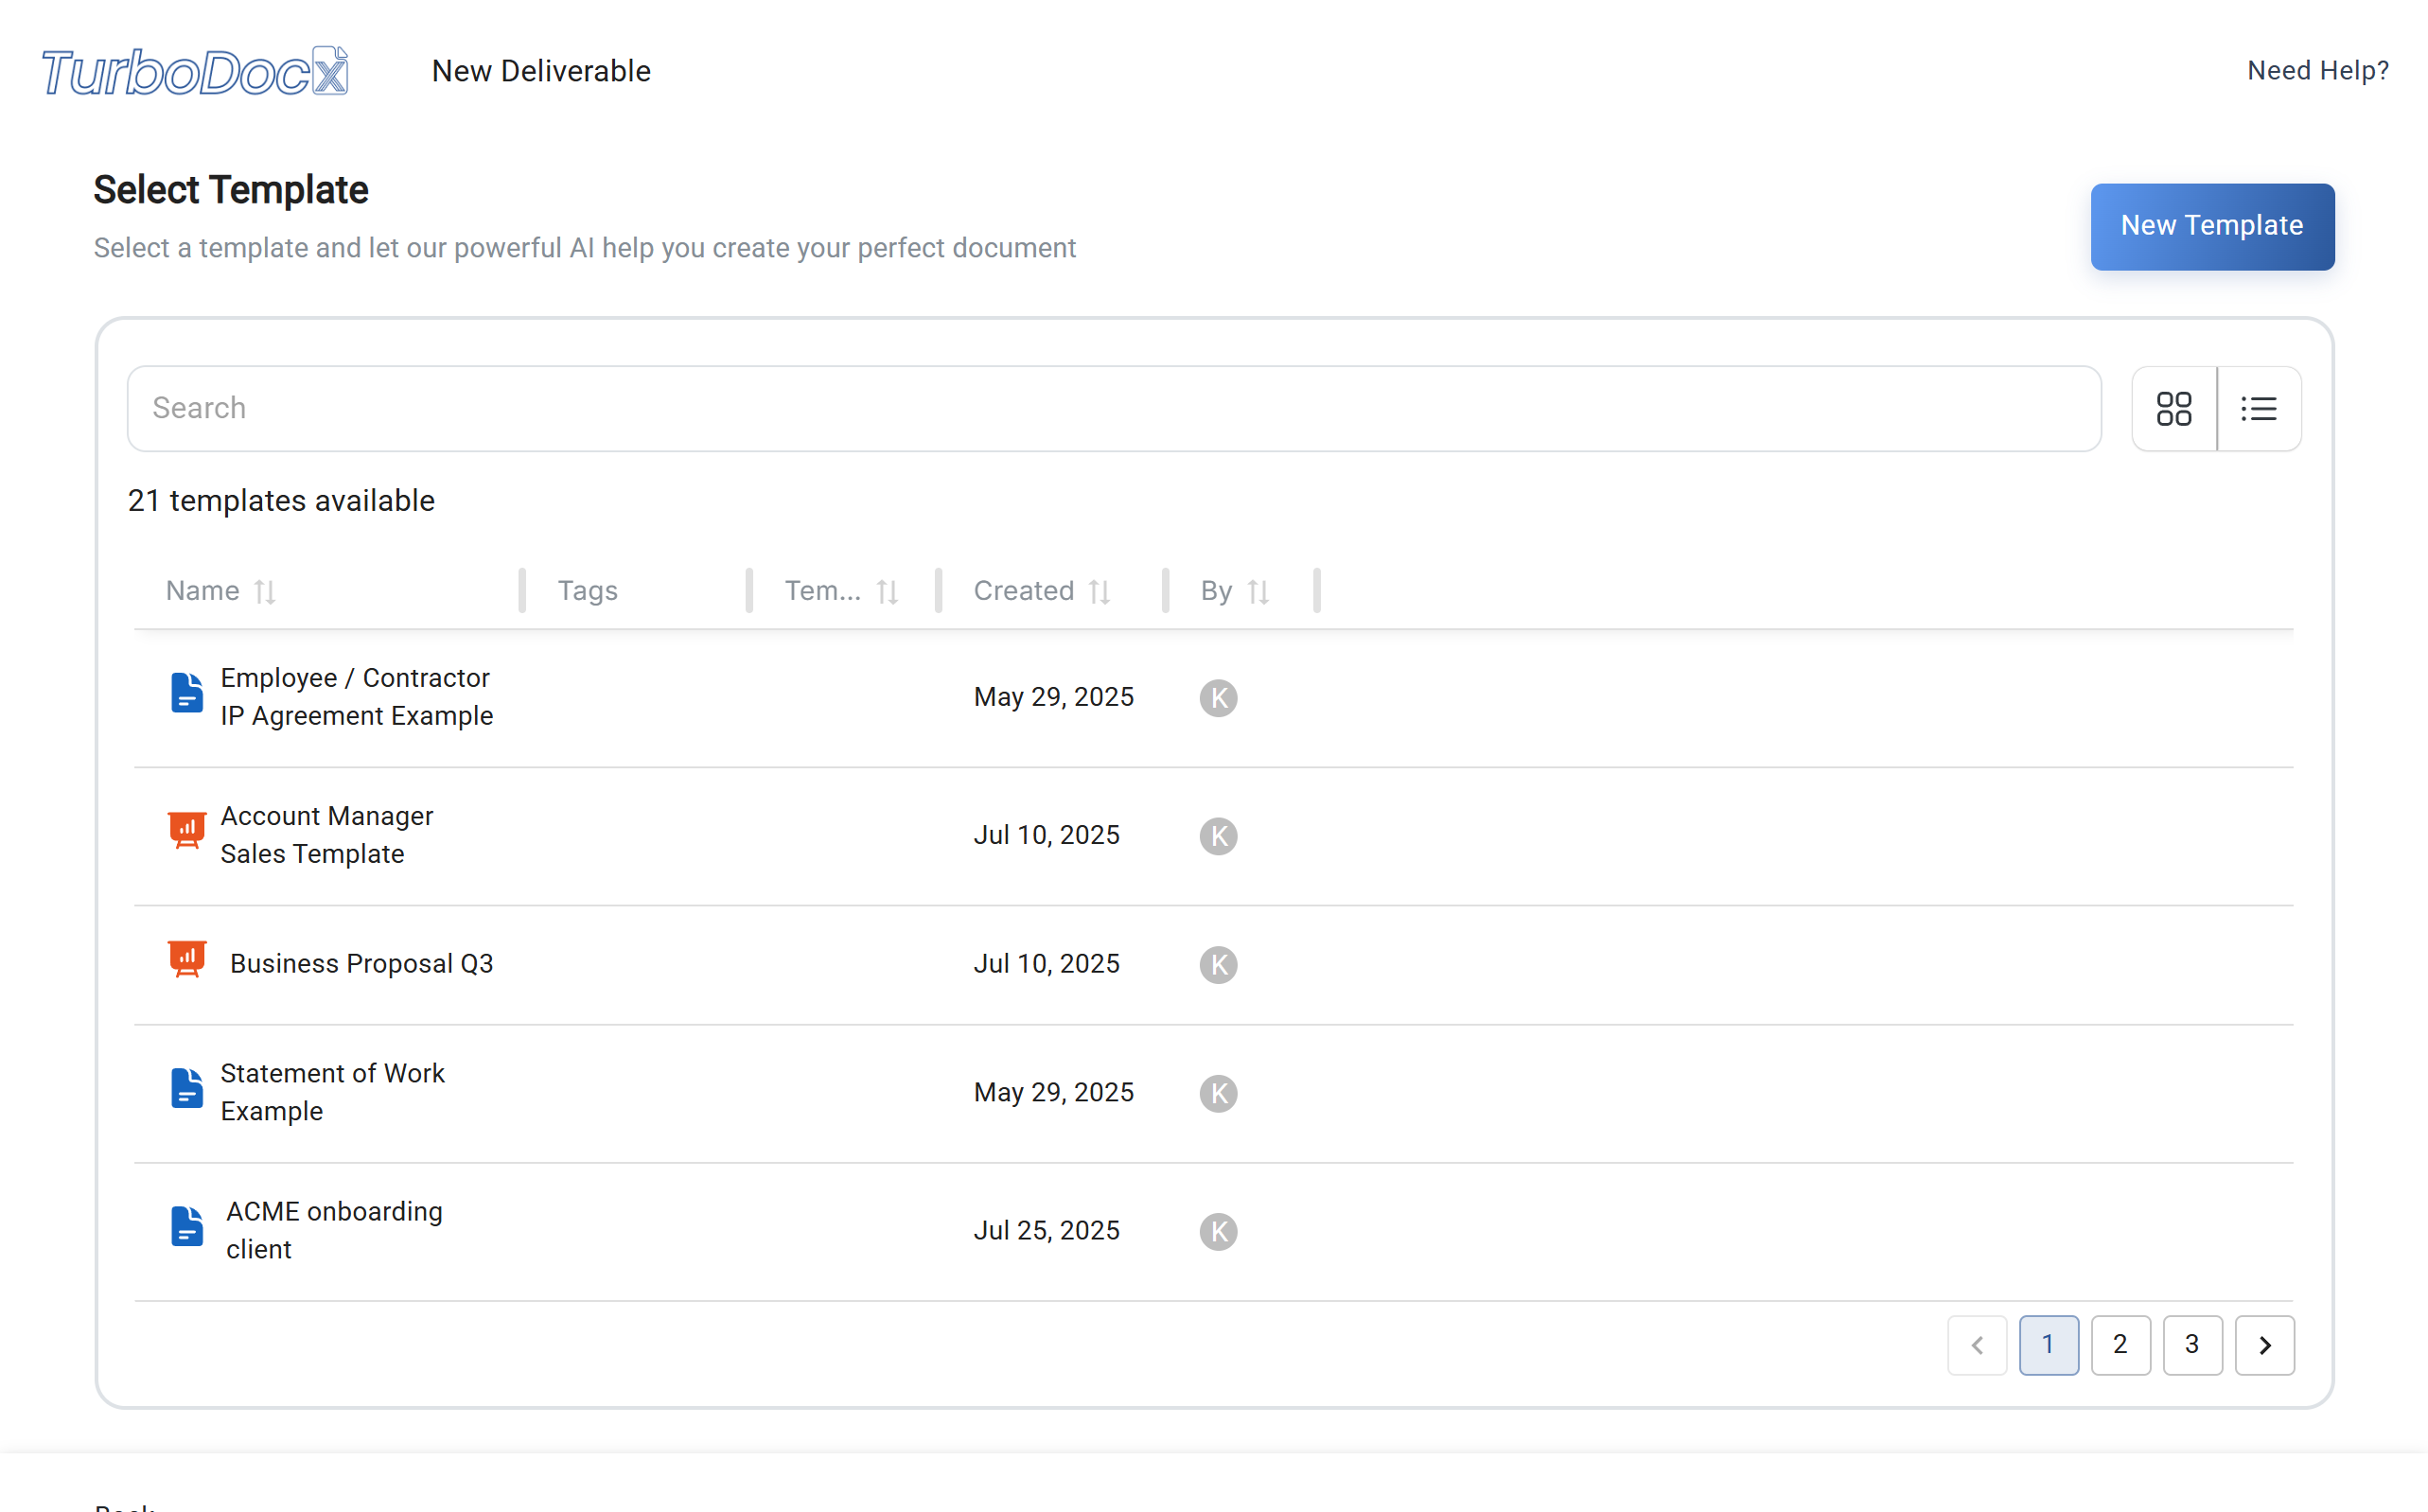
- Select Template
- Click on the template you want to work with
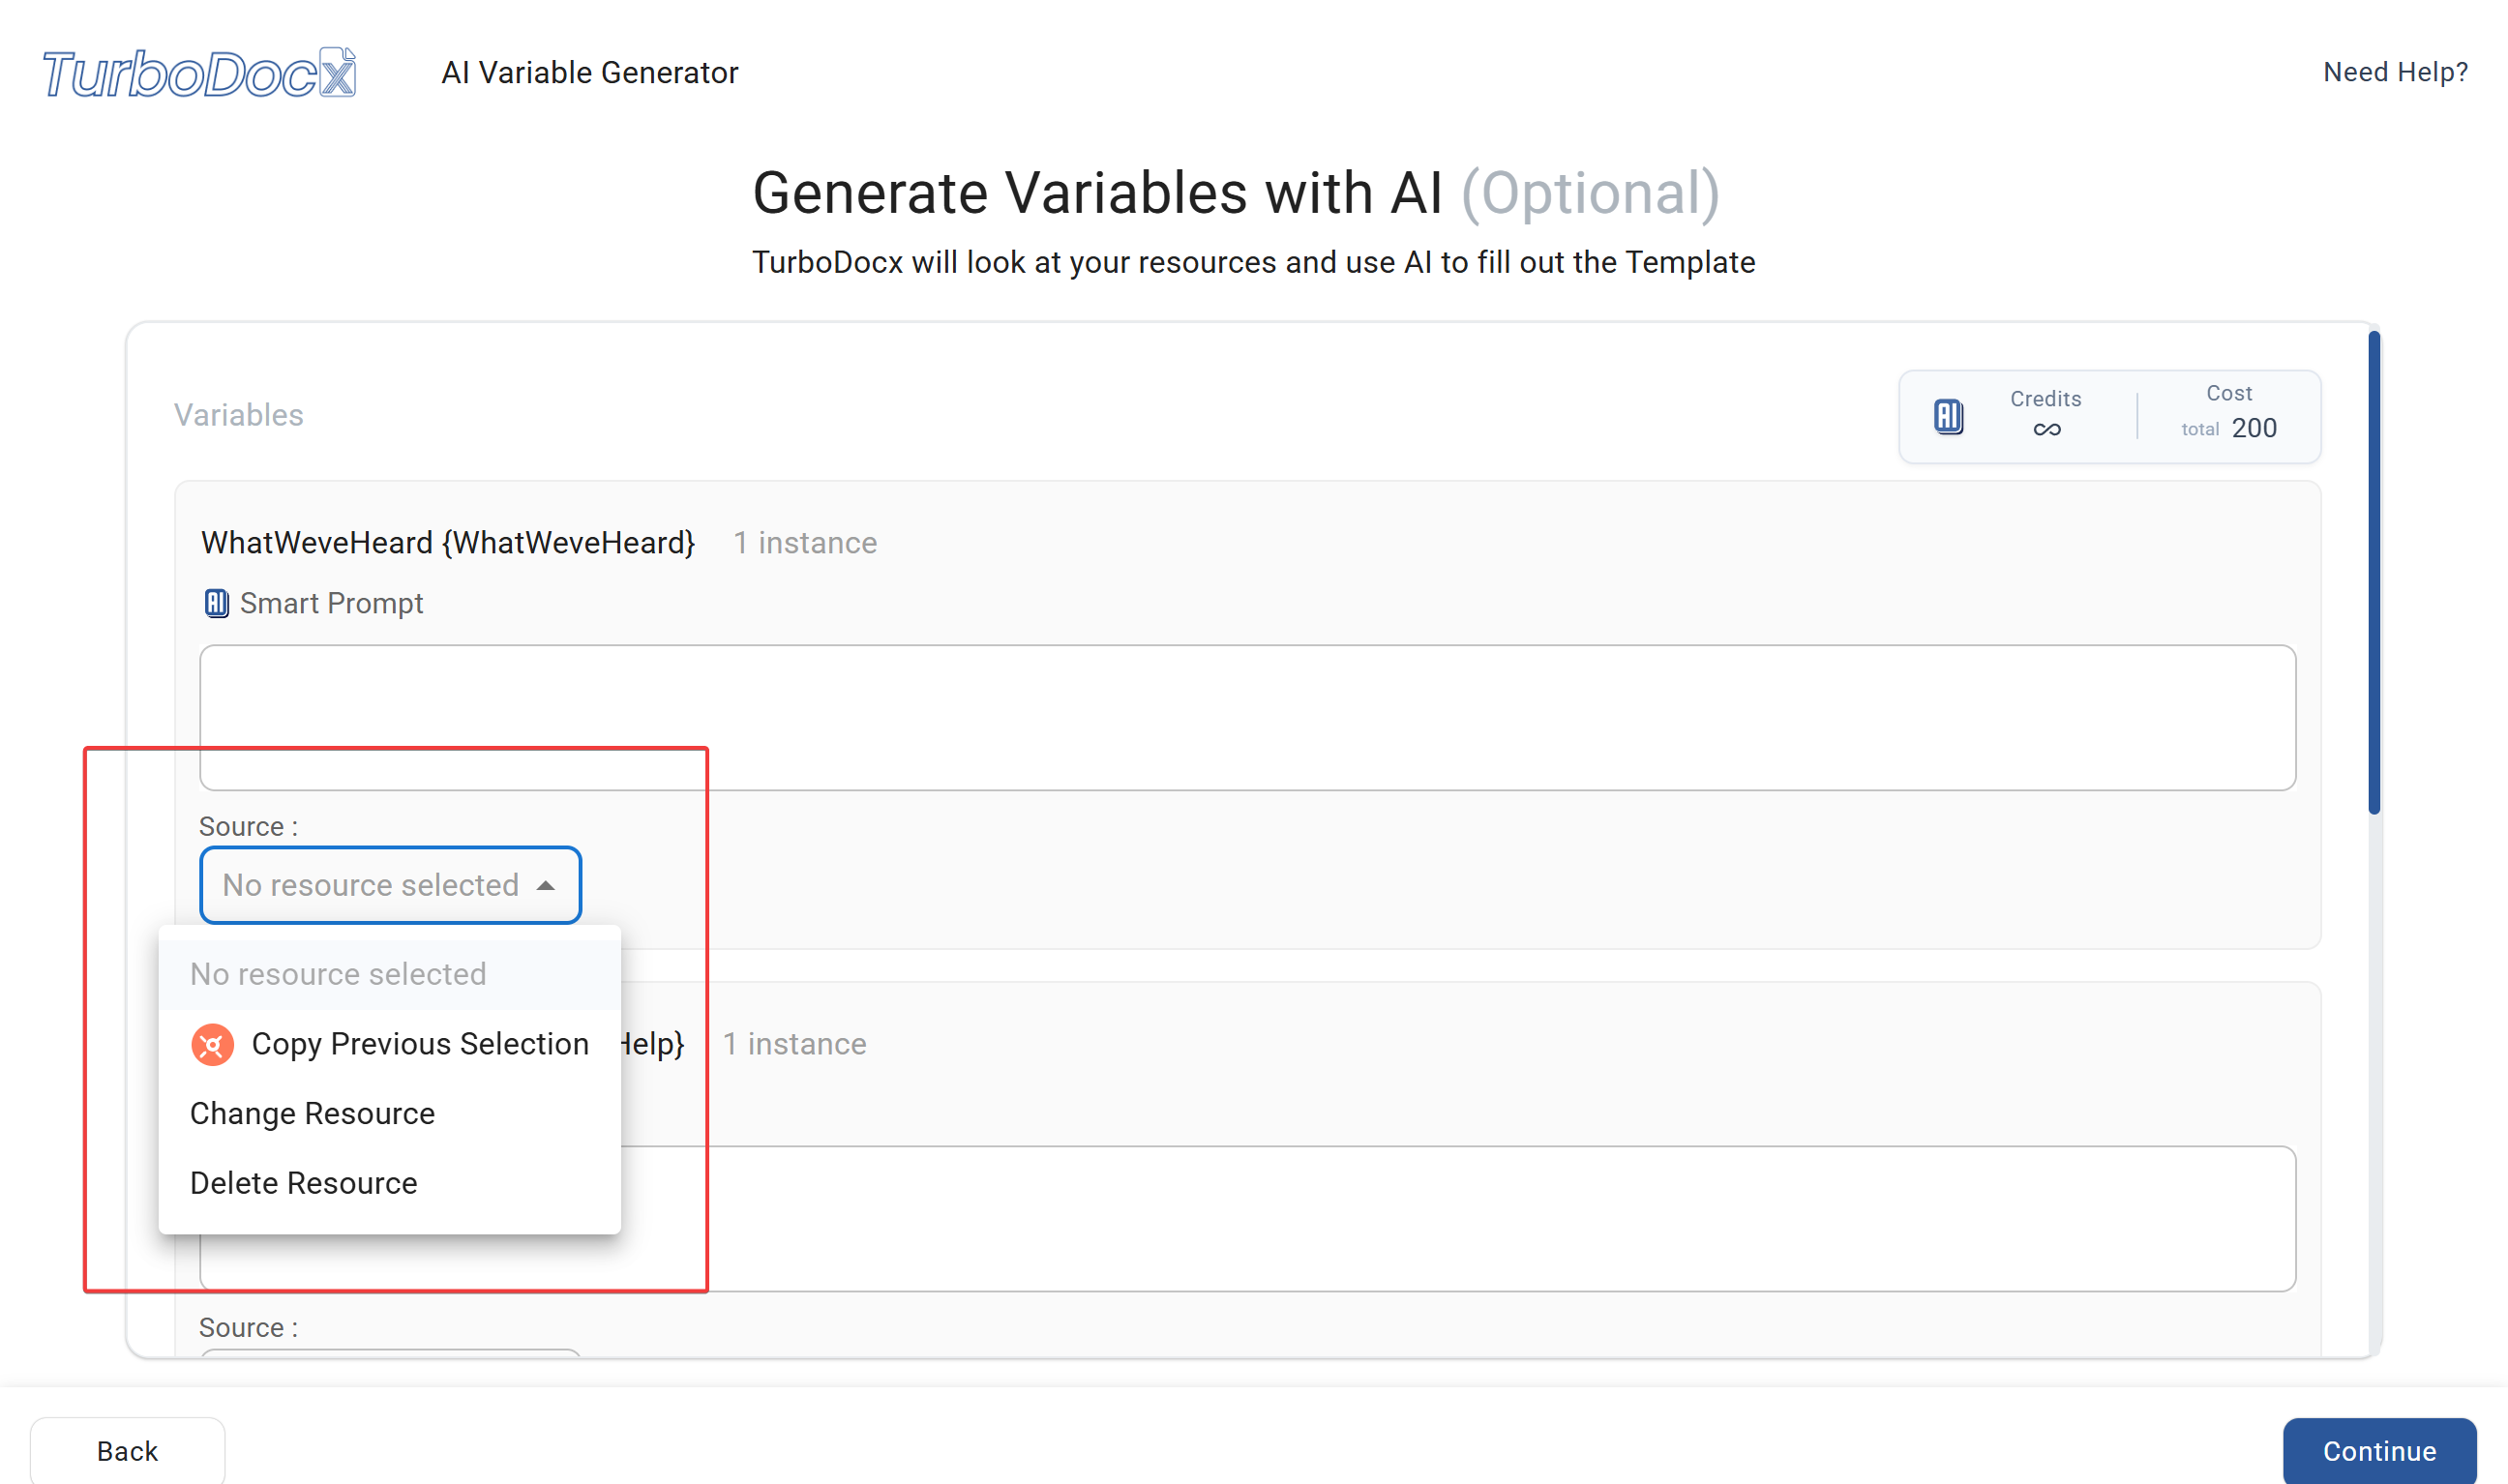
- Change your data source
- Click on the "Change Source" dropdown
- Select "Change Resource" from the menu
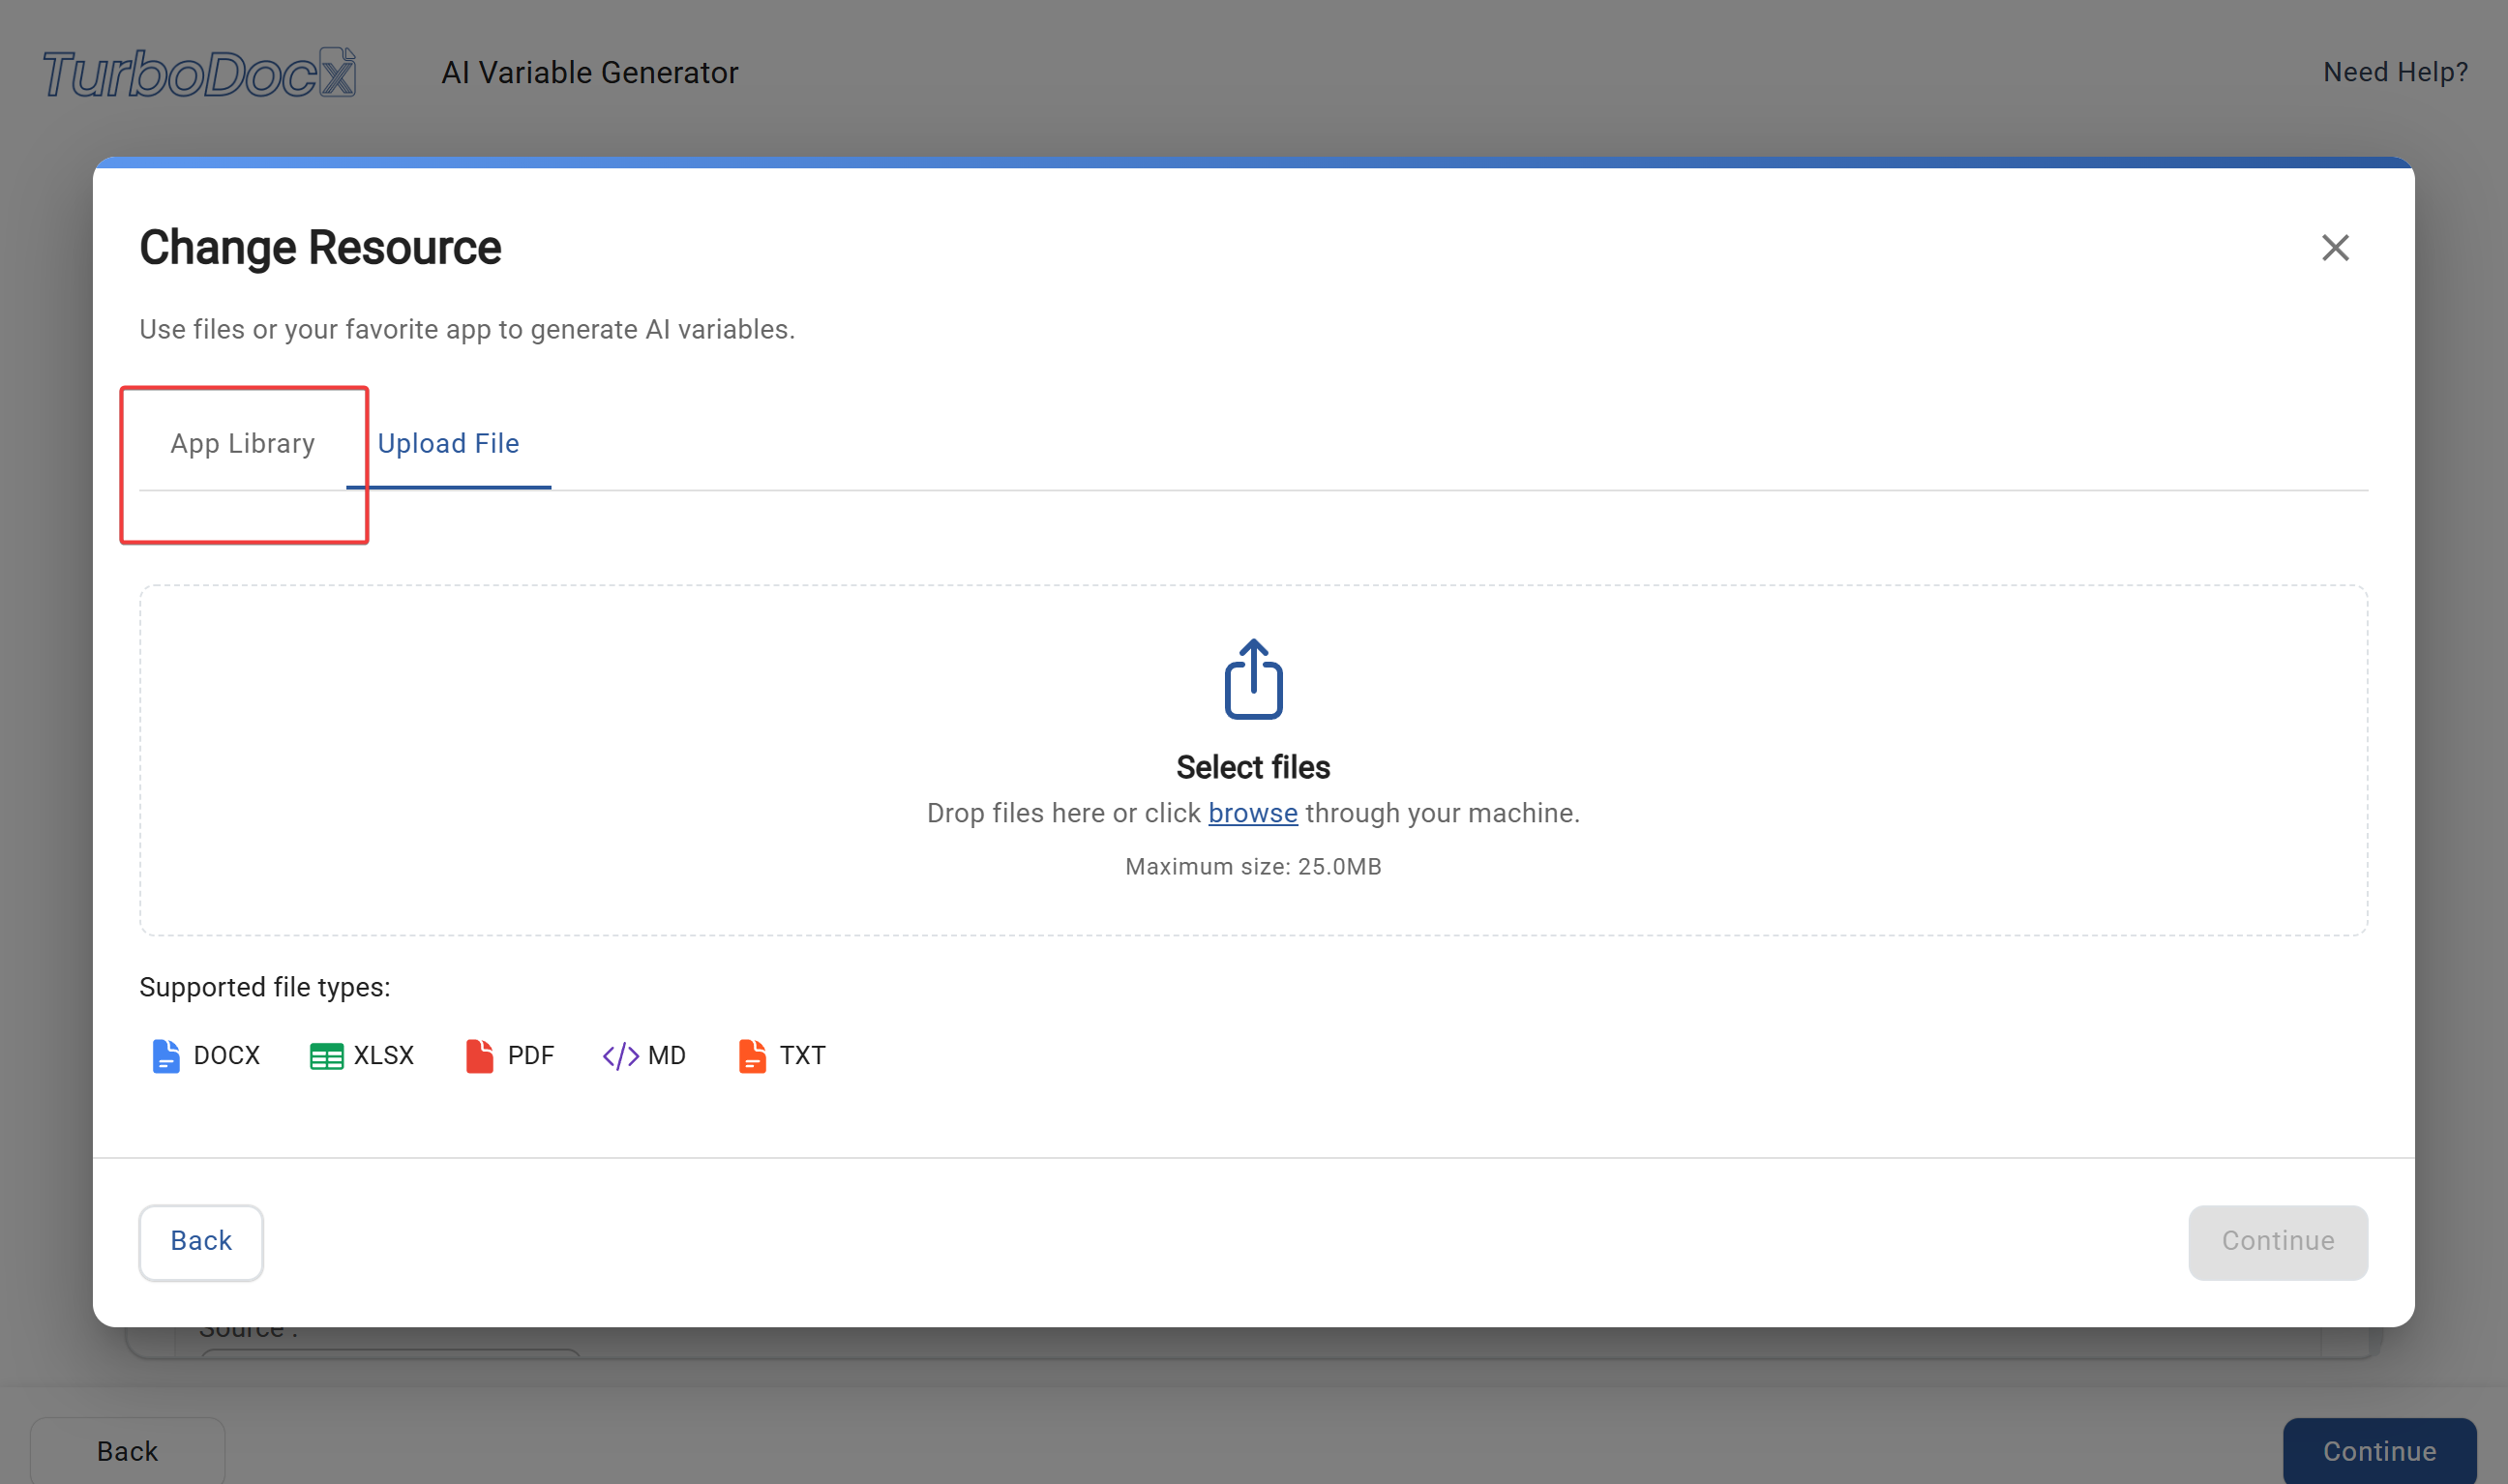
- Go to the App Library
- Click on the "App Library" tab
- This shows all your connected integrations
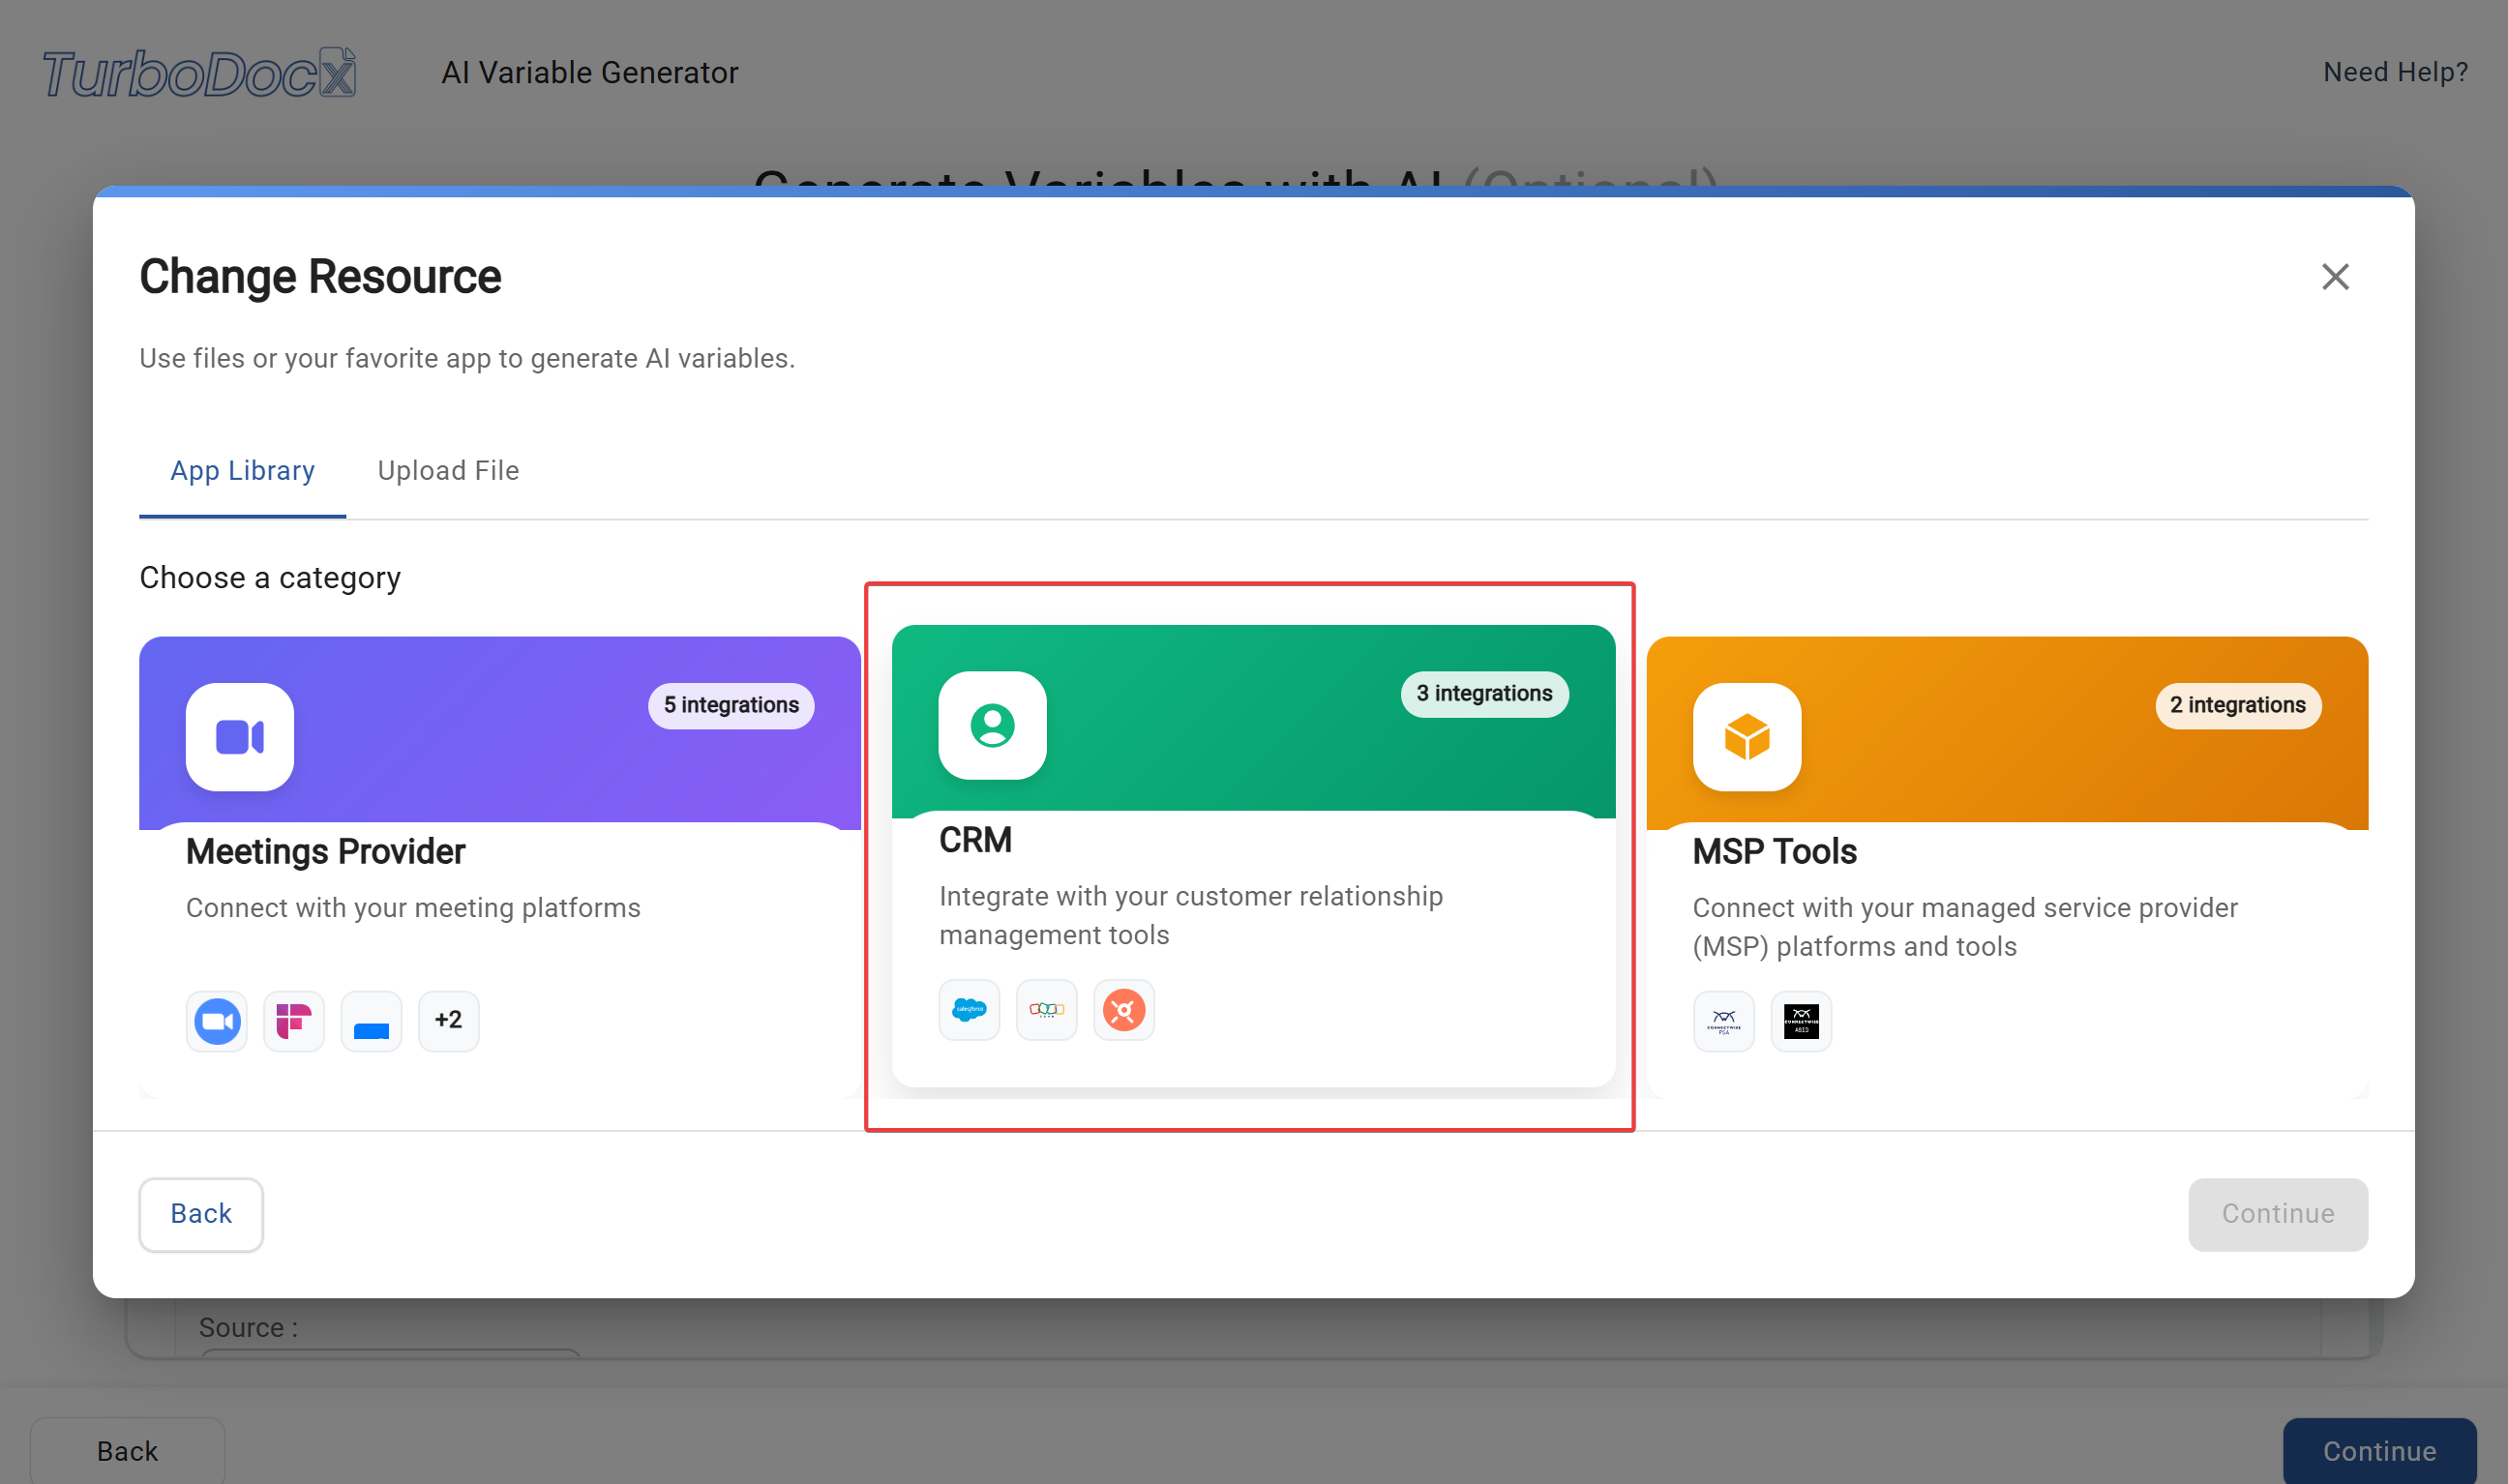
- Select CRM category
- Look for "CRM" and click on it
- This filters to show only CRM integrations
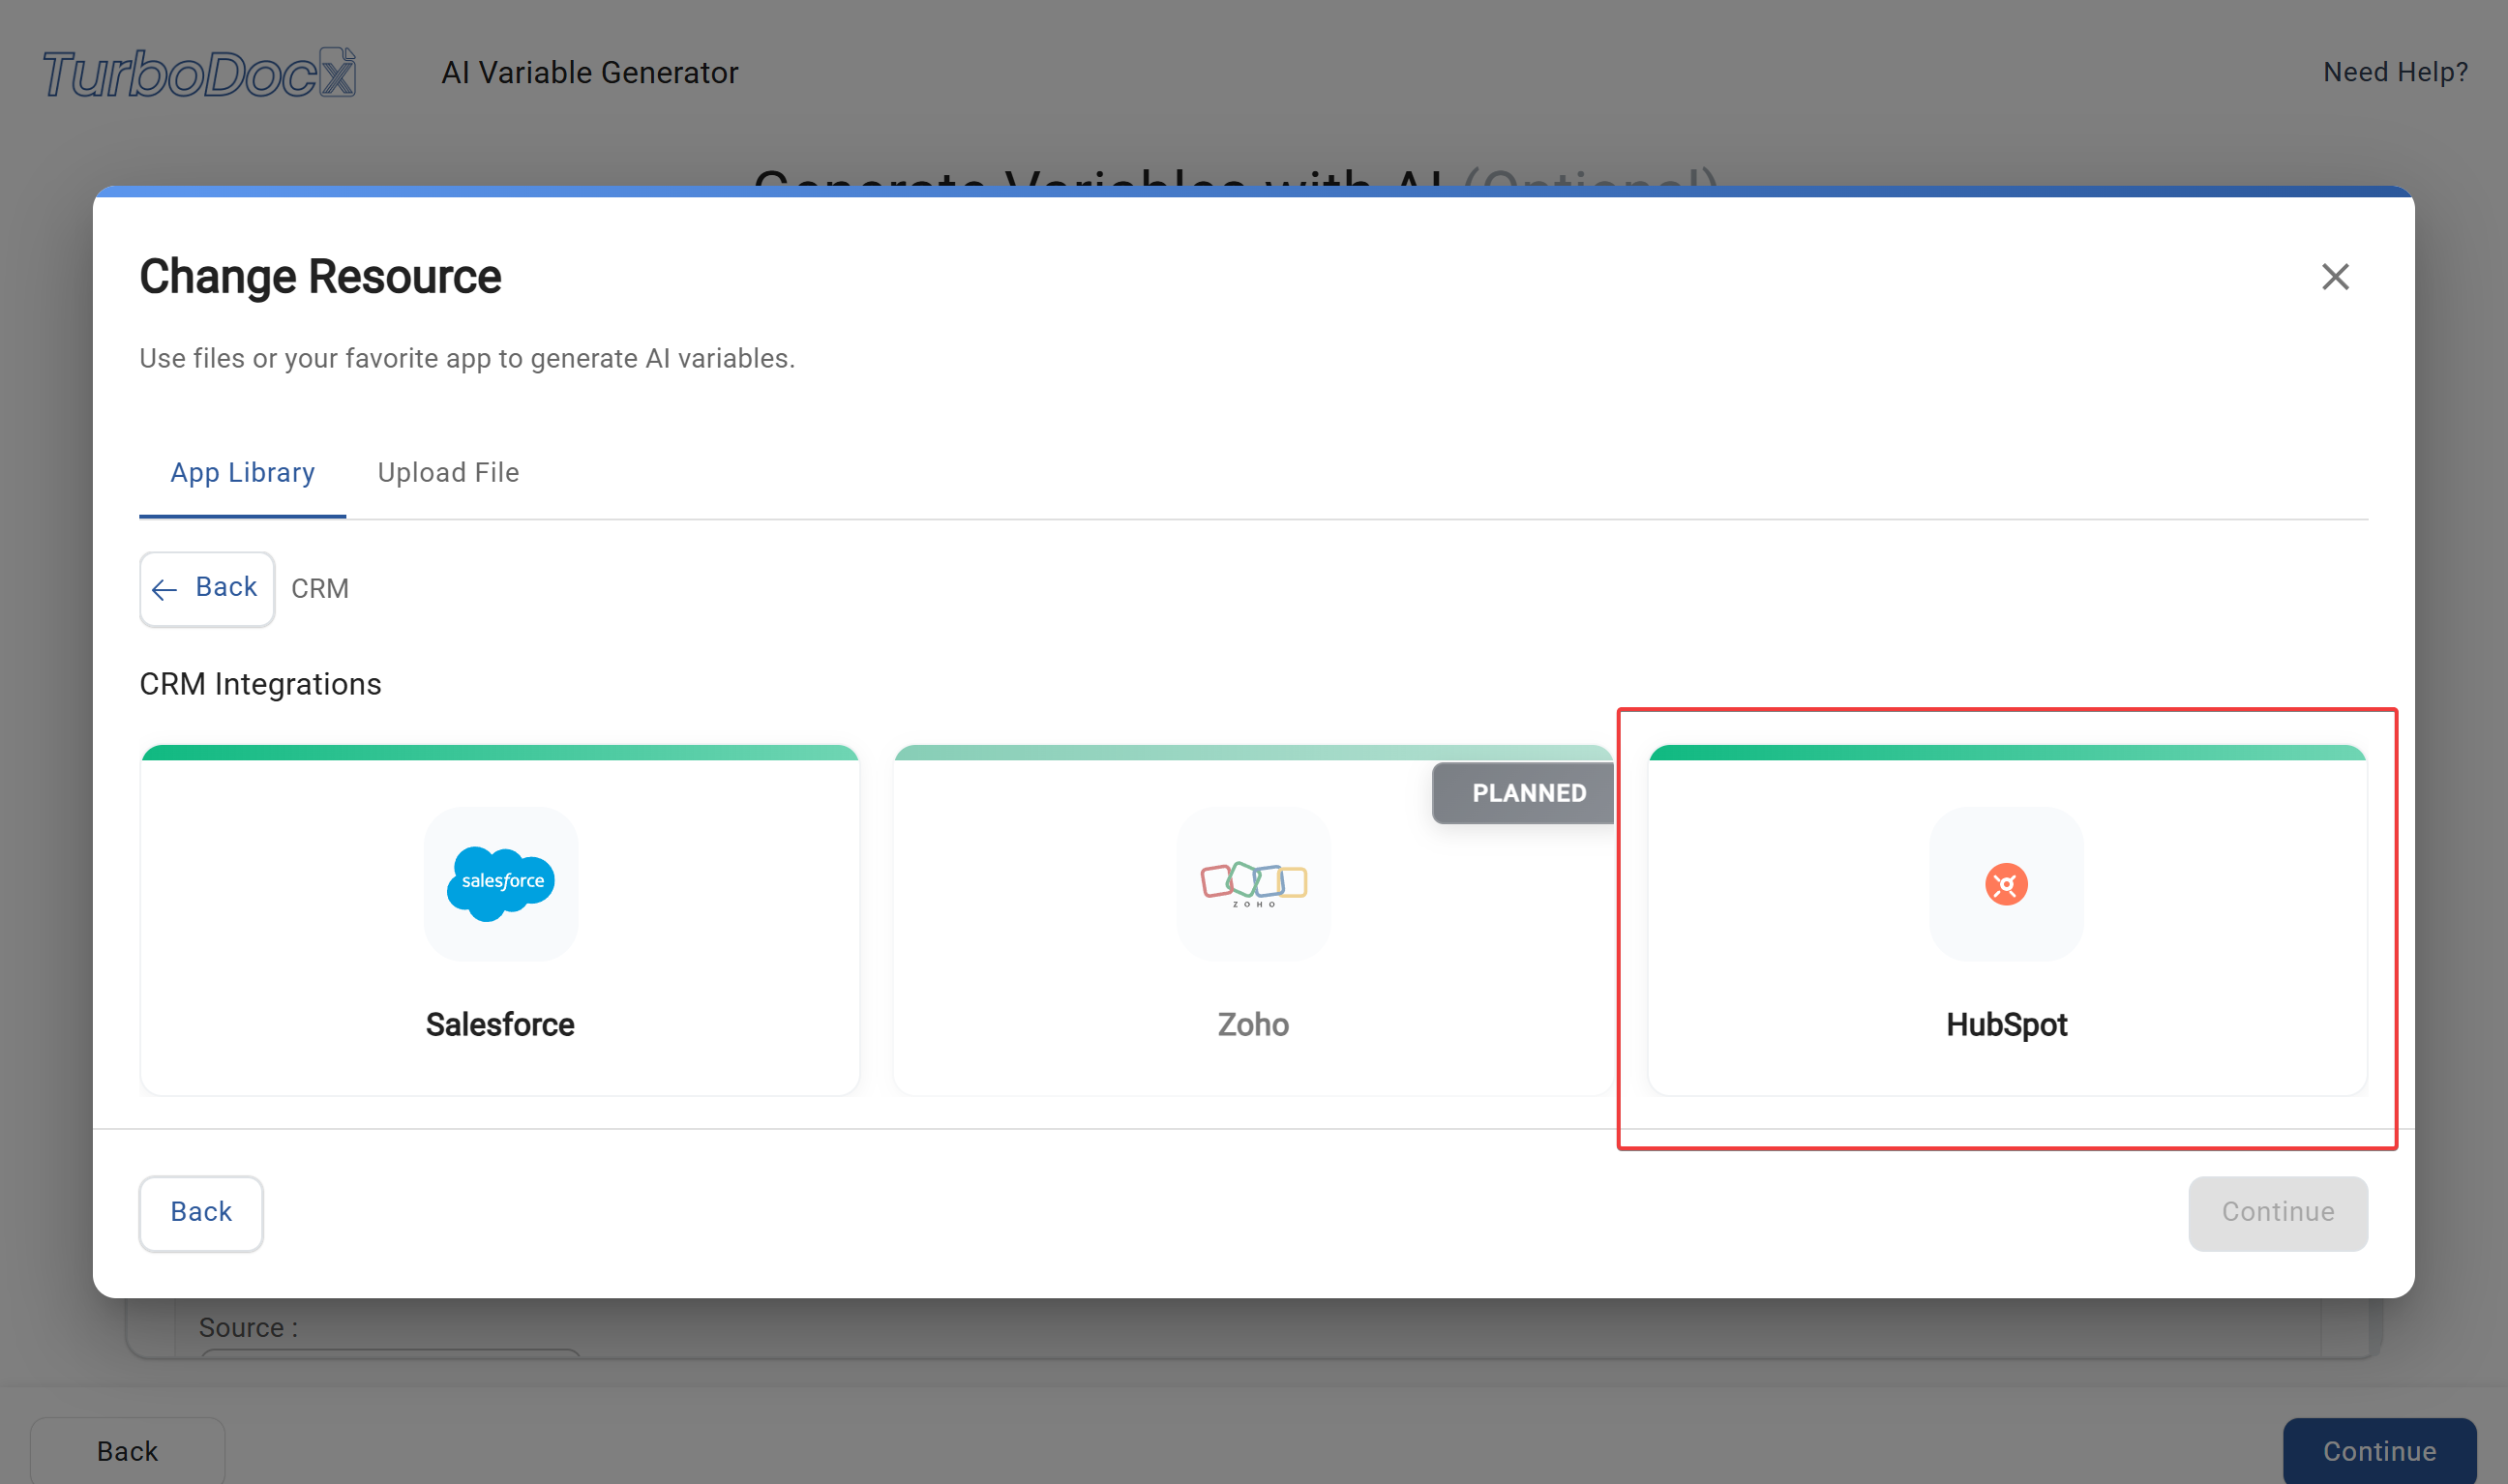
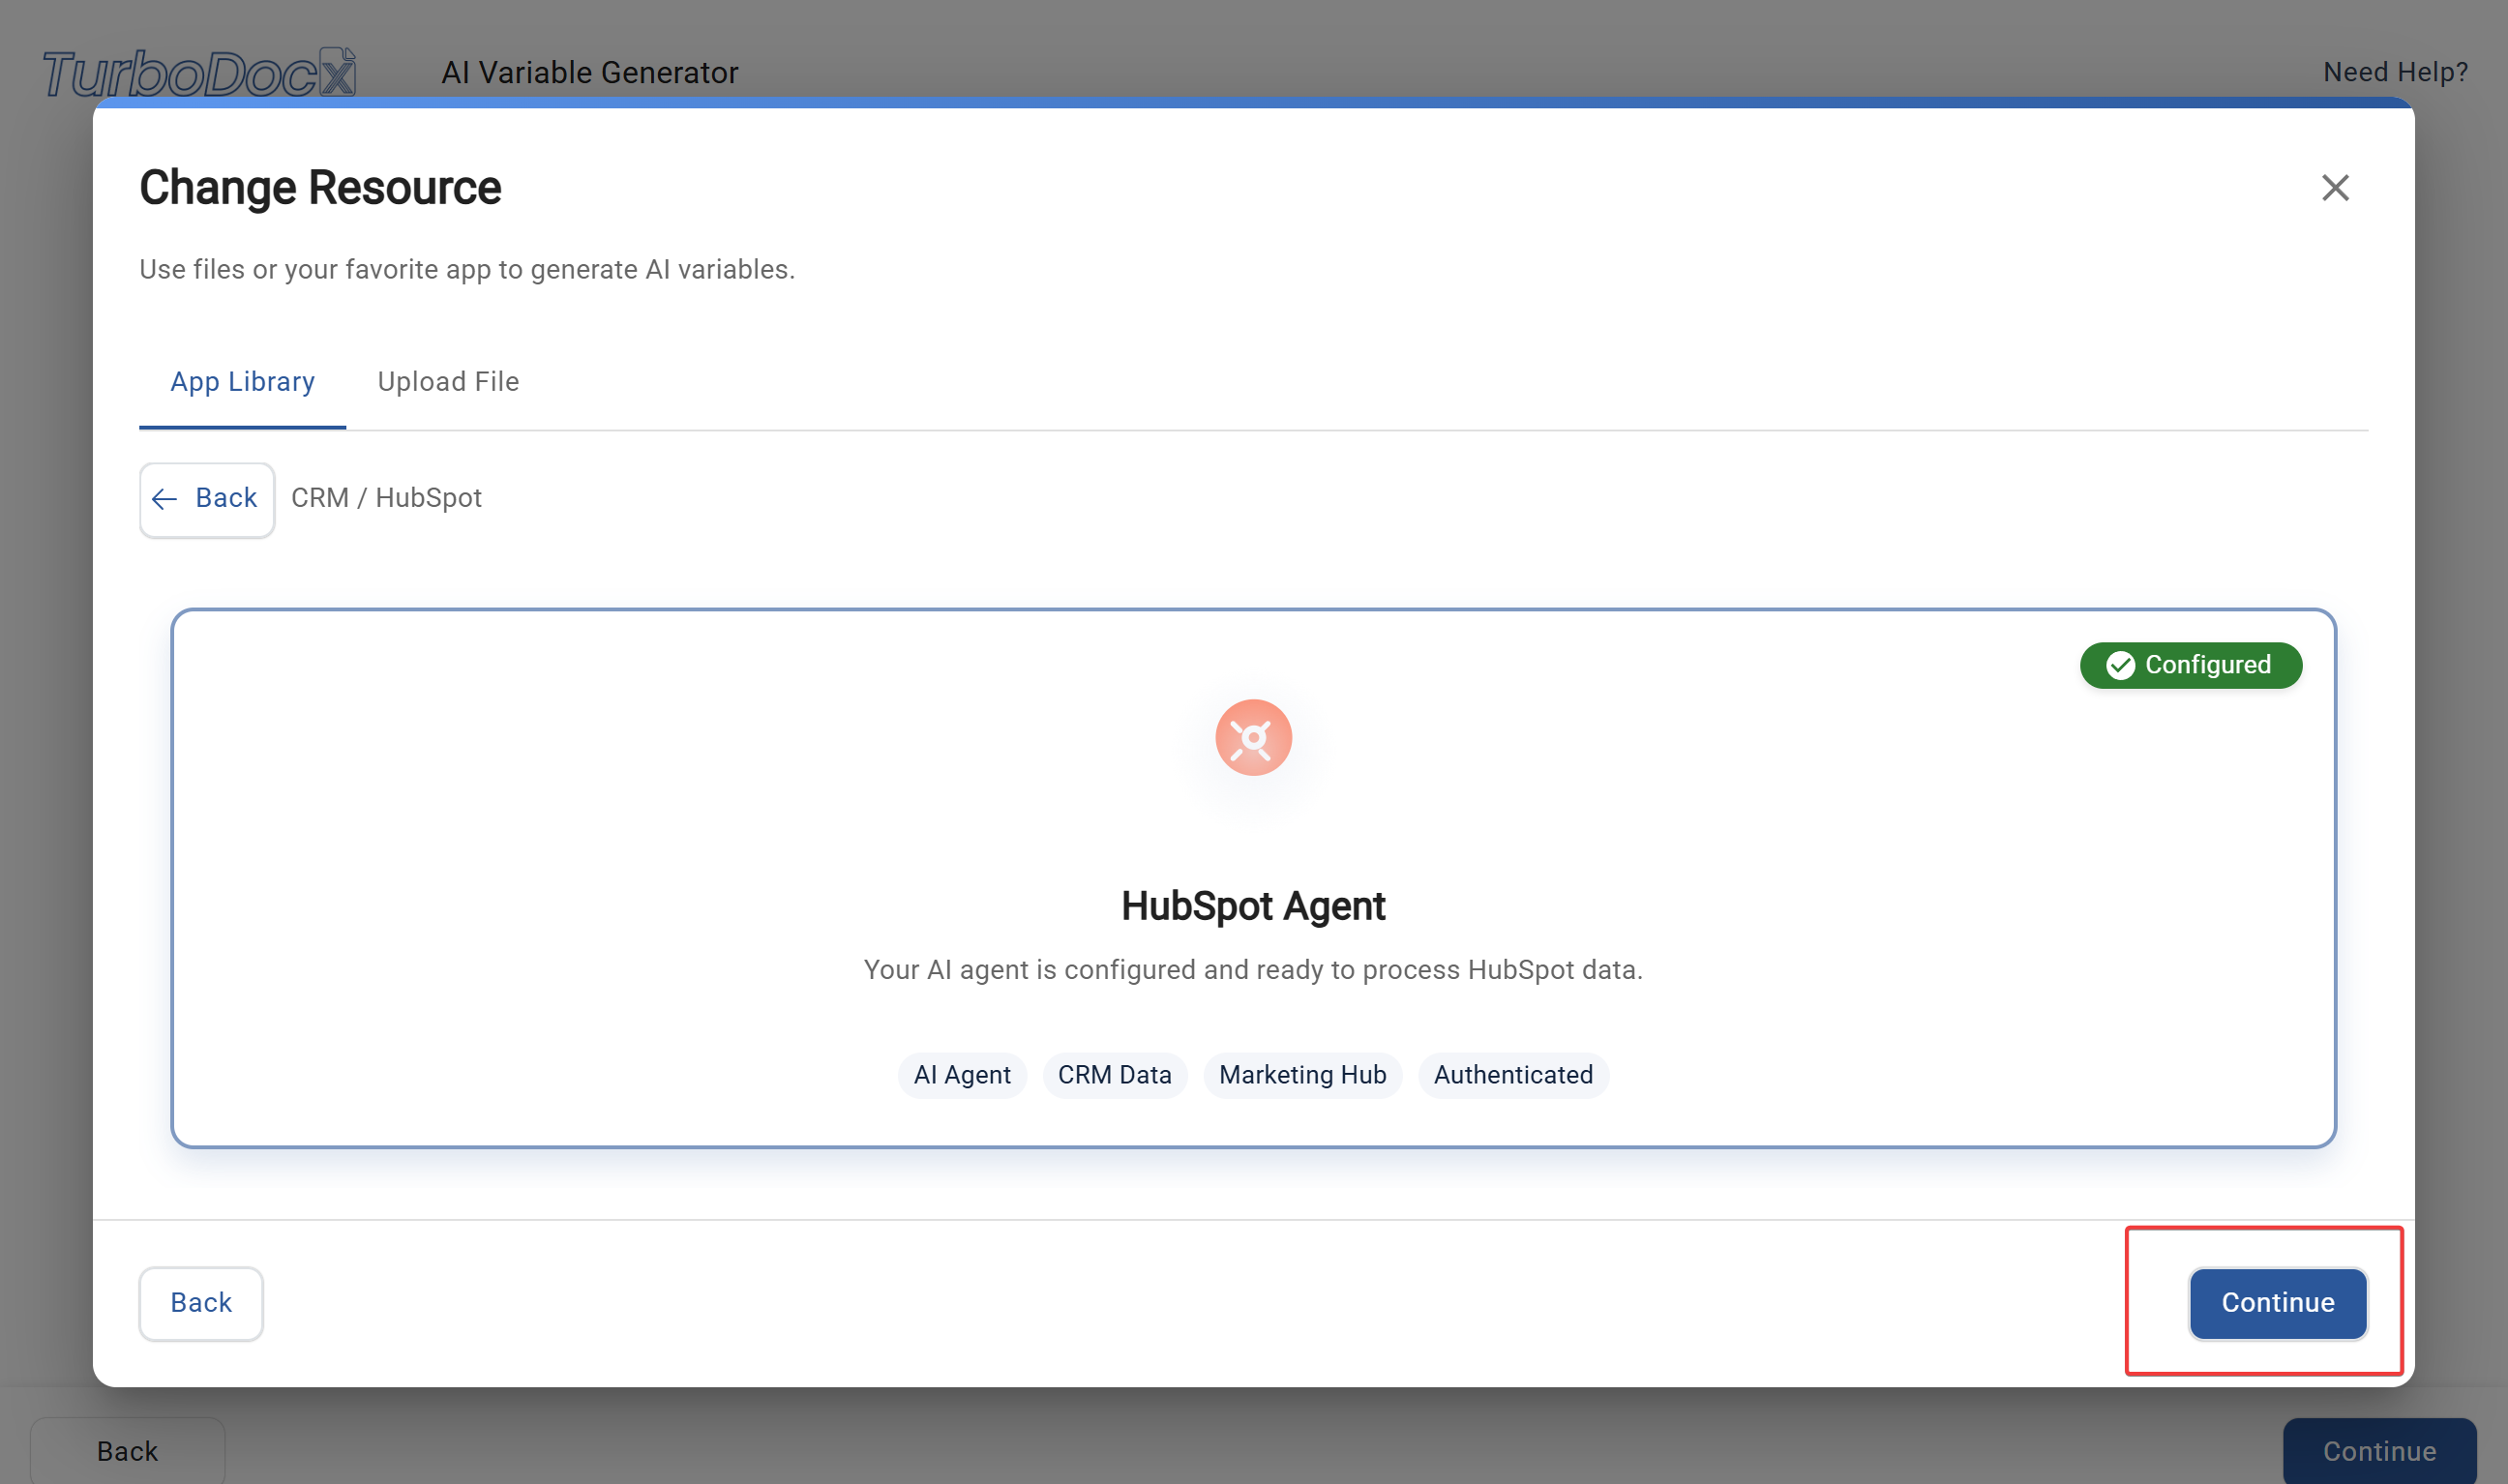
- Choose HubSpot
- Click on "HubSpot" (you should see the orange logo)
- It should show as "Connected"
- Click "Continue"
- This takes you to the HubSpot agent interface
Using the HubSpot Agent
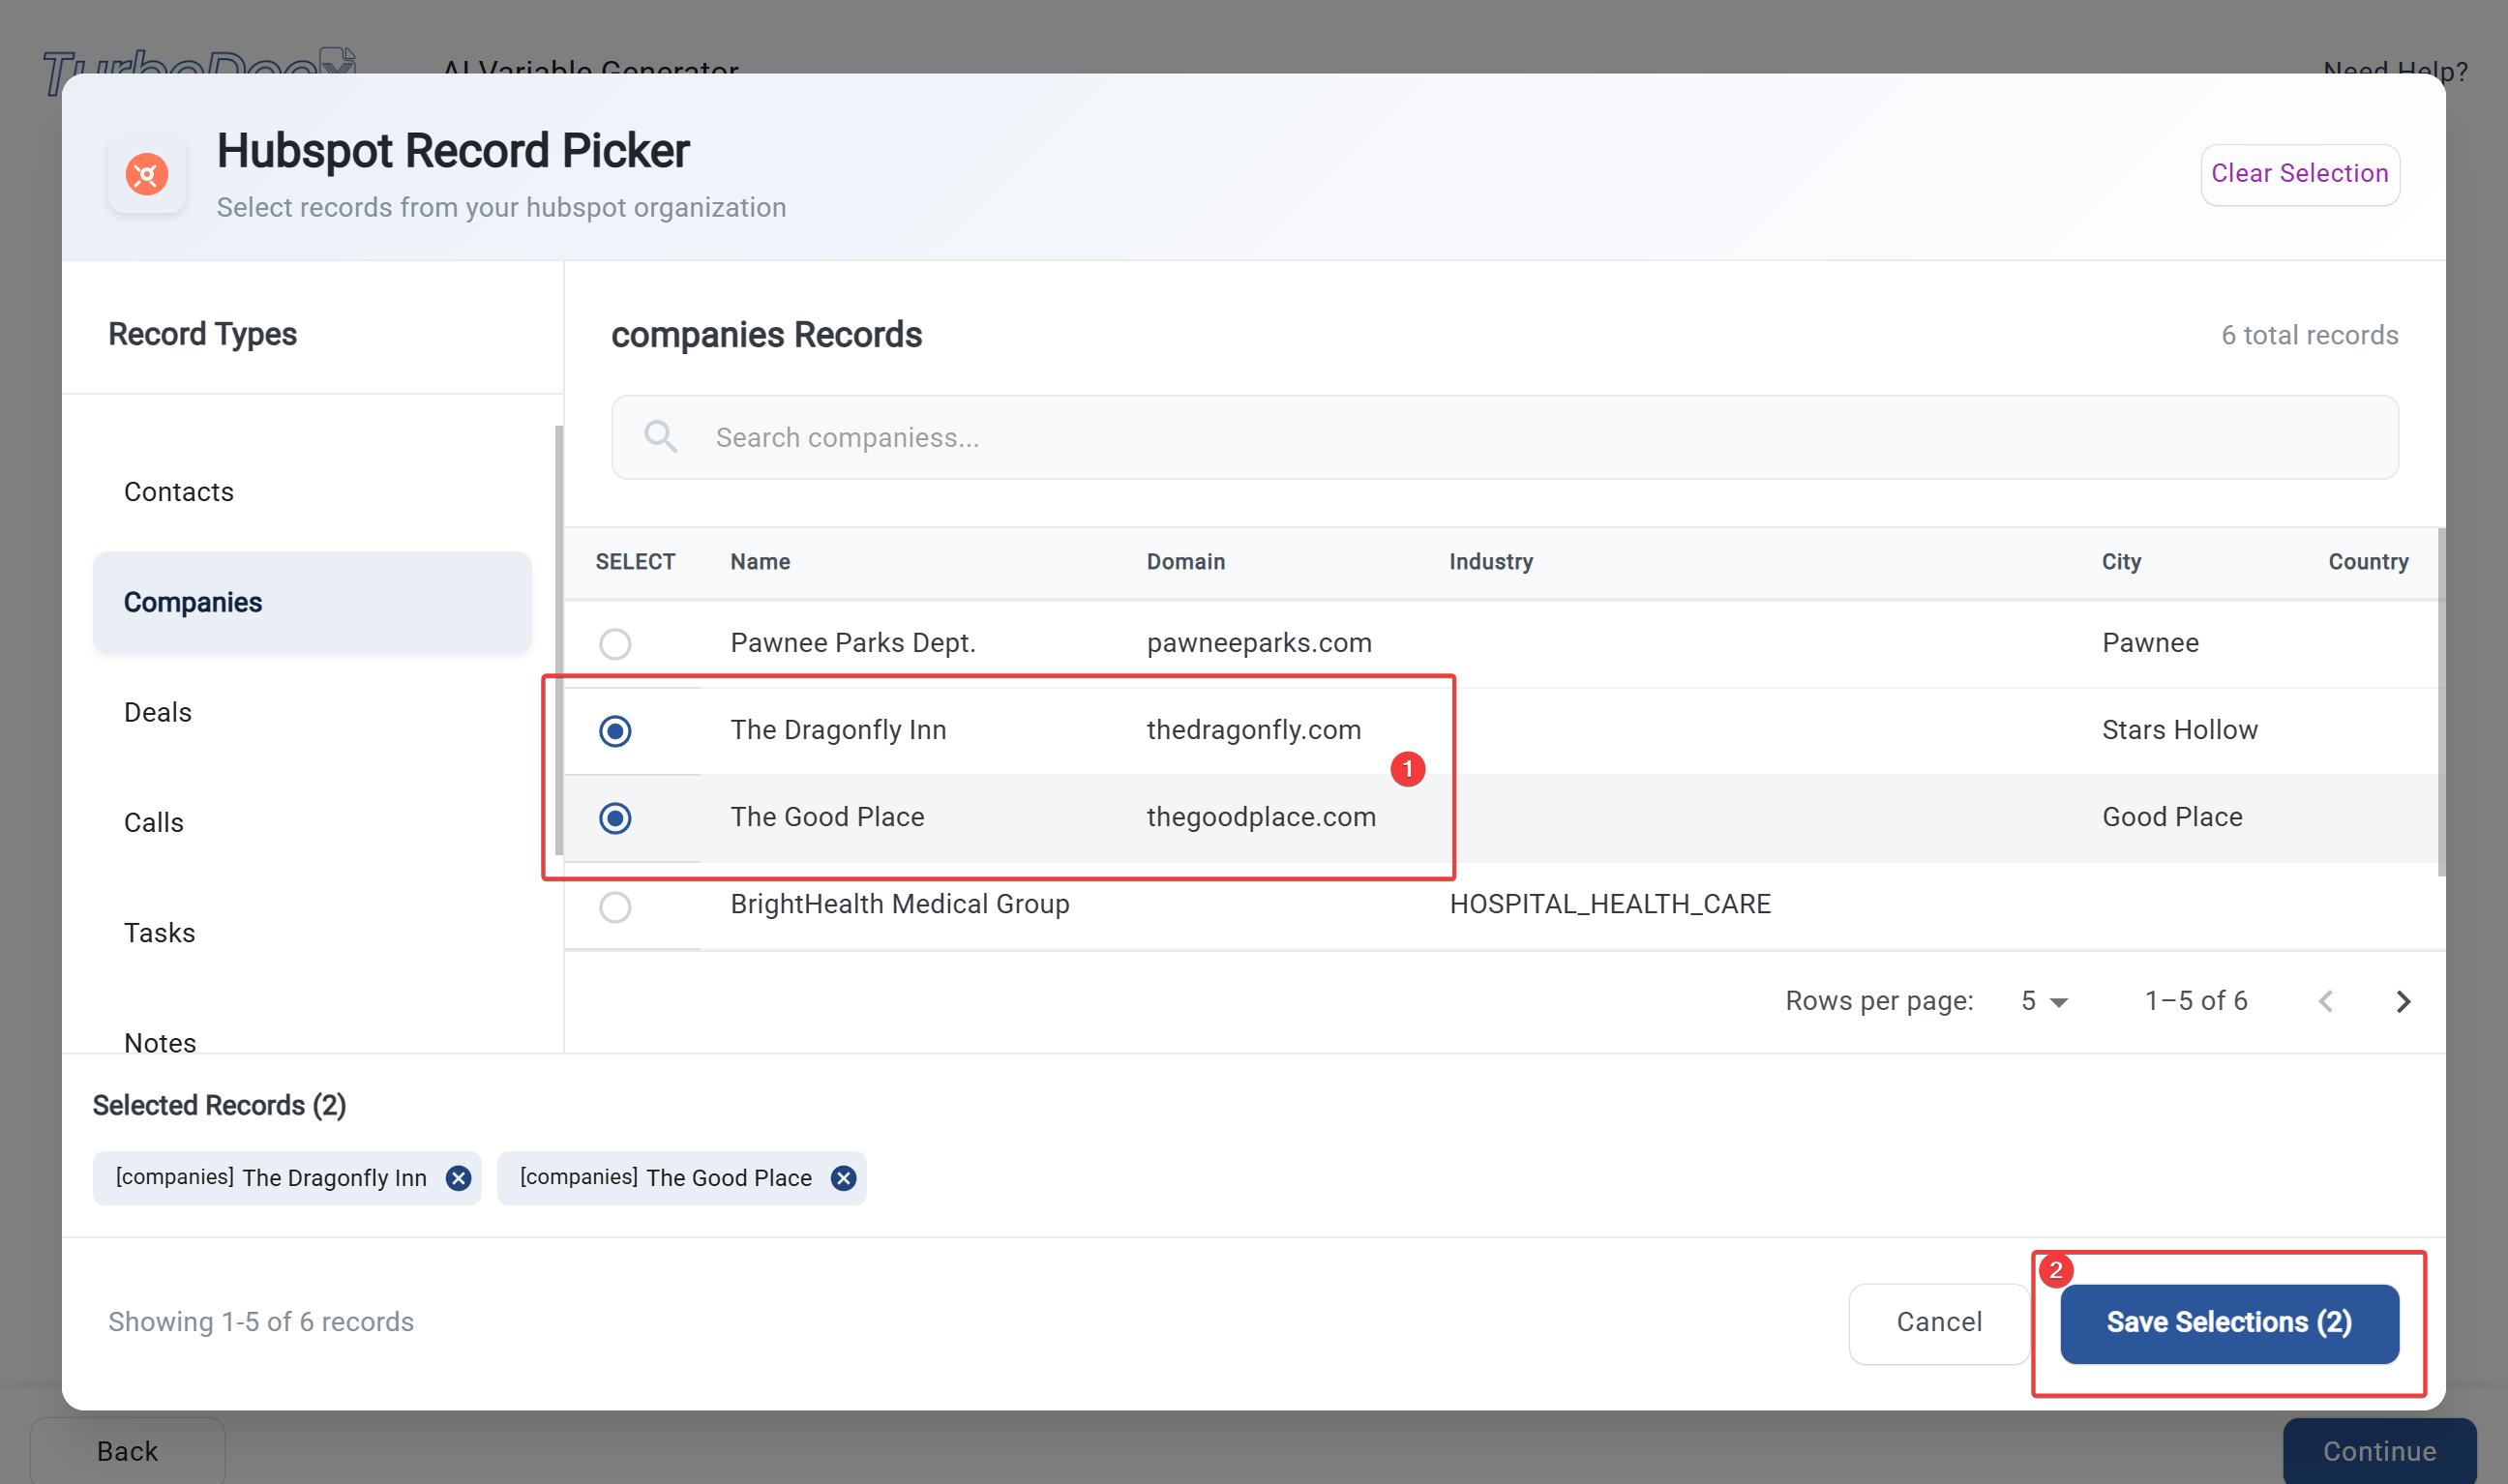
- Select your records (optional but helpful)
- Click "Select Records" to choose specific contacts, deals, or companies
- This helps the AI focus on the right data
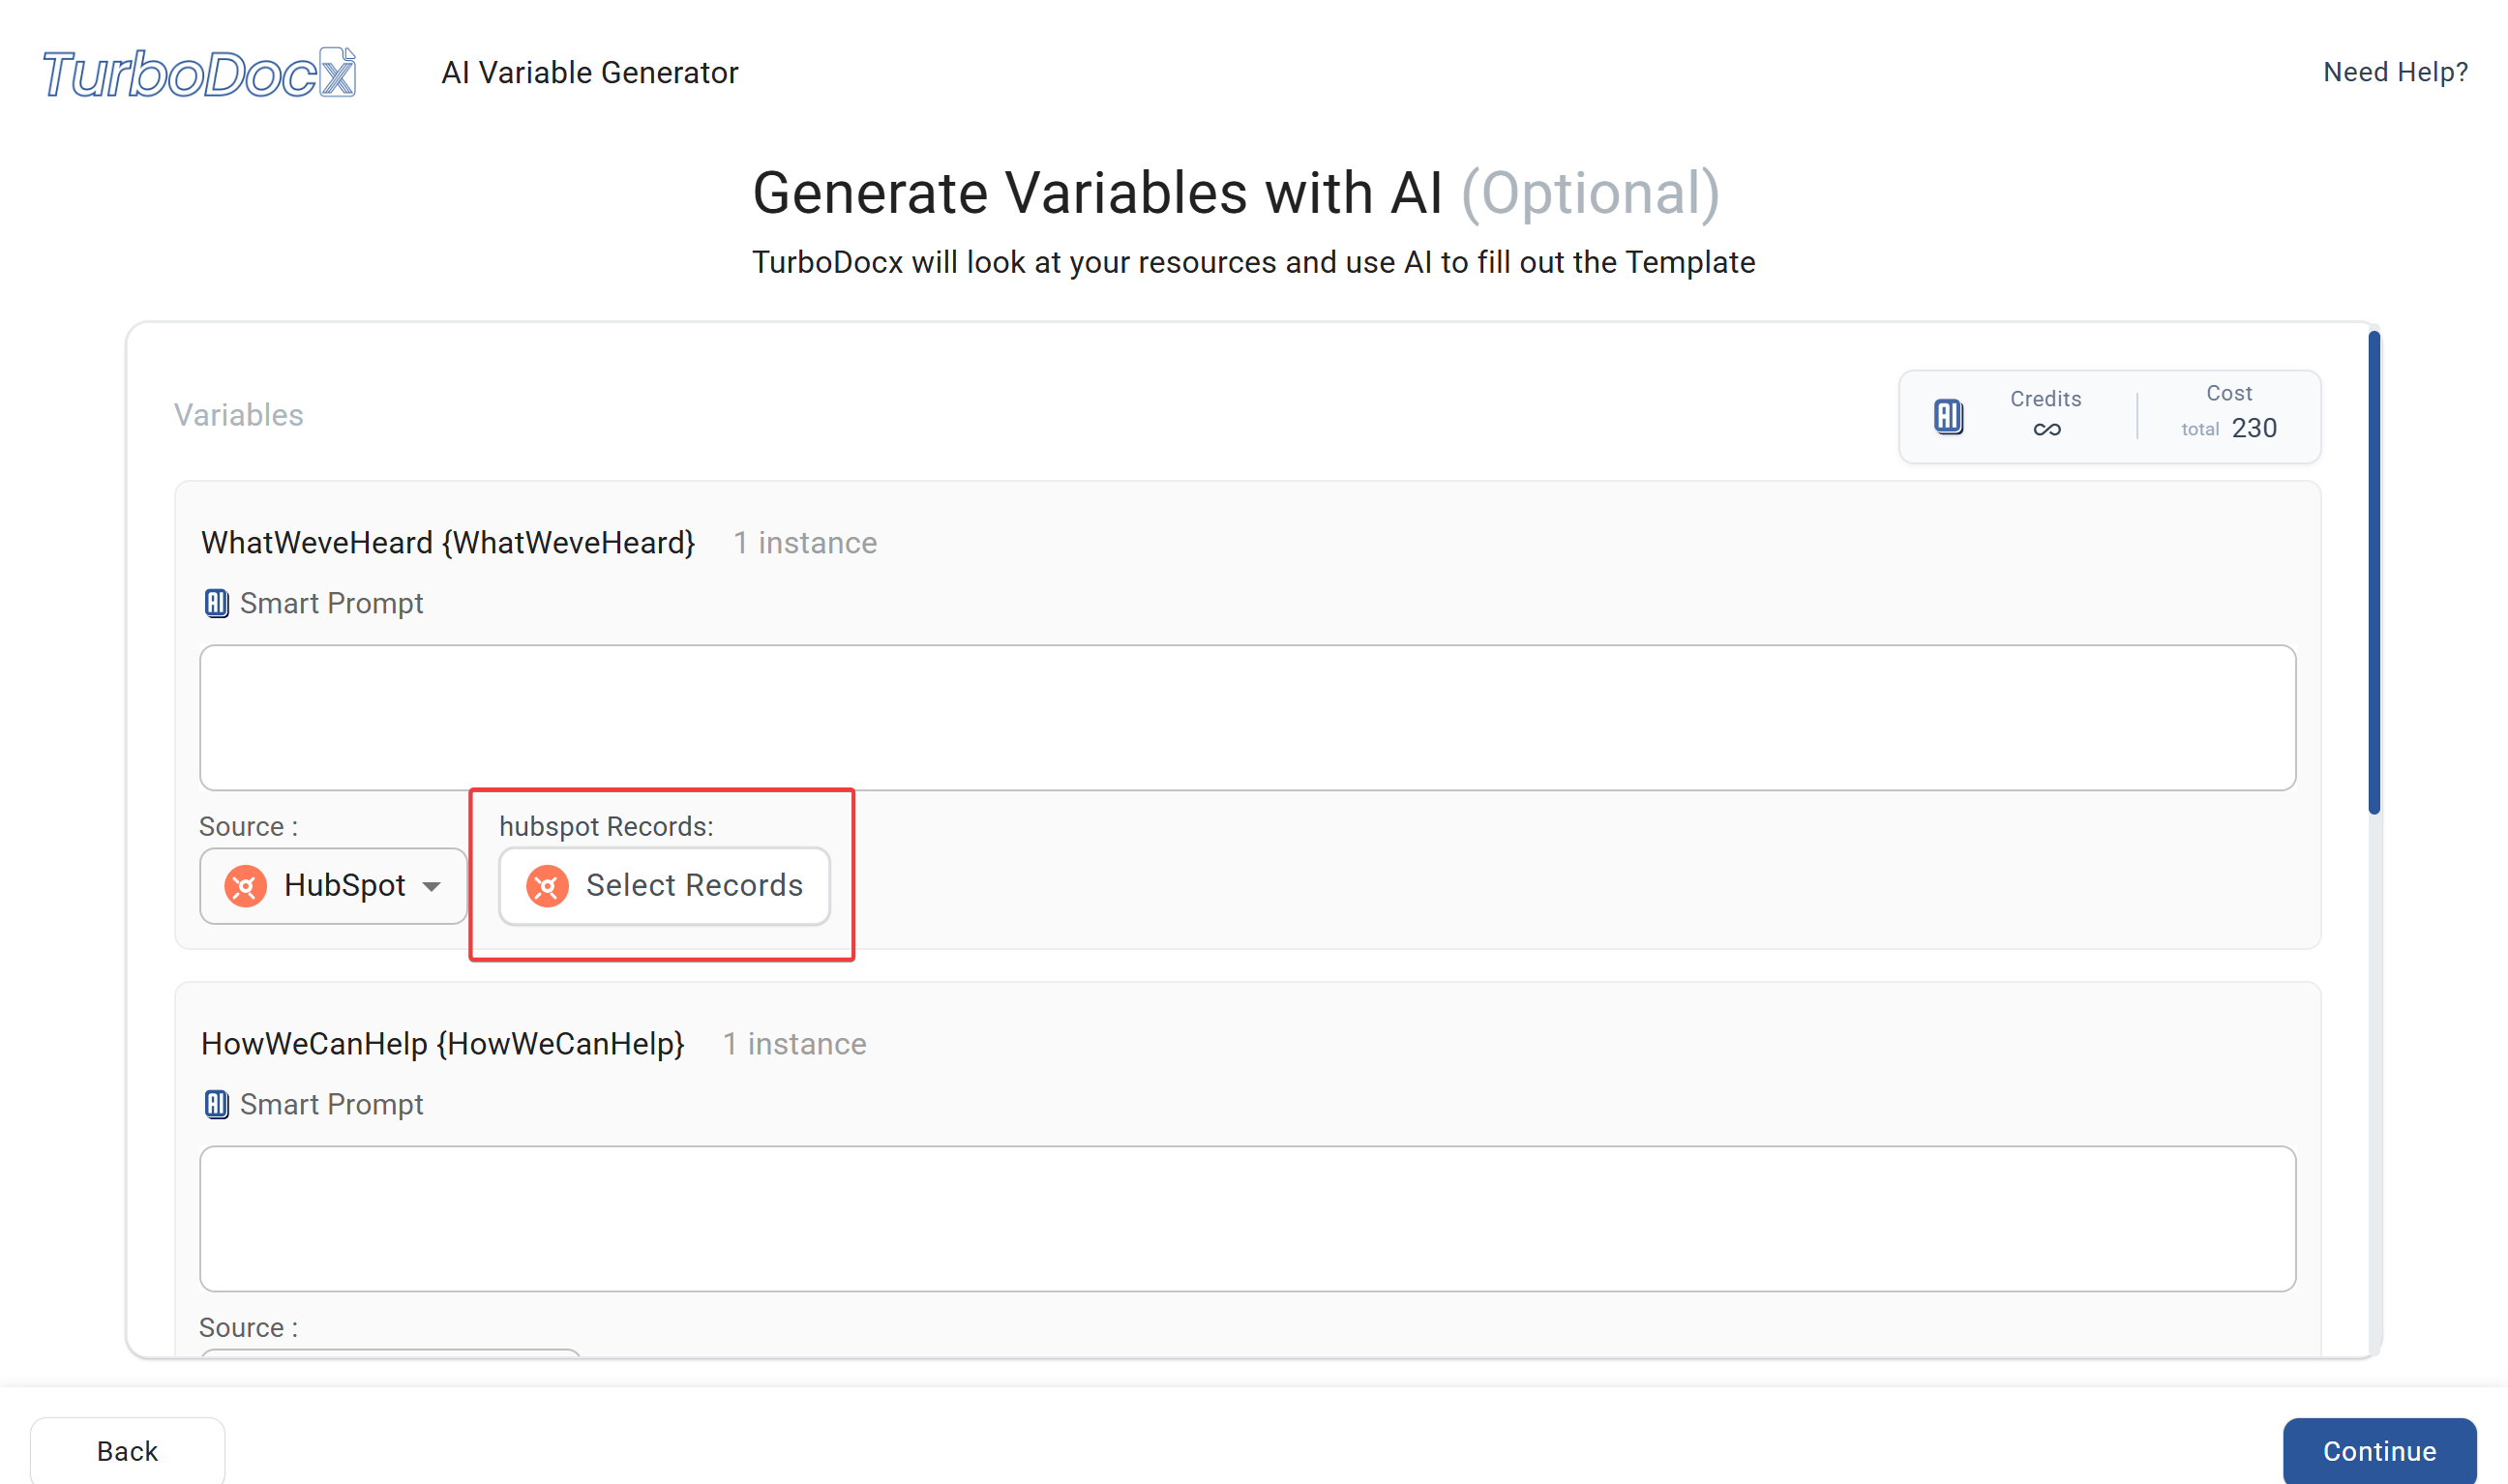
- Choose relevant records
- Click on contacts, deals, or companies relevant to your document
- Selected items will be highlighted
- Click "Save" to confirm your record selection
- Give instructions to the AI
- Type what kind of document you want in plain English
- Be specific about what you want to create
- Sit back and watch the magic happen!
- Generation typically takes 30 seconds to 2 minutes
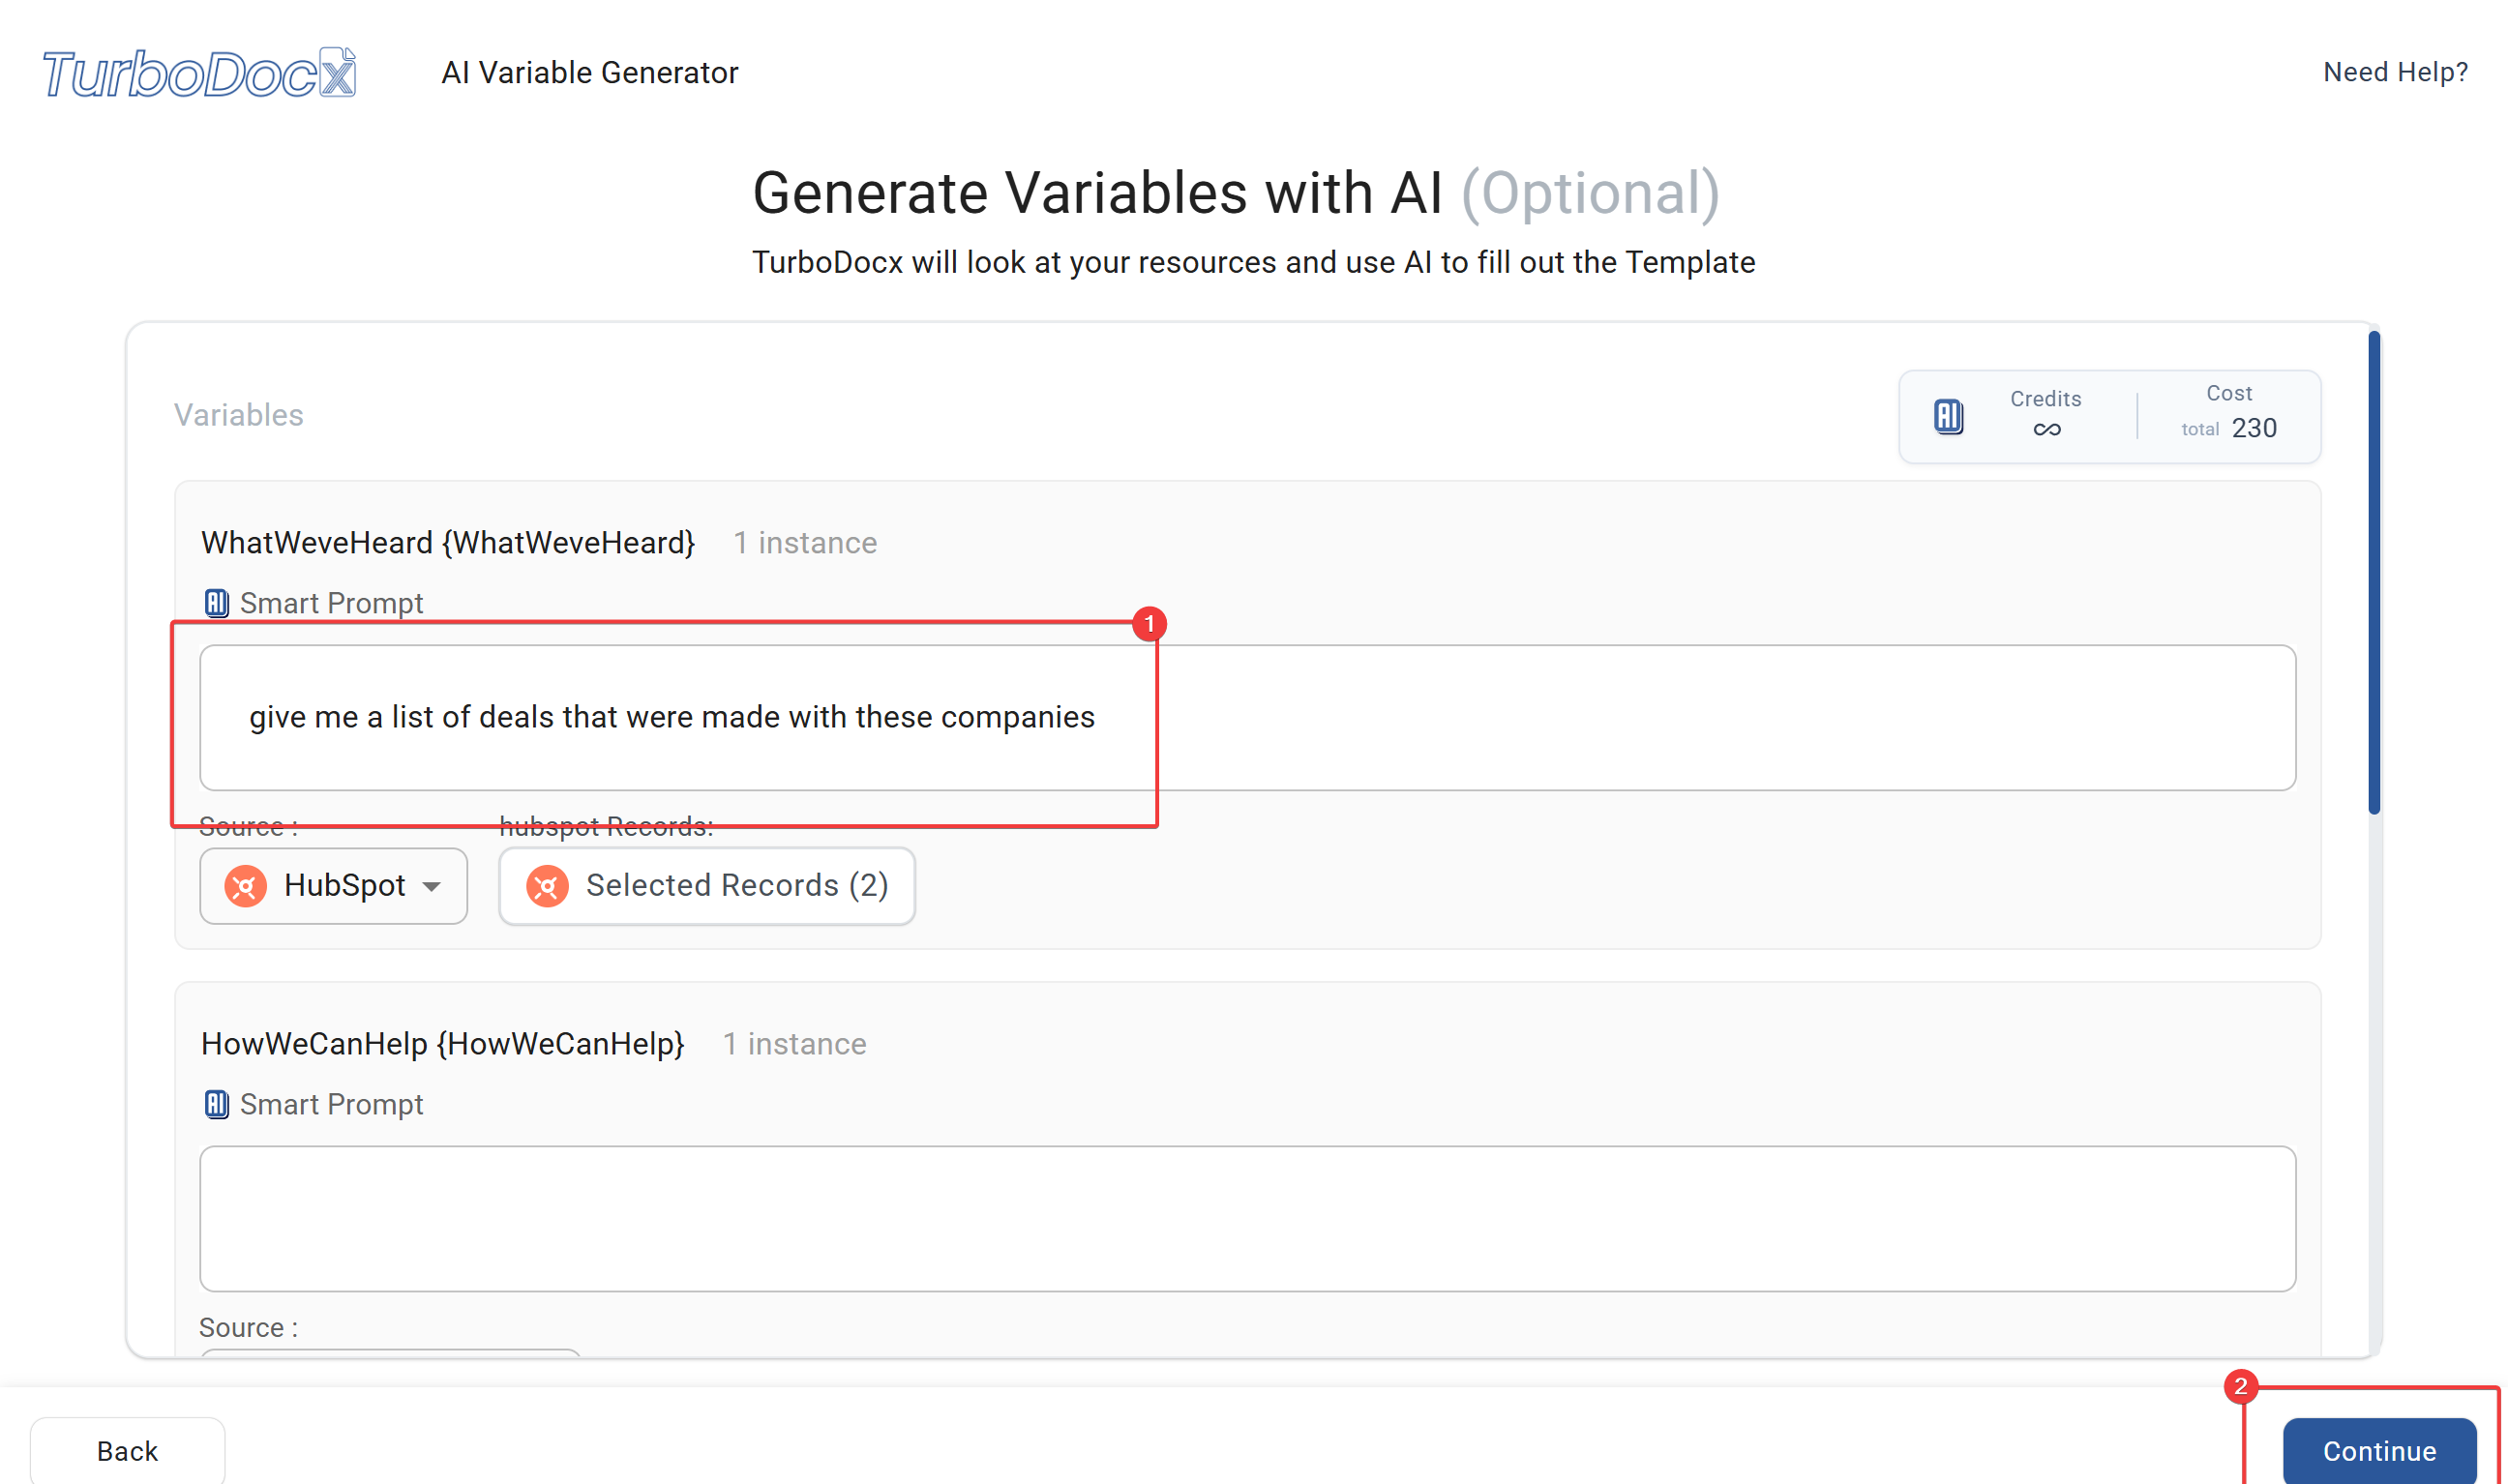
Example prompts:
- "Create a professional proposal section for the selected deal using the contact's information"
- "Generate a follow-up slide summarizing our recent meeting with this contact"
- "Create a company overview report using the selected company data"
- "Draft a project kickoff overview for the selected deal and contacts"
- Review your document
- Check that all the information looks correct
- Make any necessary edits
- Marvel at your personalized, professional document!
- Be specific in your instructions — "Create a proposal" vs. "Create a detailed Q3 marketing proposal section for ABC Corp with pricing and timeline"
- Select the right records — more relevant data = better documents
- Don't be afraid to regenerate if the first attempt isn't perfect
- Save successful prompts for future use!
Troubleshooting
Even the best-laid plans sometimes go awry. Here are solutions to common issues:
"I Can't Find the Settings Gear in HubSpot"
Solution:
- Look in the top right corner of your HubSpot dashboard
- It's usually next to your profile picture
- If you still can't find it, try refreshing the page or logging out and back in
"Invalid Access Token" Error
Solution:
- Double-check that you copied the entire token (it's usually quite long)
- Make sure there are no extra spaces at the beginning or end
- Verify your HubSpot private app is still active
- If all else fails, create a new private app and get a fresh token
"Permission Denied" Error
Solution:
- Check that you added all the required scopes to your HubSpot private app
- Make sure you're an admin in your HubSpot account
- Verify the private app is enabled and not deactivated
"No Records Found" in TurboDocx
Solution:
- Make sure you have actual data in your HubSpot account (contacts, deals, companies)
- Click "Refresh Fields" again in your organization settings
- Check that your HubSpot private app has the right permissions
"The Agent Doesn't Understand My Instructions"
Solution:
- Be more specific in your prompts
- Use simpler language
- Include the type of document you want (email, proposal, report, etc.)
- Try selecting more specific records
If you're still stuck, don't panic! Take a screenshot of any error messages, note exactly what step you're on, and contact your support team. We're here to help, not judge your tech skills! 🤝
Security and Privacy
Your data security is important to us (and should be to you too!):
How Your Data is Protected
- Secure Authentication: We use OAuth 2.0 (fancy industry-standard security)
- Limited Permissions: TurboDocx only gets permission to read your data, not change it
- Encrypted Transmission: All data transfers are encrypted (like sending a letter in a locked box)
Best Practices
- Keep Your Token Secret: Don't share your access token with anyone
- Regular Reviews: Periodically check which integrations have access to your data
- Rotate Tokens: Periodically rotate your tokens for maximal security posture.
Tips for Success
Getting the Best Results
Keep Your HubSpot Data Clean:
- Use consistent naming conventions
- Fill in important fields (contact info, deal values, etc.)
- Keep your data up-to-date
Write Clear Instructions:
- Be specific about what you want
- Mention the type of document
- Include any special requirements
Select the Right Records:
- Choose records that are relevant to your document
- Don't select too many records at once
- Quality over quantity!
Advanced Tips
For Better Proposals:
- Select the contact, deal, and company records
- Include deal value and timeline information
- Mention specific services or products
For Better Reports:
- Select relevant companies and contacts
- Include date ranges if applicable
- Specify the type of analysis you want
For Better Follow-ups:
- Select recent meeting attendees
- Include deal or project context
- Mention next steps or action items
What's Next?
Congratulations! You've successfully:
- ✅ Created a HubSpot private app (you're basically a developer now!)
- ✅ Connected it to TurboDocx (networking skills: unlocked!)
- ✅ Generated your first document (content creation: mastered!)
Now You Can:
- Create personalized proposals in minutes instead of hours
- Build comprehensive reports using your CRM information
- Automate document creation for your entire team
Next Steps:
- Train your team on being a prompting pro
- Create document and presentation templates for common use cases
- Experiment with different AI prompts to find what works best
Remember, you're not just creating documents or presentations— you're creating more time for yourself by automating repetitive tasks. Every minute saved on copy-pasting customer data is a minute you can spend on more important things (like actually talking to customers!). 🎉
Getting Help
If you need assistance:
- Check this guide first (you'd be surprised how often the answer is right here!)
- Take screenshots of any error messages
- Note the exact step where you got stuck
- Contact your TurboDocx support team with the details
Remember: There's no such thing as a bad question. We've all been there, and we're here to help you succeed! 💪
Happy document generating! May your proposals be persuasive, your reports be comprehensive, and your follow-ups be timely! 🚀