Turn Your Zoom Meetings into Professional Documents & Presentations
Transform your meeting recordings into professional documents automatically. TurboDocx's integration eliminates manual note-taking by converting meeting transcripts into polished deliverables, streamlining your post-meeting workflow.
What You Can Create
- 📄 Meeting Summaries: Convert discussions into formatted meeting minutes and action items
- 📊 Client Presentations: Turn discovery calls into compelling presentation decks
- 📋 Project Proposals: Use requirement gathering sessions to create detailed proposals
- 📝 Follow-up Reports: Generate comprehensive meeting reports with key takeaways
- 💼 Sales Materials: Transform prospect calls into customized sales presentations
- 🔄 Automated Workflows: Connect meeting transcripts directly to your document templates
Before You Begin
To use the Zoom integration, you'll need:
- A Zoom account with cloud recording enabled
- Administrative access to create a Zoom app (or assistance from your IT team)
- Meeting recordings stored in Zoom's cloud (local recordings are not accessible)
If you're not sure whether you have cloud recording enabled, check with your Zoom administrator or look for the "Cloud" option when you start recording a meeting.
Step 1: Creating Your Zoom App
The first step is to create a Zoom app that will allow TurboDocx to access your meeting transcripts. Don't worry - this is a one-time setup process that we'll walk you through step by step.
Navigate to the Zoom Marketplace
- Open your web browser and go to https://marketplace.zoom.us
- Click "Sign In" in the top right corner
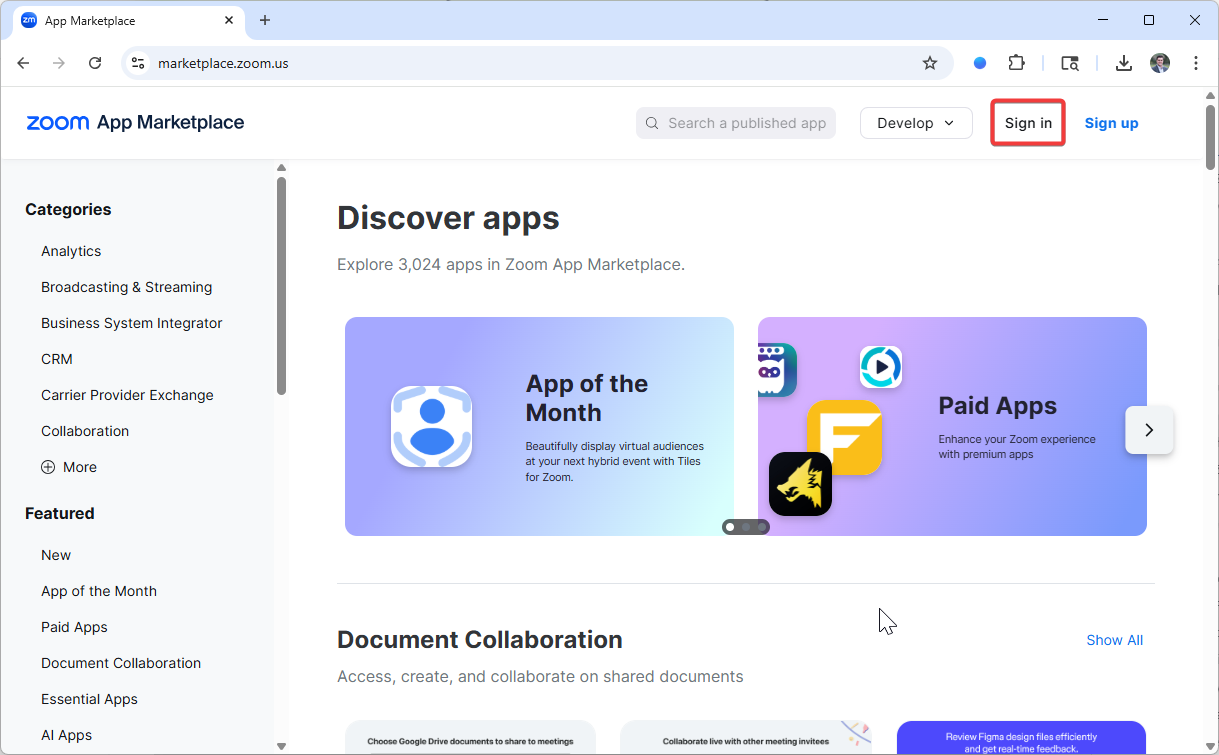
- Sign in with your Zoom account credentials
- You'll be taken to https://marketplace.zoom.us/user/build
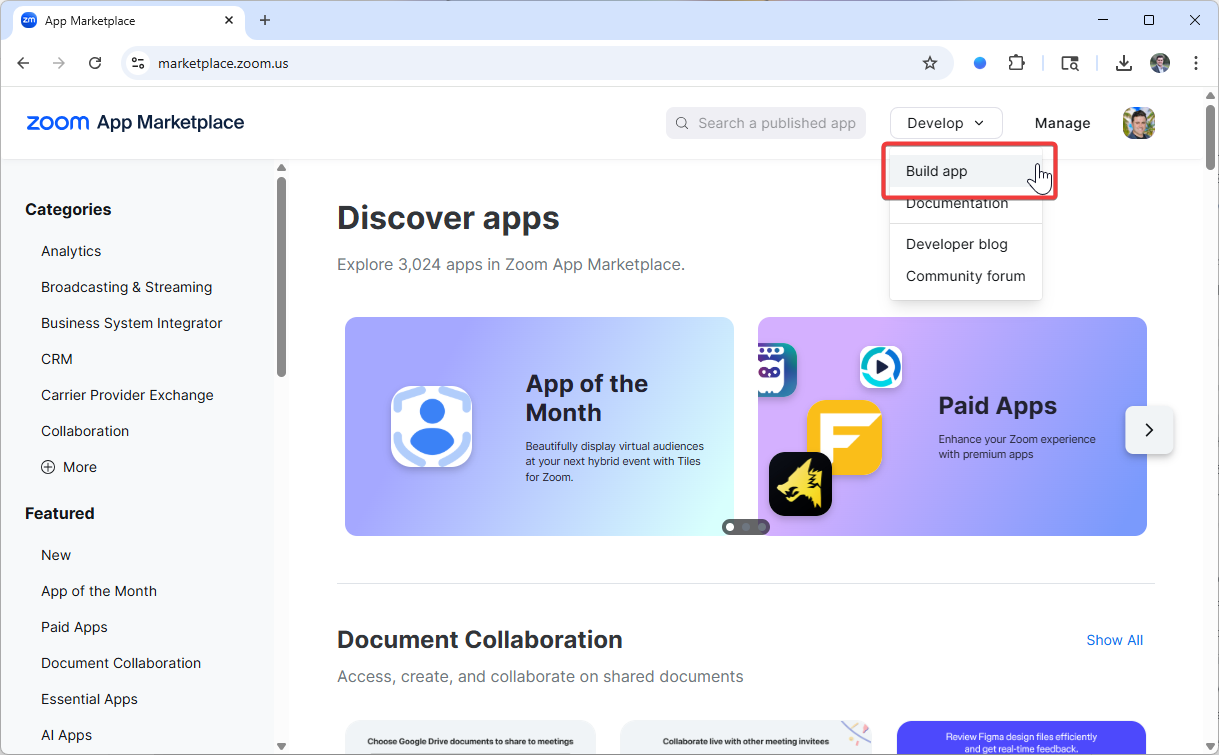
Create a New App
-
In the top right corner, click the dropdown that says "Develop"
-
Select "Build App" from the dropdown
- In the dialog that appears, select "General App"
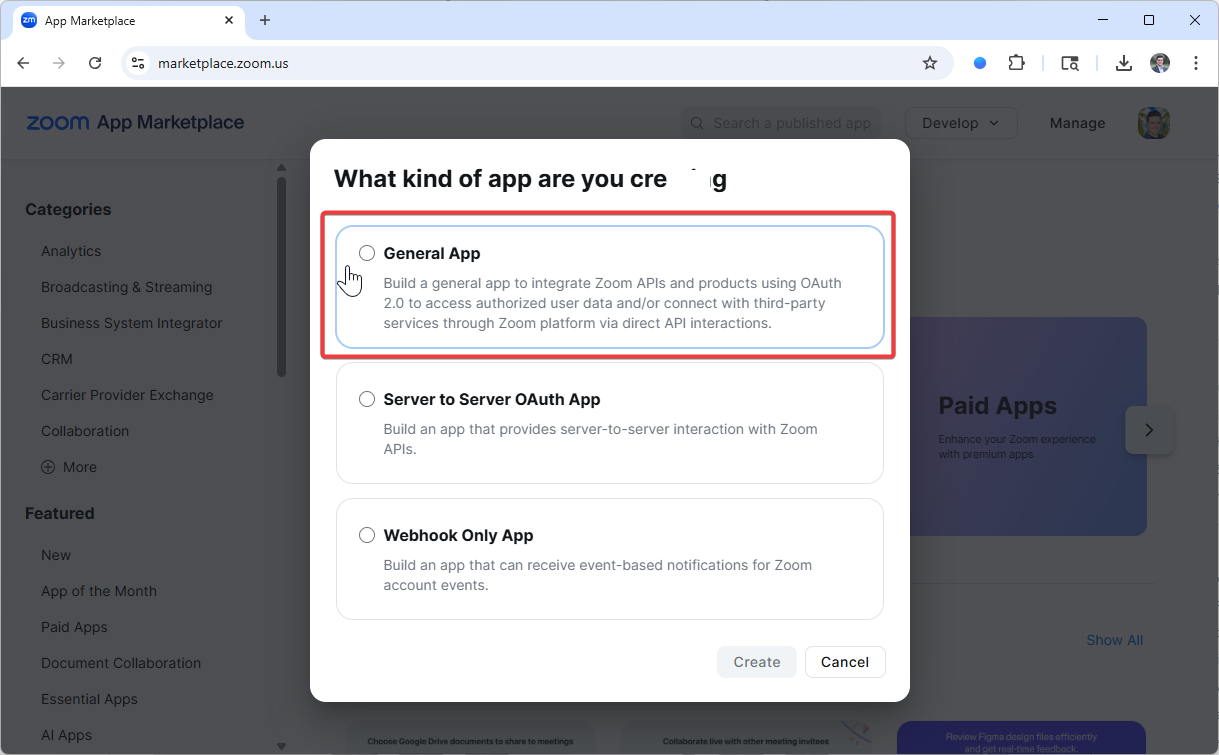
- Click "Create"
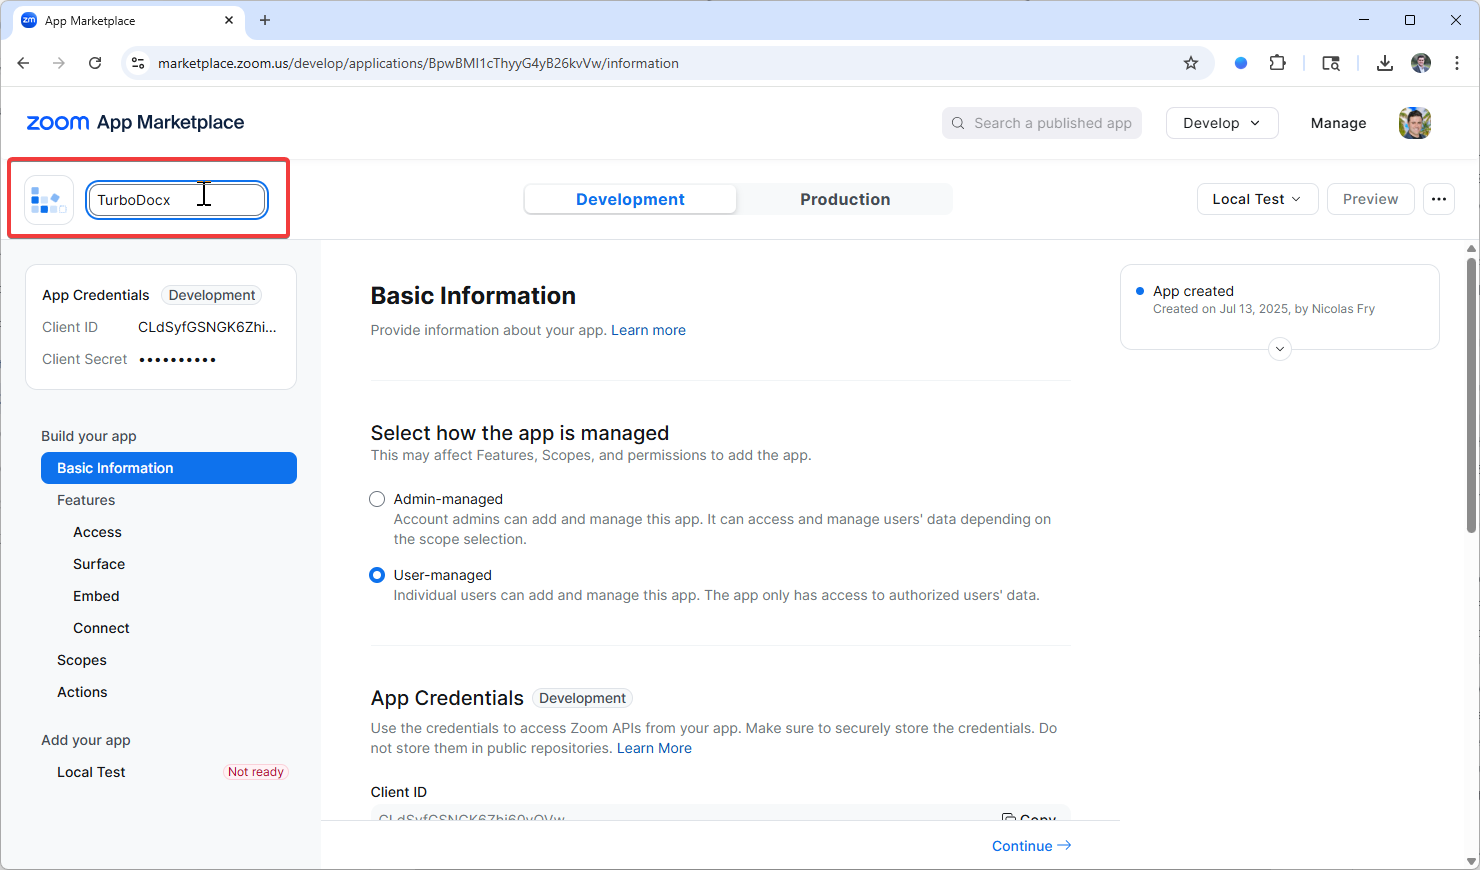
- Rename your app to "TurboDocx"
We use a "General App" because it provides the specific permissions needed to access your cloud recordings safely and securely.
Configure Basic Information
After creating your app, you'll be taken to the app configuration page. Let's set up the basic information first.
Basic Information Tab
- Make sure you're on the "Basic Information" tab
- Leave app as User Managed - Ensure the app type remains set as "User Managed"
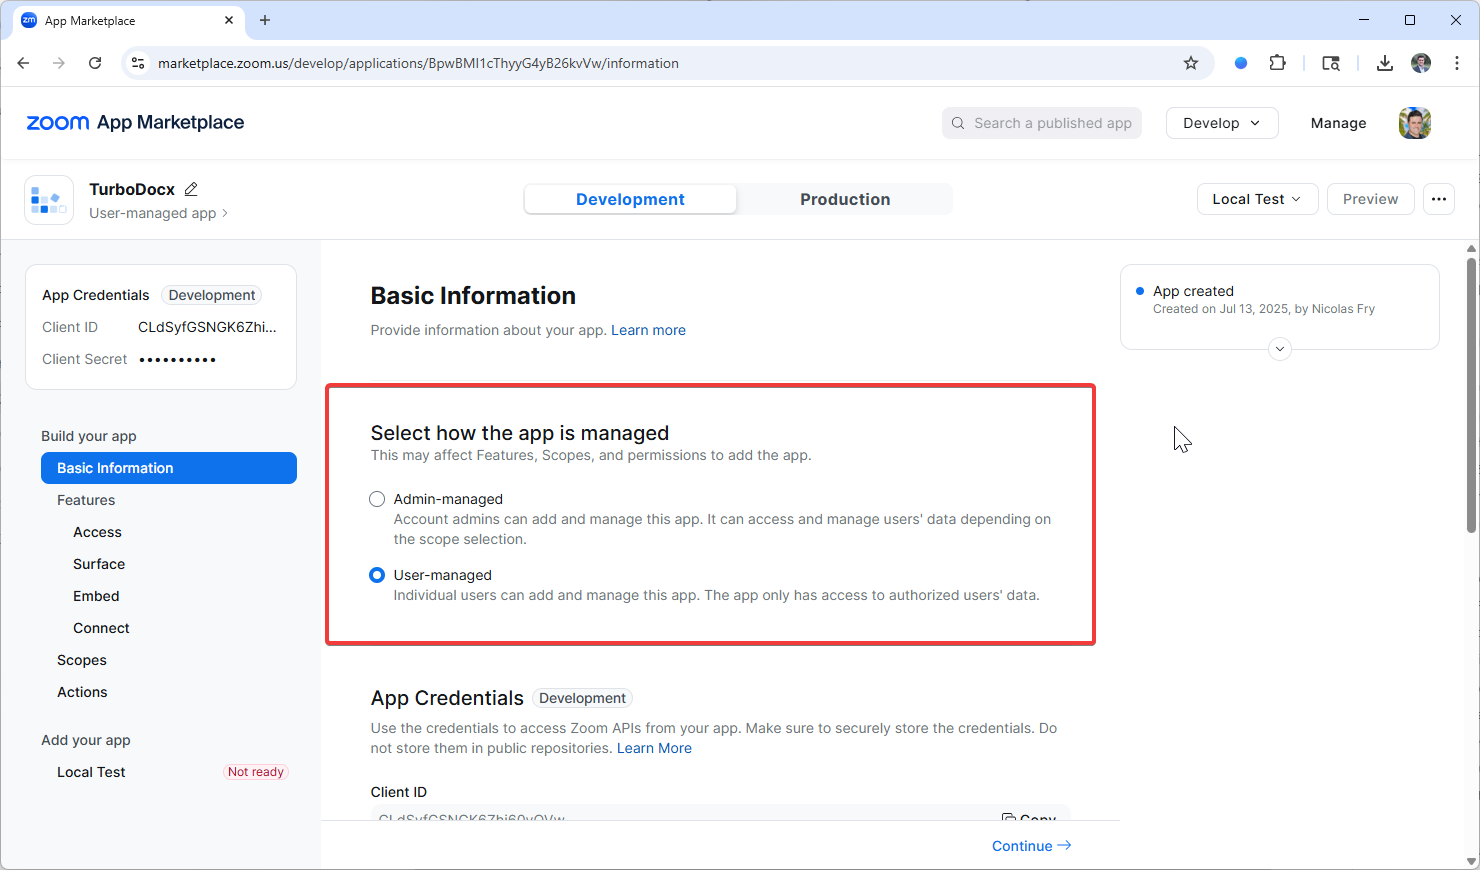
- Scroll down to "App Credentials" section
- Note down the Client ID and Client Secret - You'll need these values when configuring TurboDocx
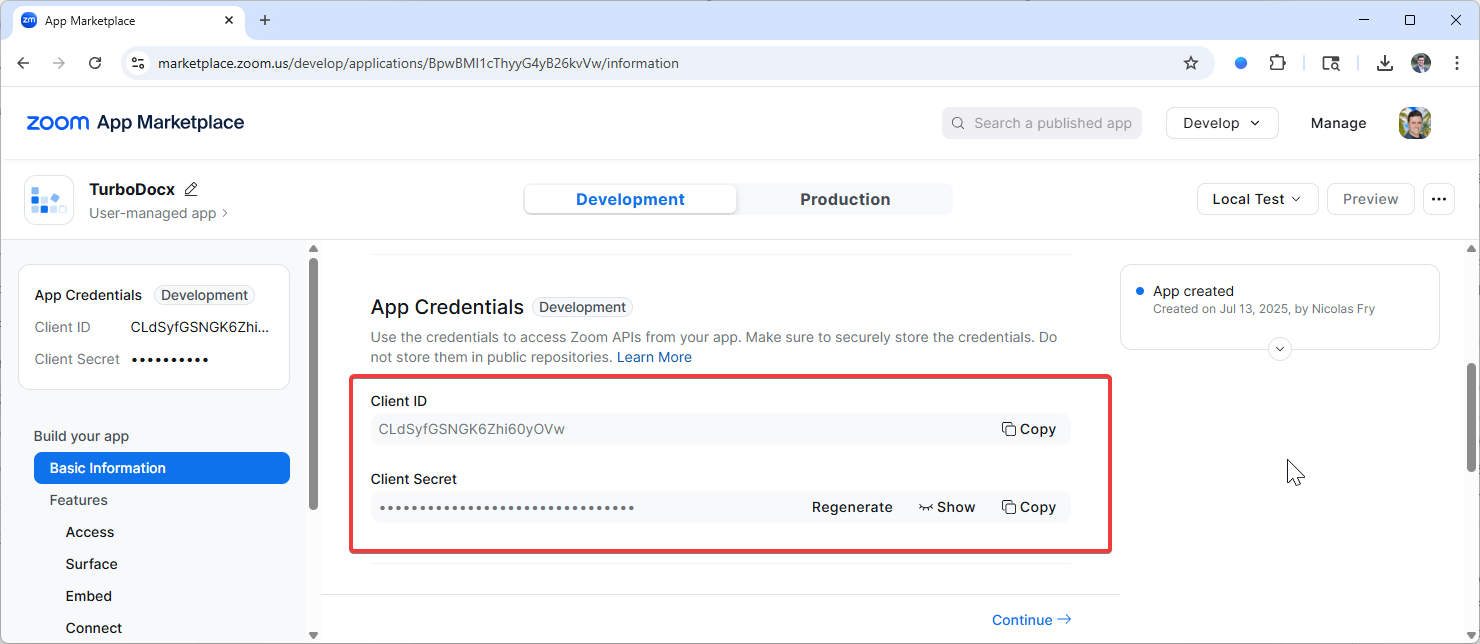
Your Client Secret is like a password - never share it publicly or include it in emails. TurboDocx will store it securely once you enter it.
OAuth Information
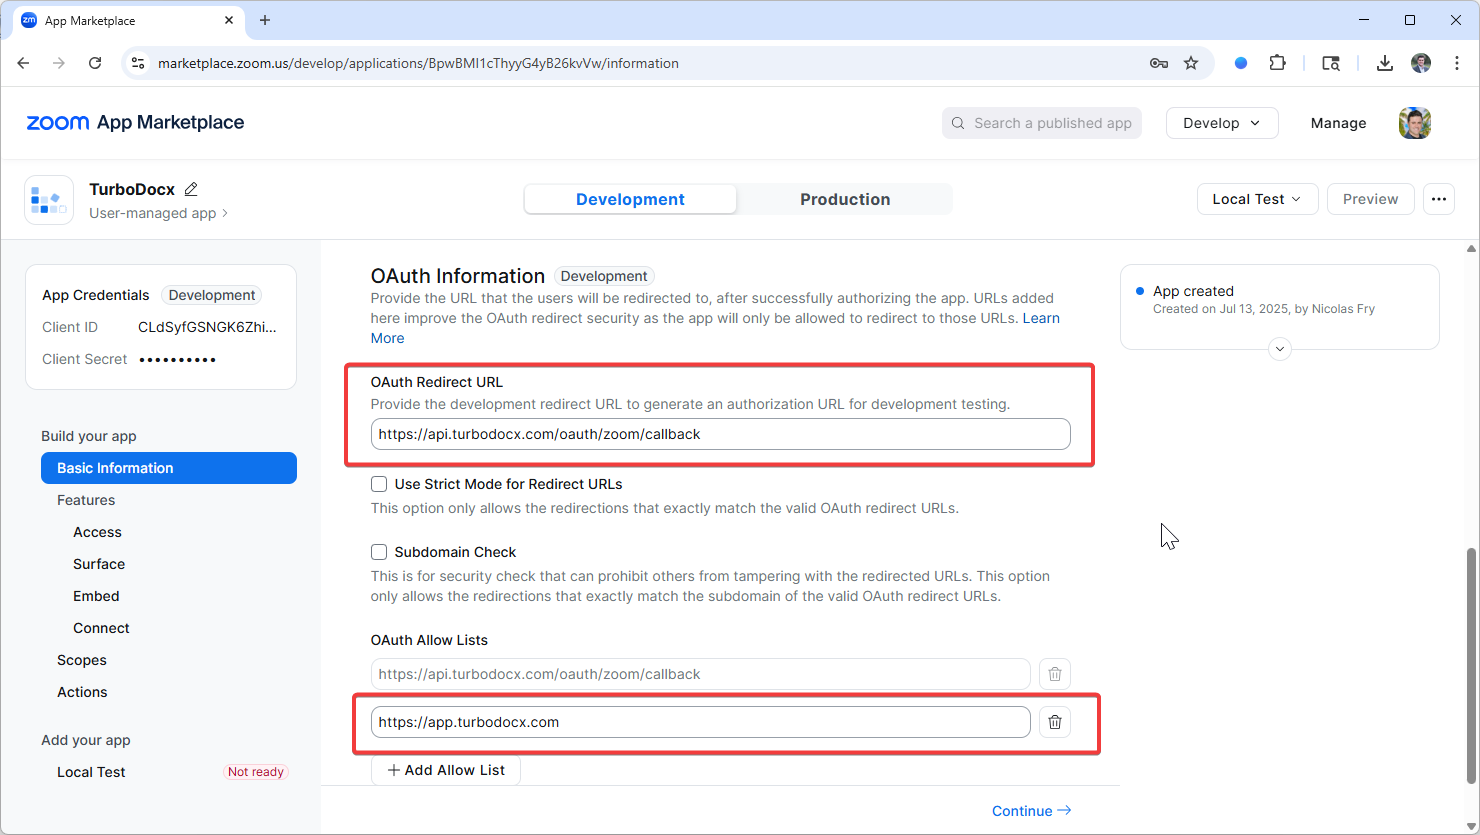
- Still on the Basic Information tab, scroll down to "OAuth Information"
- For "Redirect URL for OAuth", enter:
https://api.turbodocx.com/oauth/zoom/callback
- Under "OAuth Allow List", add the following URLs (click "Add" for each one):
https://app.turbodocx.com
Configure Scopes
Now we need to set up the permissions (scopes) that allow TurboDocx to access your cloud recordings.
Scopes Tab
- In the left bar, click on the "Scopes" button and navigate to the add scopes page
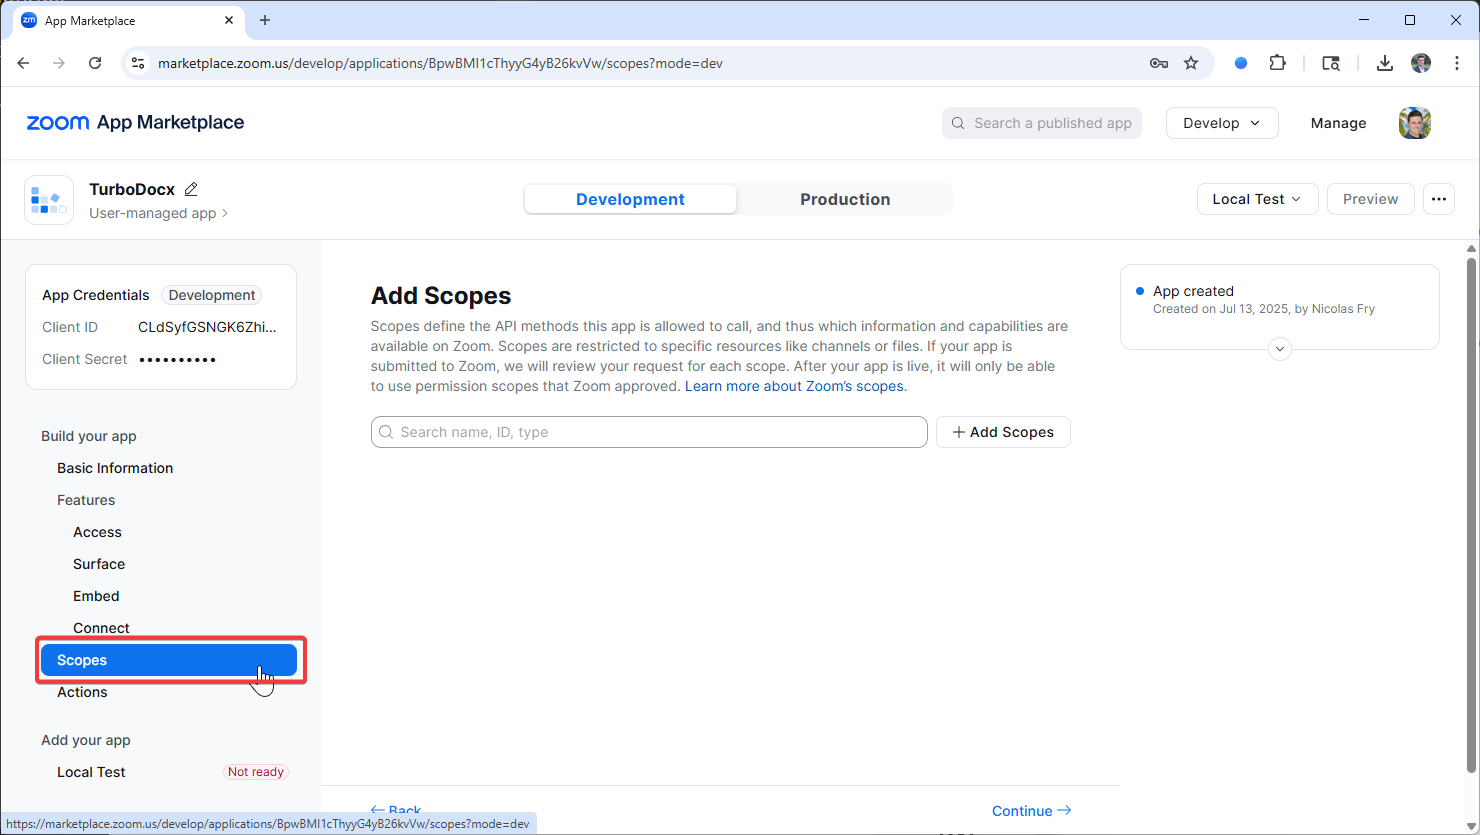
- Click "Add Scopes" button
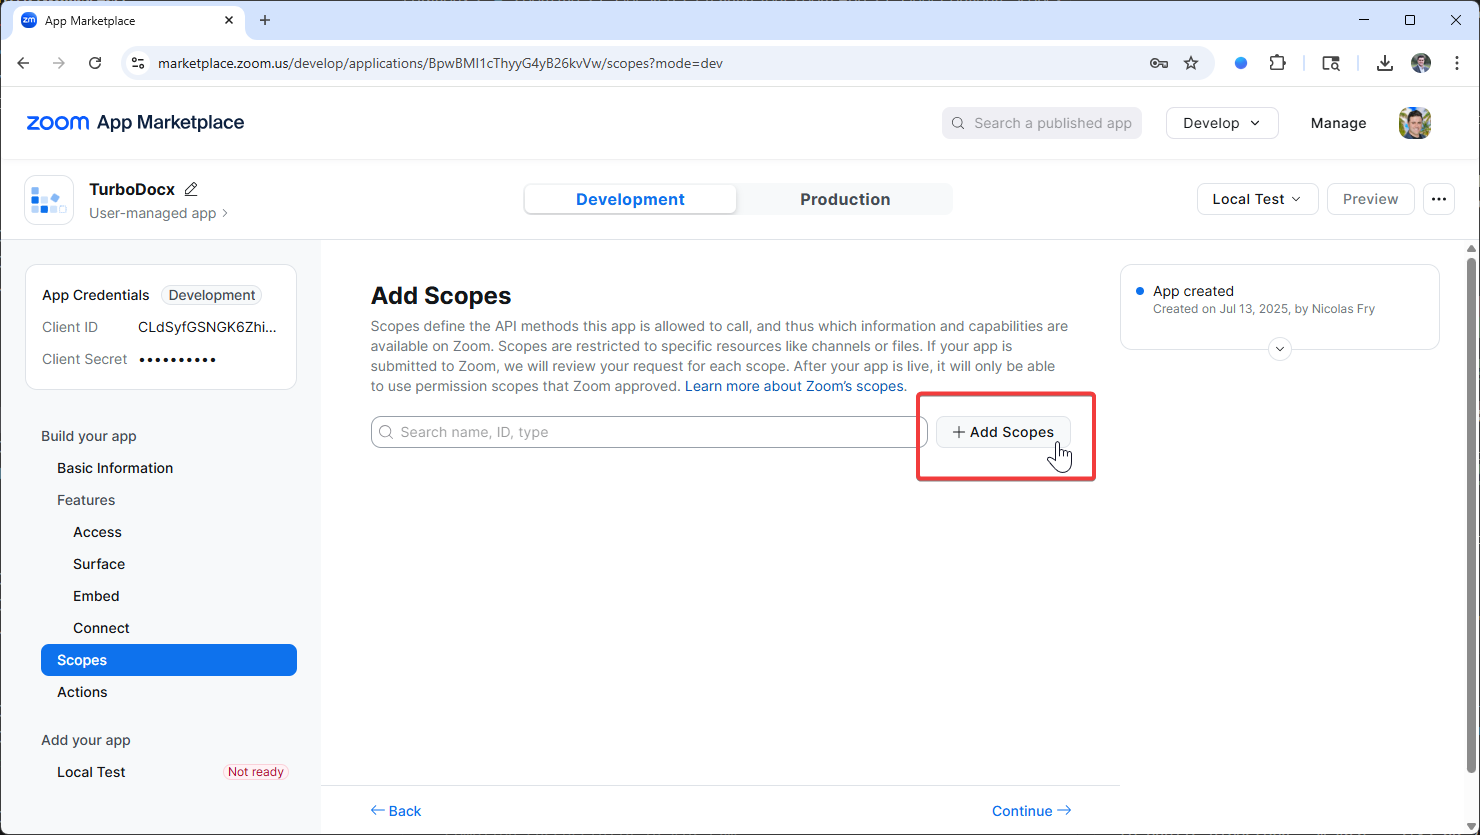
- In the search dialog that appears, search for:
List all cloud recordings for a user
Or look for the scope with this value:
cloud_recording:read:list_user_recordings
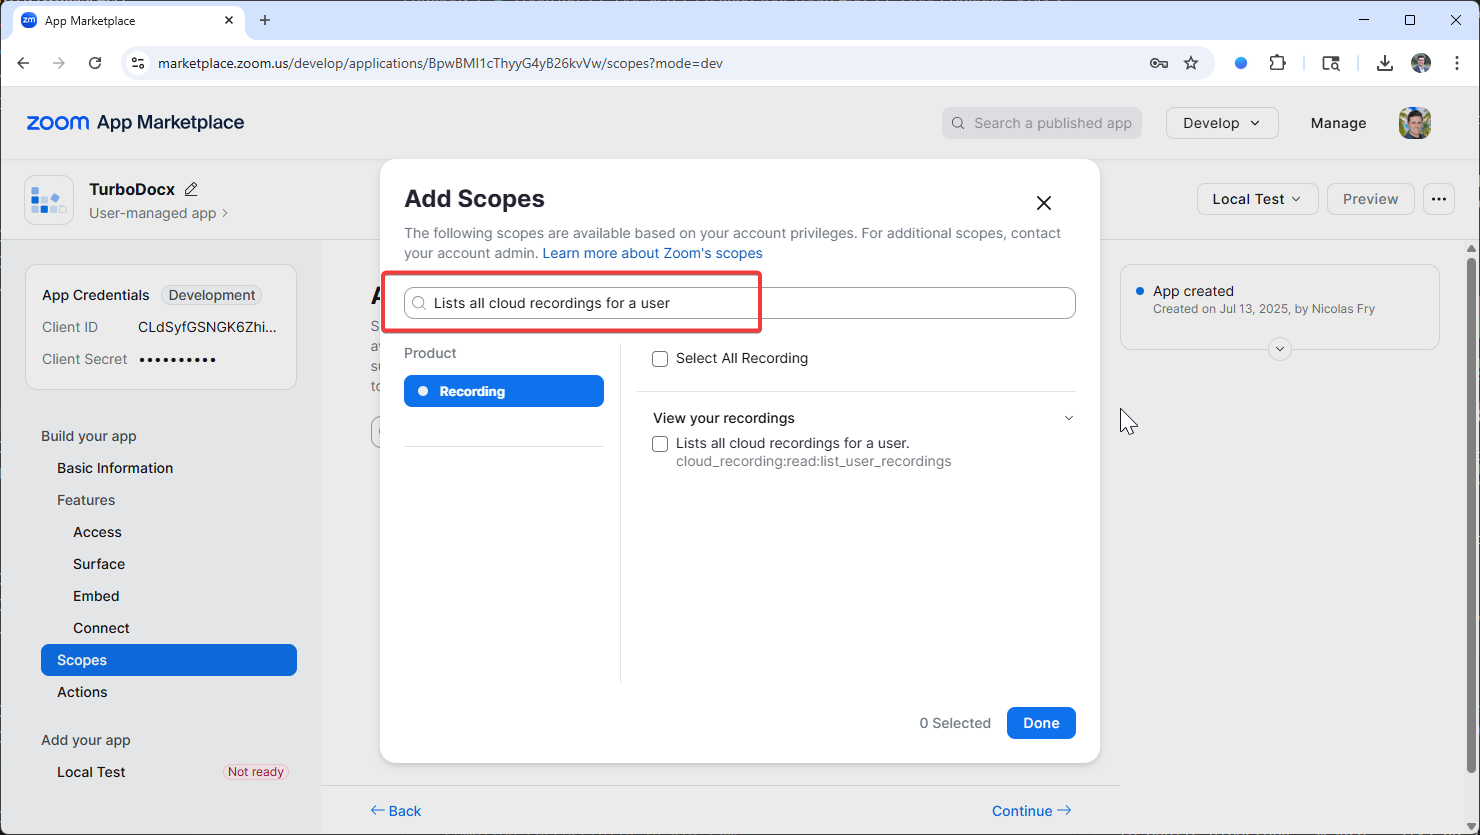
- Add the scope labeled "View your recordings" (with value
cloud_recording:read:list_user_recordings)
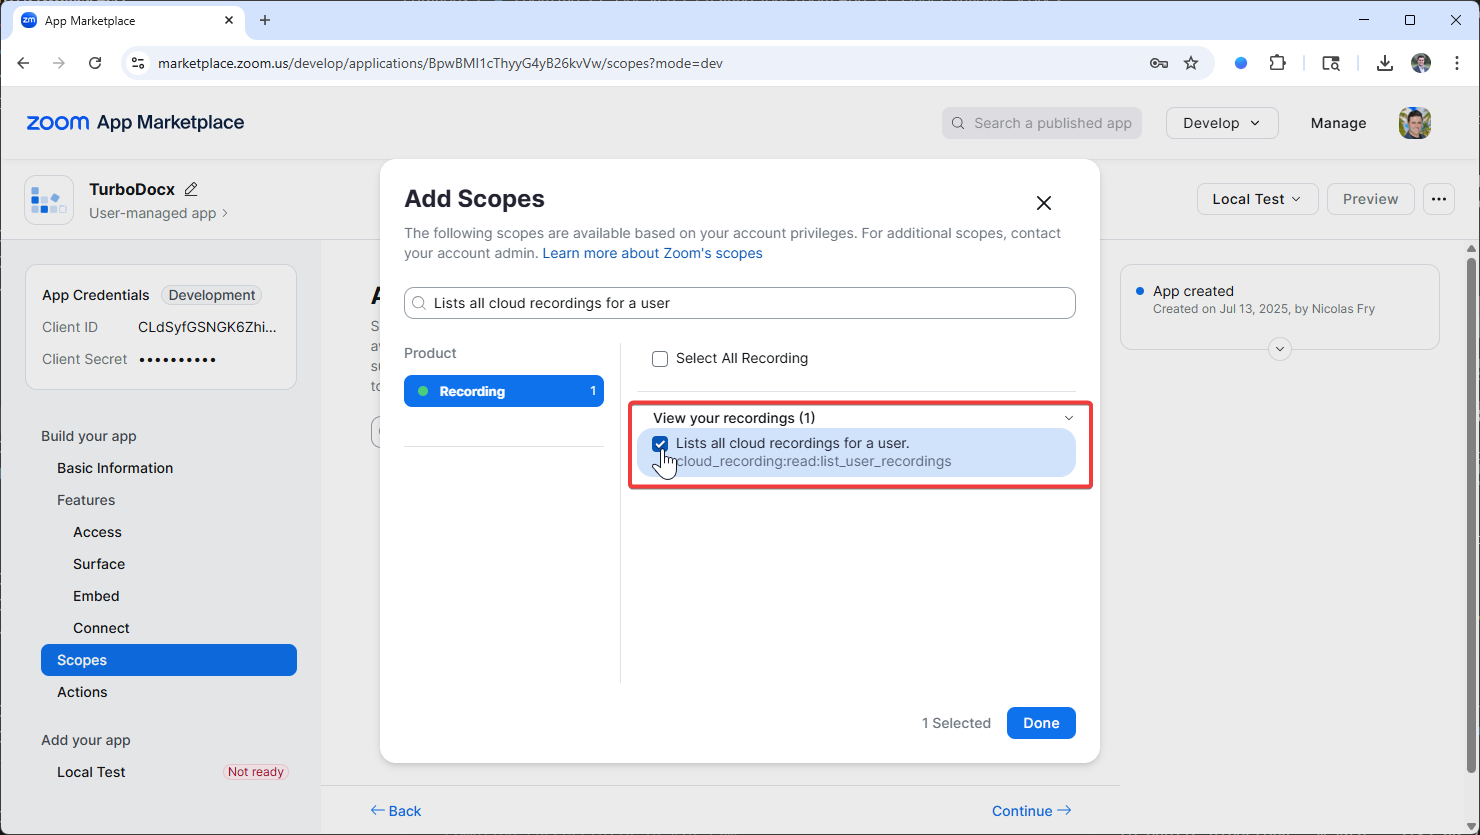
- Click "Done" to save the configuration
Step 2: Configuring TurboDocx
🔧 How to Configure Zoom in Organization Settings
- Go to Settings
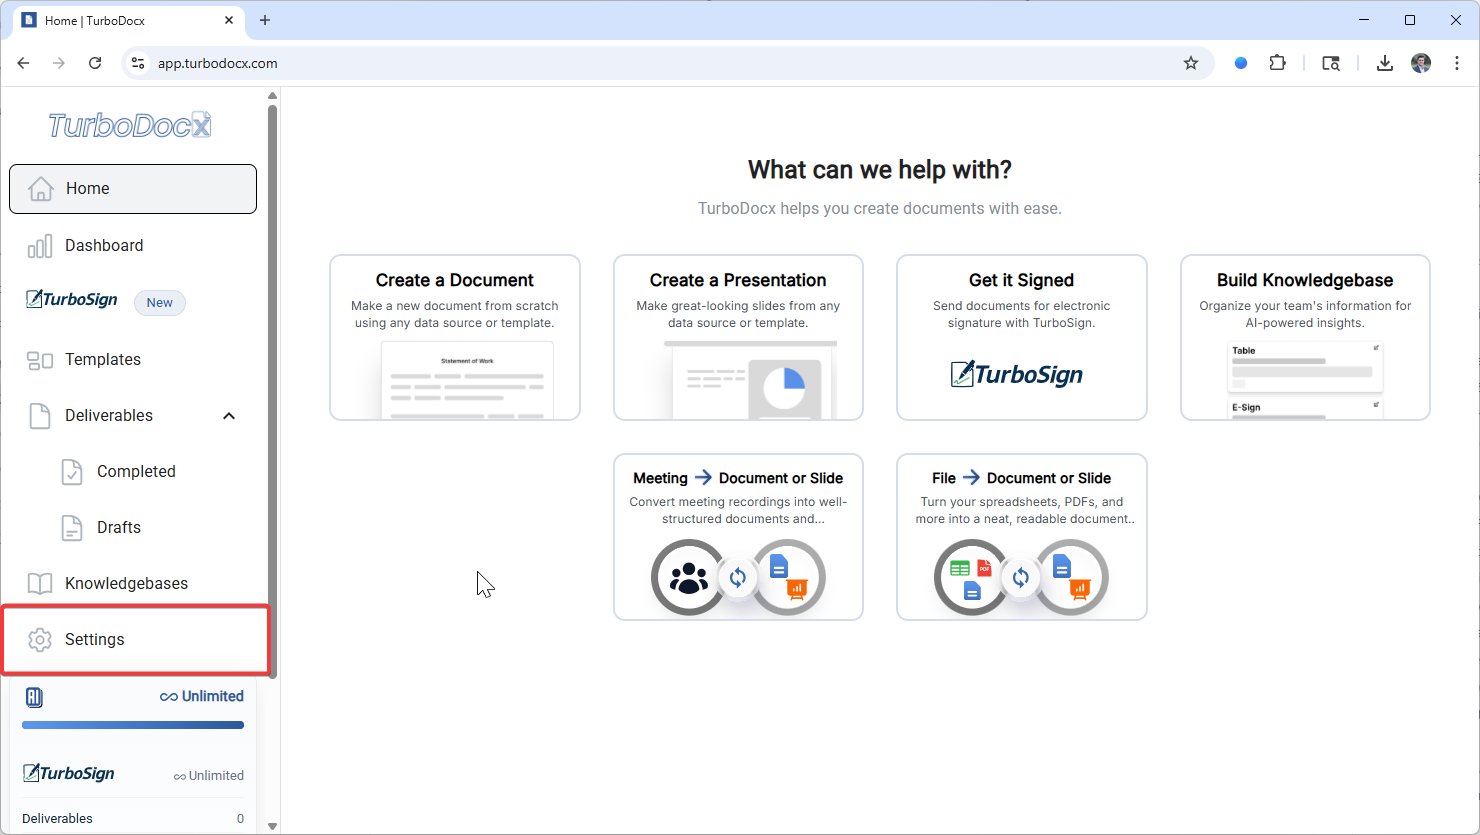
- Click on Organization Settings
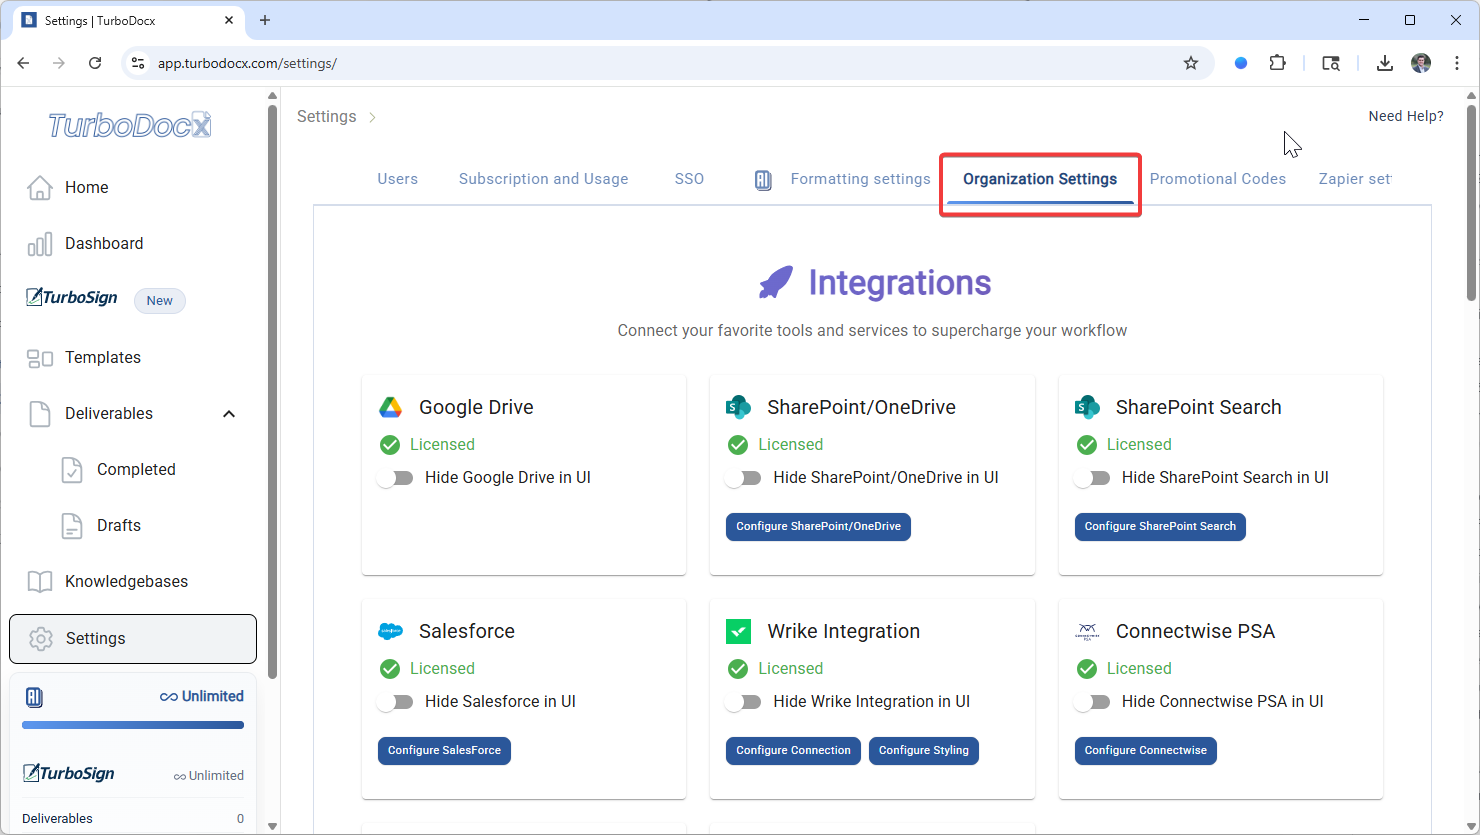
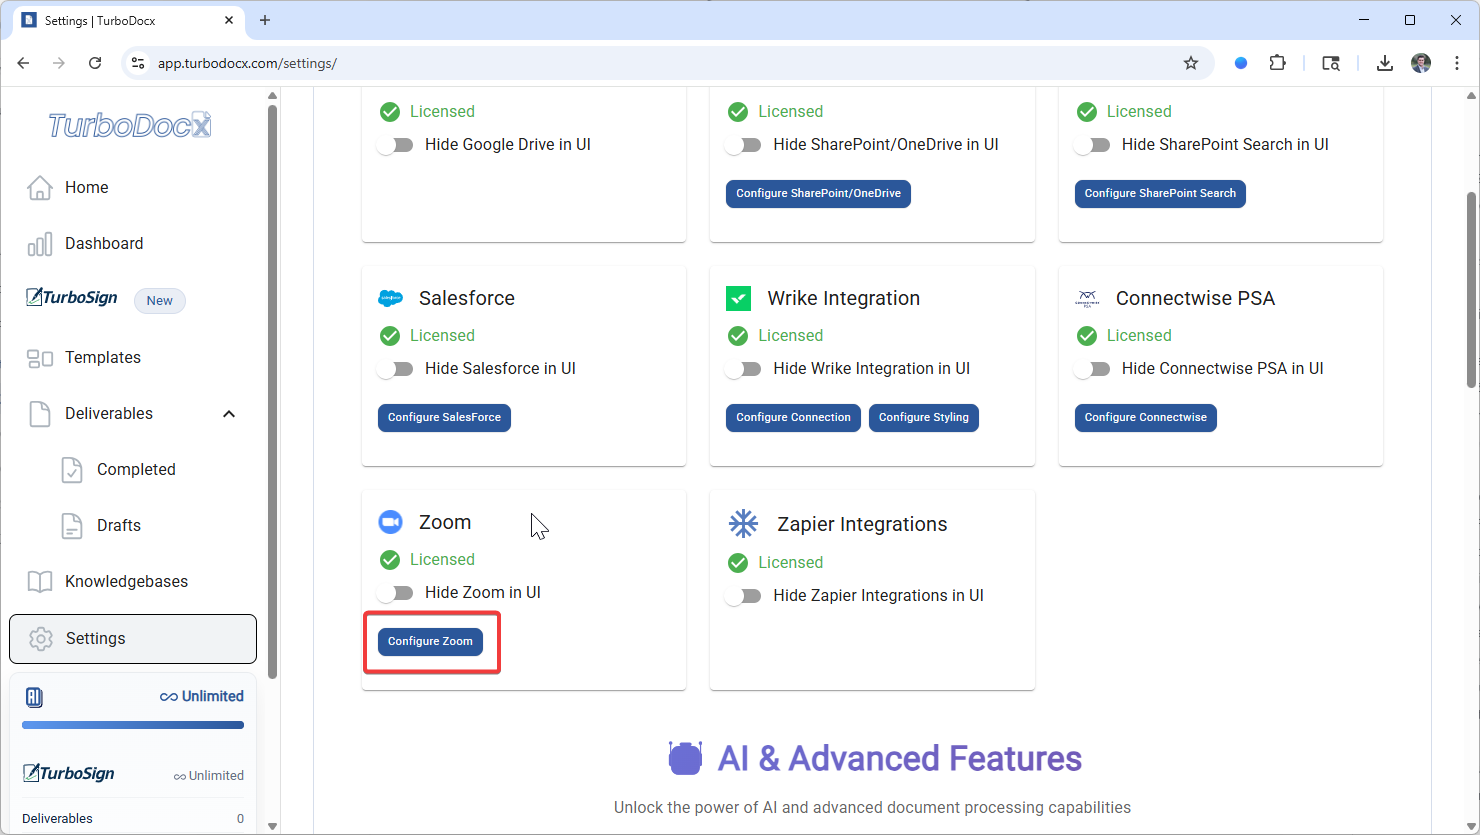
- Scroll down to the Zoom section
- Click Configure Zoom
- A Zoom Configuration pop-up will appear
- Take the Client ID and Client Secret you obtained earlier, paste them into the appropriate fields, and click Save Configuration in the bottom right-hand corner

Alternative: Inline Configuration
Alternatively, you can configure Zoom integration directly when you first access transcript providers. When you navigate to the transcript providers section and select Zoom, you'll be prompted to enter your credentials if the integration hasn't been configured yet. Simply enter your Client ID and Client Secret in the configuration dialog that appears and save your settings.
Step 3: Using Your Zoom Integration
Congratulations! Your Zoom integration is now ready to use. Here's how to access your meeting transcripts and use them in your documents.
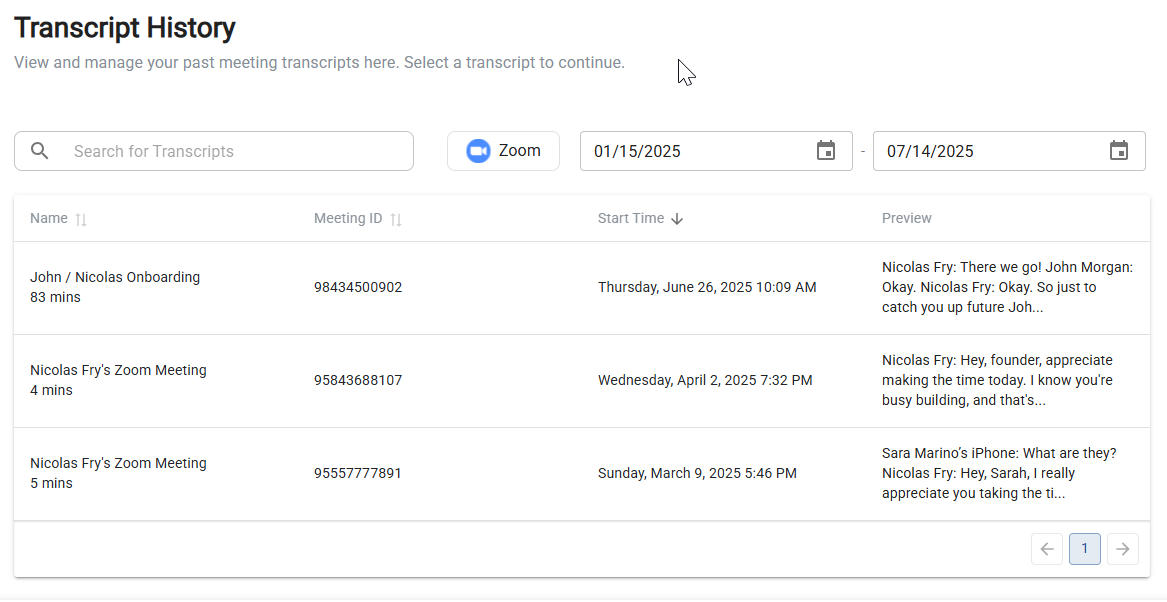
Accessing Meeting Transcripts
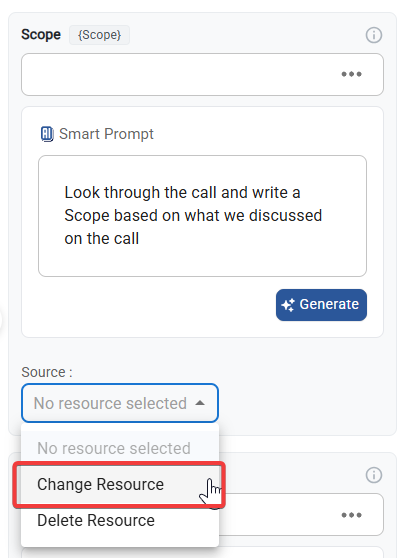
- Click the source dropdown and click "Change Source"
- Go to the App Library tab
- Click "Transcript Providers"
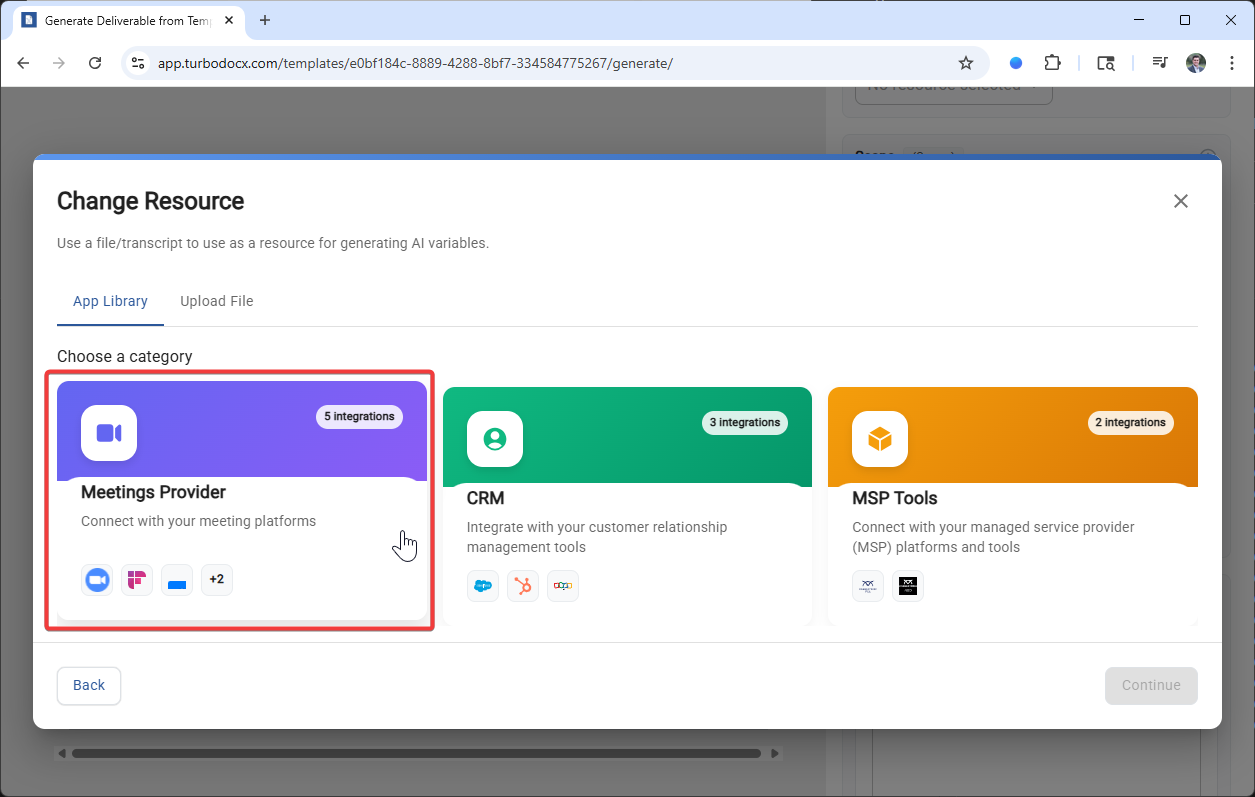
- Click "Zoom" and then you should be able to click the transcript
- You'll see a list of your recent cloud recordings with transcripts
Troubleshooting
If you're having trouble with your Zoom integration, here are some common issues and their solutions.
"No Meetings Found"
- Cause: No cloud recordings with transcripts available
- Solution: Ensure your meetings are recorded to the cloud and have transcription enabled
"Authentication Failed"
- Cause: Incorrect credentials or expired authentication
- Solution:
- Double-check your Client ID and Client Secret
- Try re-authenticating by clicking "Authenticate with Zoom" again
"Permission Denied"
- Cause: Required scope not properly configured
- Solution: Verify that
cloud_recording:read:list_user_recordingsscope is added to your Zoom app
If you continue to experience issues:
- Verify all steps in this guide have been completed
- Check that your Zoom account has cloud recording enabled
- Ensure you have meeting recordings stored in Zoom's cloud
- Contact your TurboDocx support team for assistance
Security and Privacy
Your data security and privacy are important to us. Here's how your information is protected when using the Zoom integration.
How Your Data is Protected
- Secure Authentication: TurboDocx uses OAuth 2.0, the industry standard for secure API access
- Limited Permissions: The integration only requests access to read your cloud recordings
- Encrypted Transmission: All data transfers are encrypted using industry-standard protocols
Best Practices
For Optimal Results
- Enable Transcription: Always enable transcription when recording meetings to the cloud
- Use Clear Audio: Ensure good audio quality for more accurate transcripts
- Descriptive Meeting Names: Use clear, descriptive names for your meetings to easily identify them later
- Regular Cleanup: Periodically review and organize your cloud recordings
Meeting Recording Tips
- Start recording at the beginning of important meetings
- Speak clearly and avoid overlapping conversations
- Use a good quality microphone when possible
- Consider recording in a quiet environment
Finished
Congratulations on setting up your Zoom integration! You can now seamlessly import meeting transcripts and use them to create professional documents with TurboDocx.