Creating an E-Signature Pipeline
This guide walks you through the pipeline wizard one step at a time. By the end, you'll have a hands-free automation that picks up PDFs from a folder, signs them, and files the results.
The wizard has five steps, shown in the progress rail on the left: Sample, Source, Extract & Route, Sign, and Deliver. This guide follows them in that order.
As you work, the If this ran now panel on the right previews what the pipeline would produce for your sample: the fields it extracted, where the document would land, and its final file name. Any warnings there (for example, "add a routing rule or a fallback folder") are guidance for finishing setup, not errors.
Pipelines are an Enterprise feature. If you don't see the option to create one, Contact us to enable it for your organization.
Before You Begin
You'll need:
- SharePoint connected to TurboDocx for Pipelines. Pipelines run unattended, so they use their own SharePoint connection. An administrator registers an Azure AD app in the Azure portal (app-only and delegated permissions, admin consent, and a client secret), then pastes its credentials into the Connect SharePoint dialog reached from the Pipelines settings gear. This is a one-time admin task, and you can't create a pipeline until it's done. If you're not an administrator, have IT complete the Connect SharePoint for Pipelines setup first. (This is a separate connection from Configuring SharePoint or OneDrive, which covers template import and export, not Pipelines.)
- A SharePoint document library to use as your intake folder.
- A representative sample PDF, meaning a real example of the kind of document this pipeline will process.
- The details of who should sign these documents.
Step 1: Upload a Sample
Start by uploading a representative sample PDF. The wizard uses this sample to preview every later step against real content, so the fields you define and place line up with the documents you'll actually process.
Choose a PDF that looks like the documents that will flow through this pipeline, with the same layout and the same kind of data.
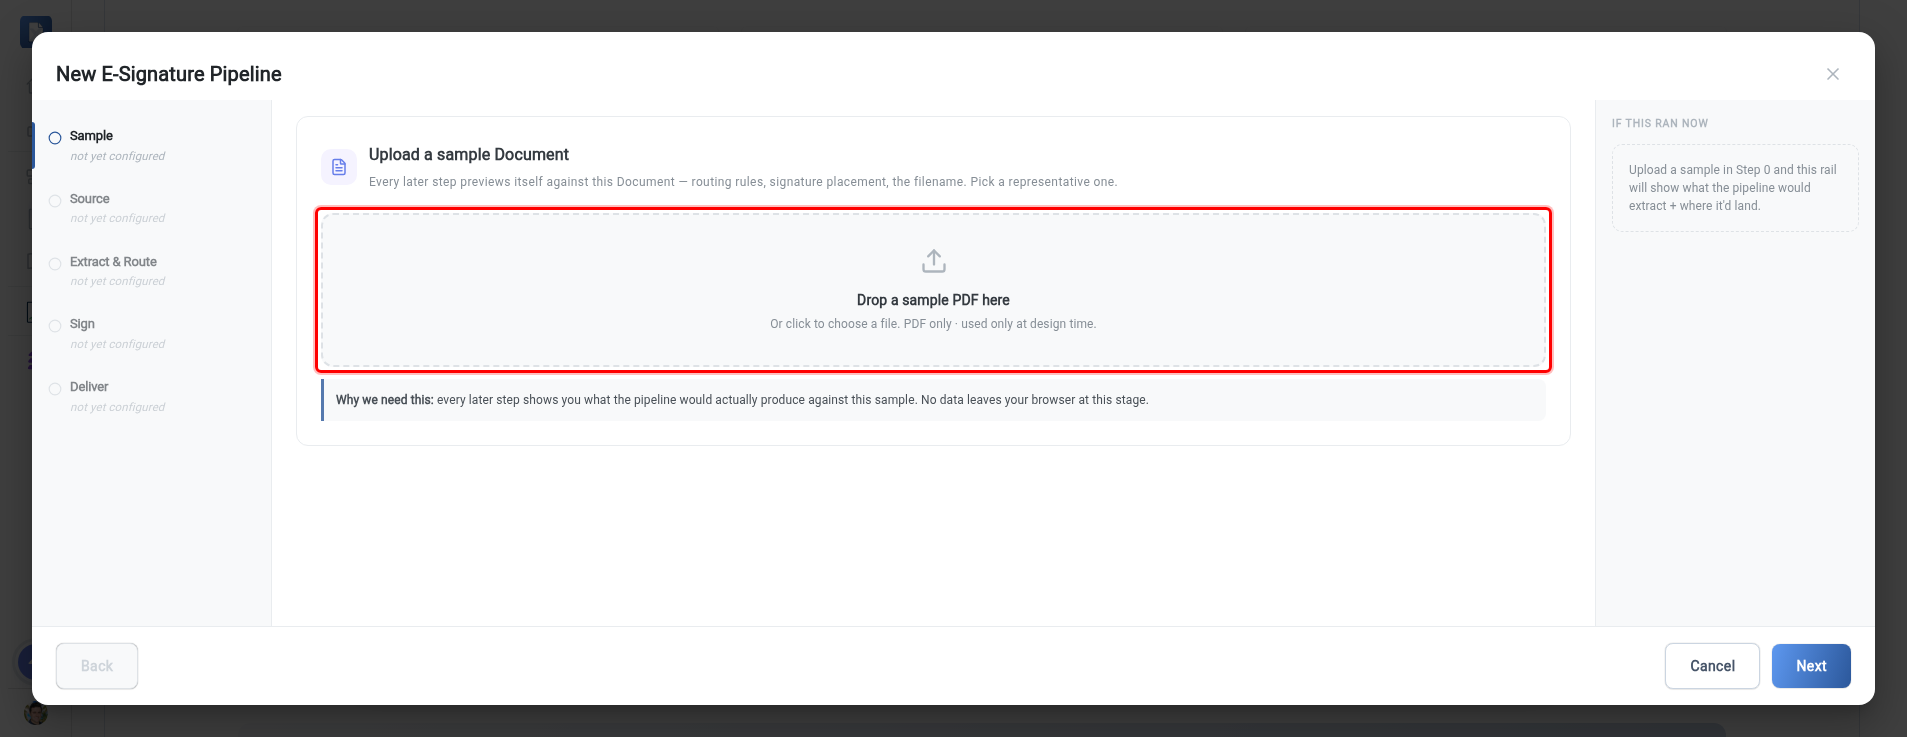
Use a document that represents the common case. If most of your invoices follow one layout, upload that layout rather than an unusual one-off.
Step 2: Source
Now name the pipeline and connect the source it will watch. SharePoint is the source available today, with more connectors on the way.
- Name the pipeline something descriptive, for example "Vendor Invoice Signing" or "NDA Intake." The Active toggle beside the name controls whether the pipeline starts watching as soon as you save it.
- Pick the SharePoint document library to watch. This is your dedicated intake library, the folder where PDFs are dropped to kick off the pipeline. Clicking Browse SharePoint opens a Microsoft sign-in the first time. If the picker has nothing to choose, SharePoint isn't connected yet, see Before You Begin above.
Think of the intake library as the pipeline's inbox: anything that lands there gets processed automatically.
Once the pipeline is activated, its source library is permanent. To point at a different library, you have to recreate the pipeline, so choose the intake library carefully.
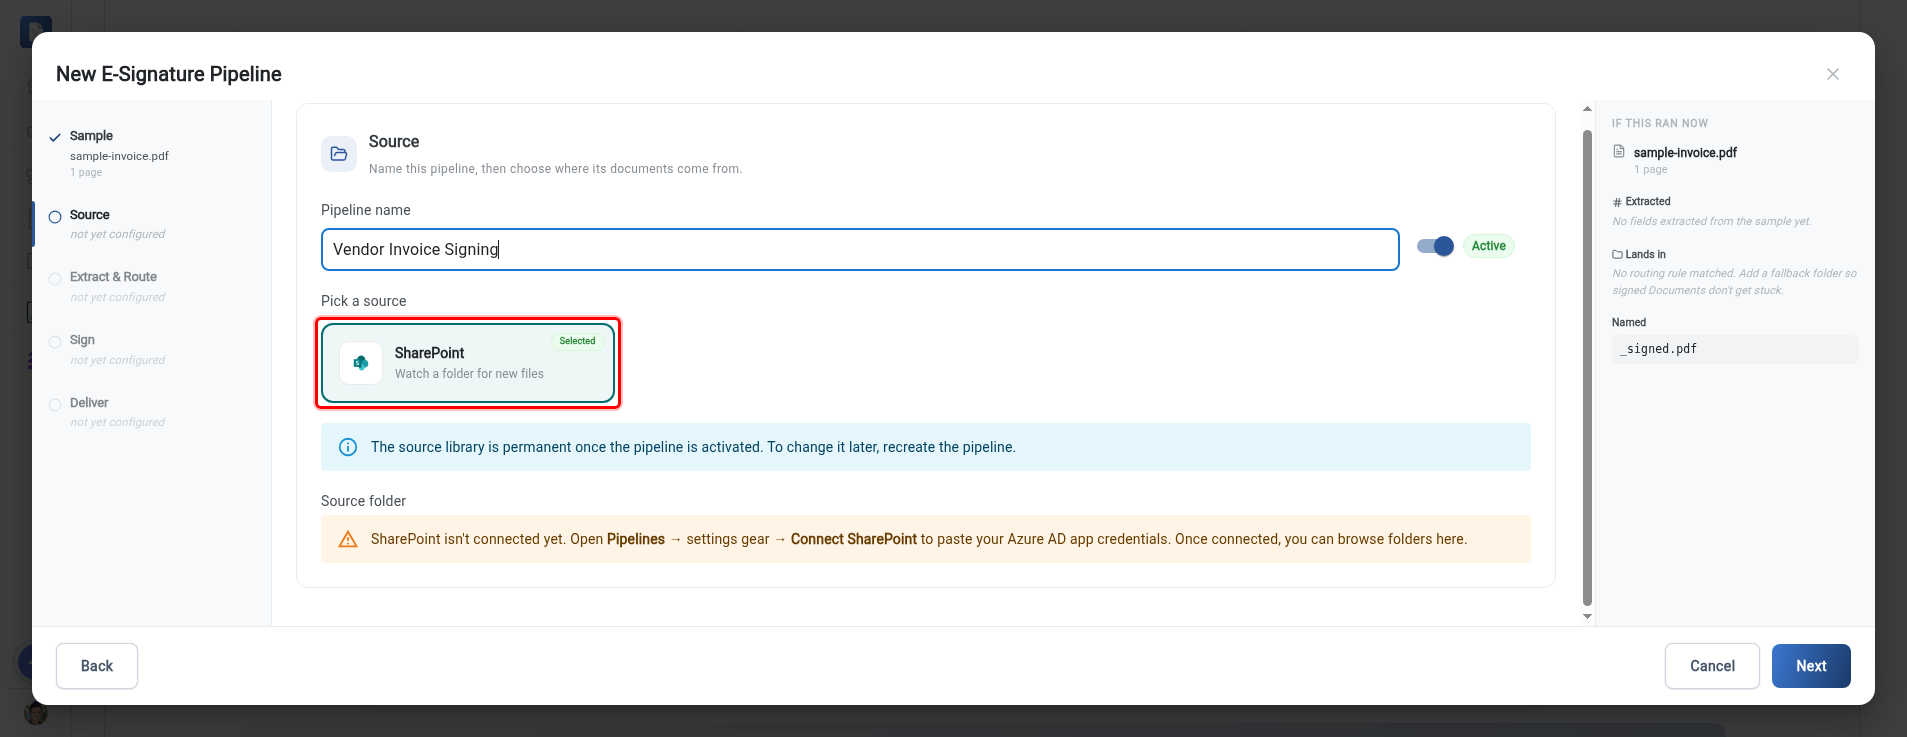
Create a library used only for this pipeline's intake. That keeps unrelated files from being picked up and processed by mistake.
Move Processed Files to a Sent Folder (Optional)
Turn on Move files to a Sent folder once sent for signing to keep your intake library tidy. As soon as a document is sent for signing, its original moves out of the intake library into a Sent folder you choose. From then on, the intake library only ever shows what still needs sending.
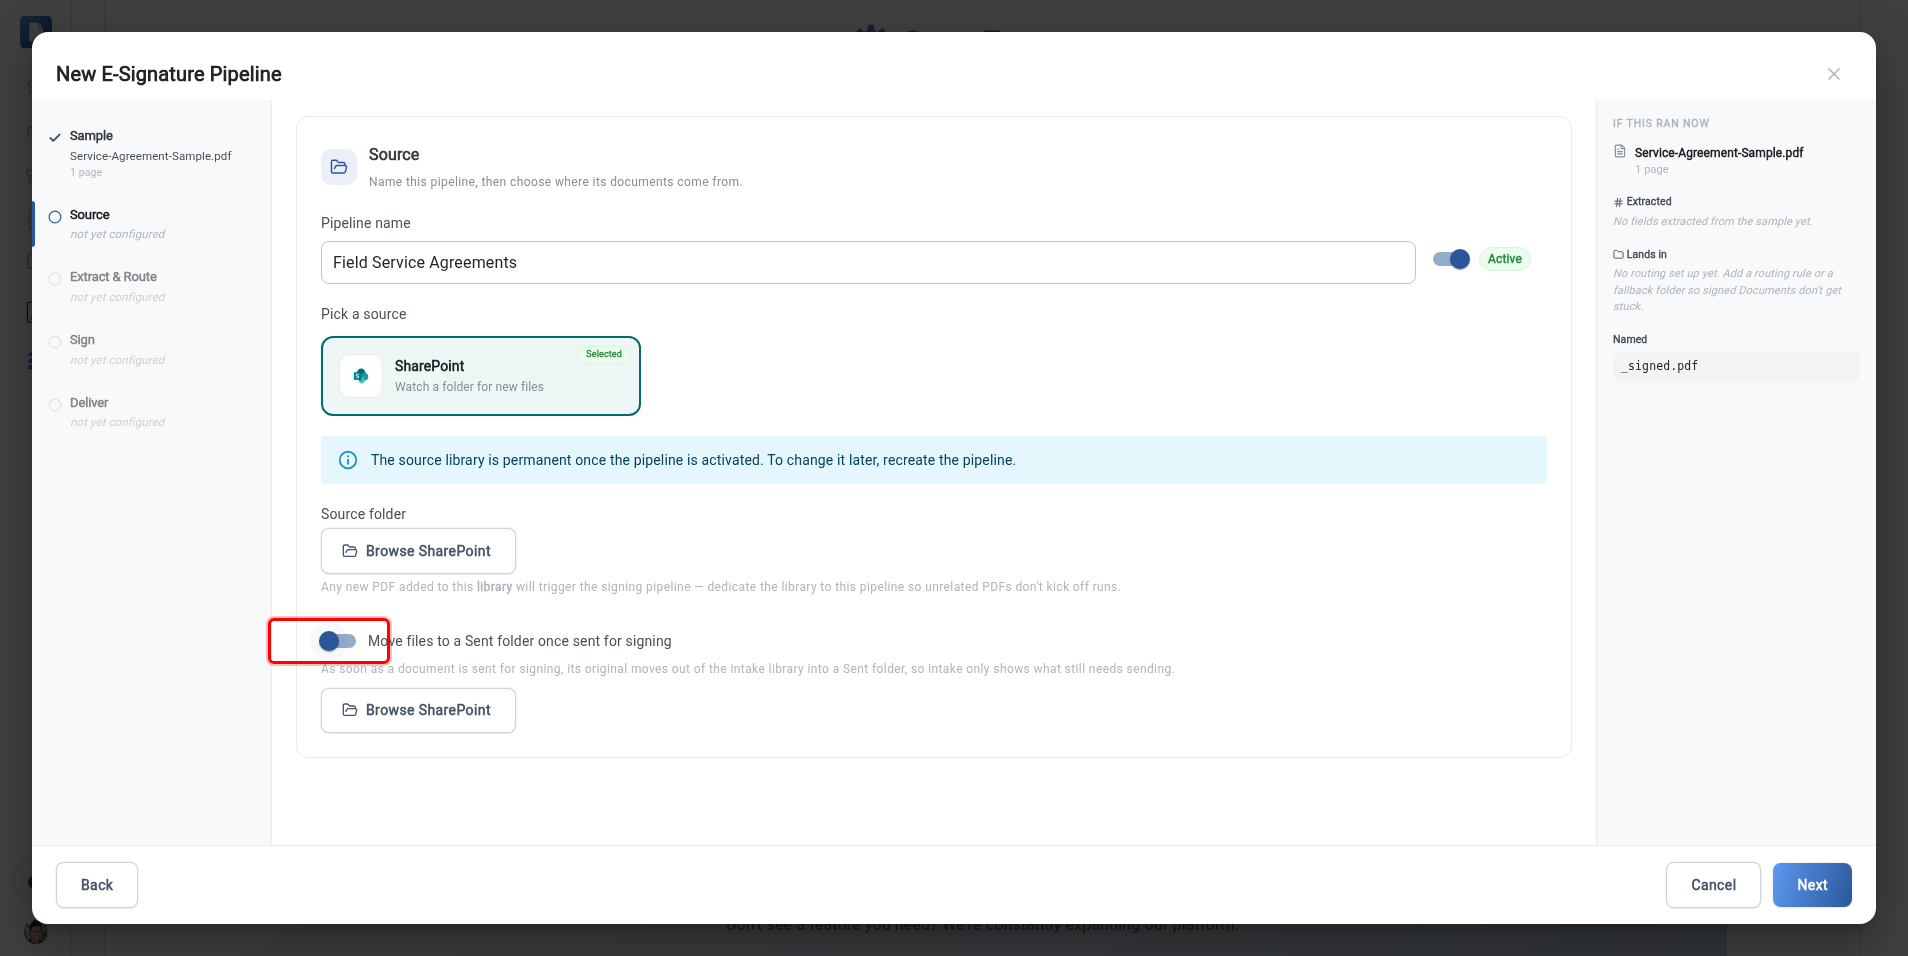
The Sent folder must be a different folder from the intake library. If they were the same, moving a file back into the watched library would trigger the pipeline again.
Step 3: Extract & Route
This step has three sections, matching the wizard: Route each Document, Also extract, and Signature Placement. The first two are optional; signature placement is required.
- Route each Document (optional): send documents that match certain text to different destination folders. For example, route anything containing "West Region" to one folder and "East Region" to another, each with its own Pick Folder. Anything that matches no rule lands in the default destination folder you'll choose in Step 5. Turn on Required, fail if nothing matches only if a document that matches no rule should be treated as an error instead.
- Also extract (optional): pull additional values out of each PDF, such as a customer code, a date, an email, or an amount. Extracted values can drive filenames, signer lookup, and routing. See Field Extraction for the details and examples.
- Signature Placement (required): click Place Fields to open the placement tool, then pick a field type and click on the sample to drop signature, date, initial, and other fields. You must place at least one signature field before you can continue. TurboDocx pins each field to the same spot on every document the pipeline processes. See Field Placement for all the field types and details.
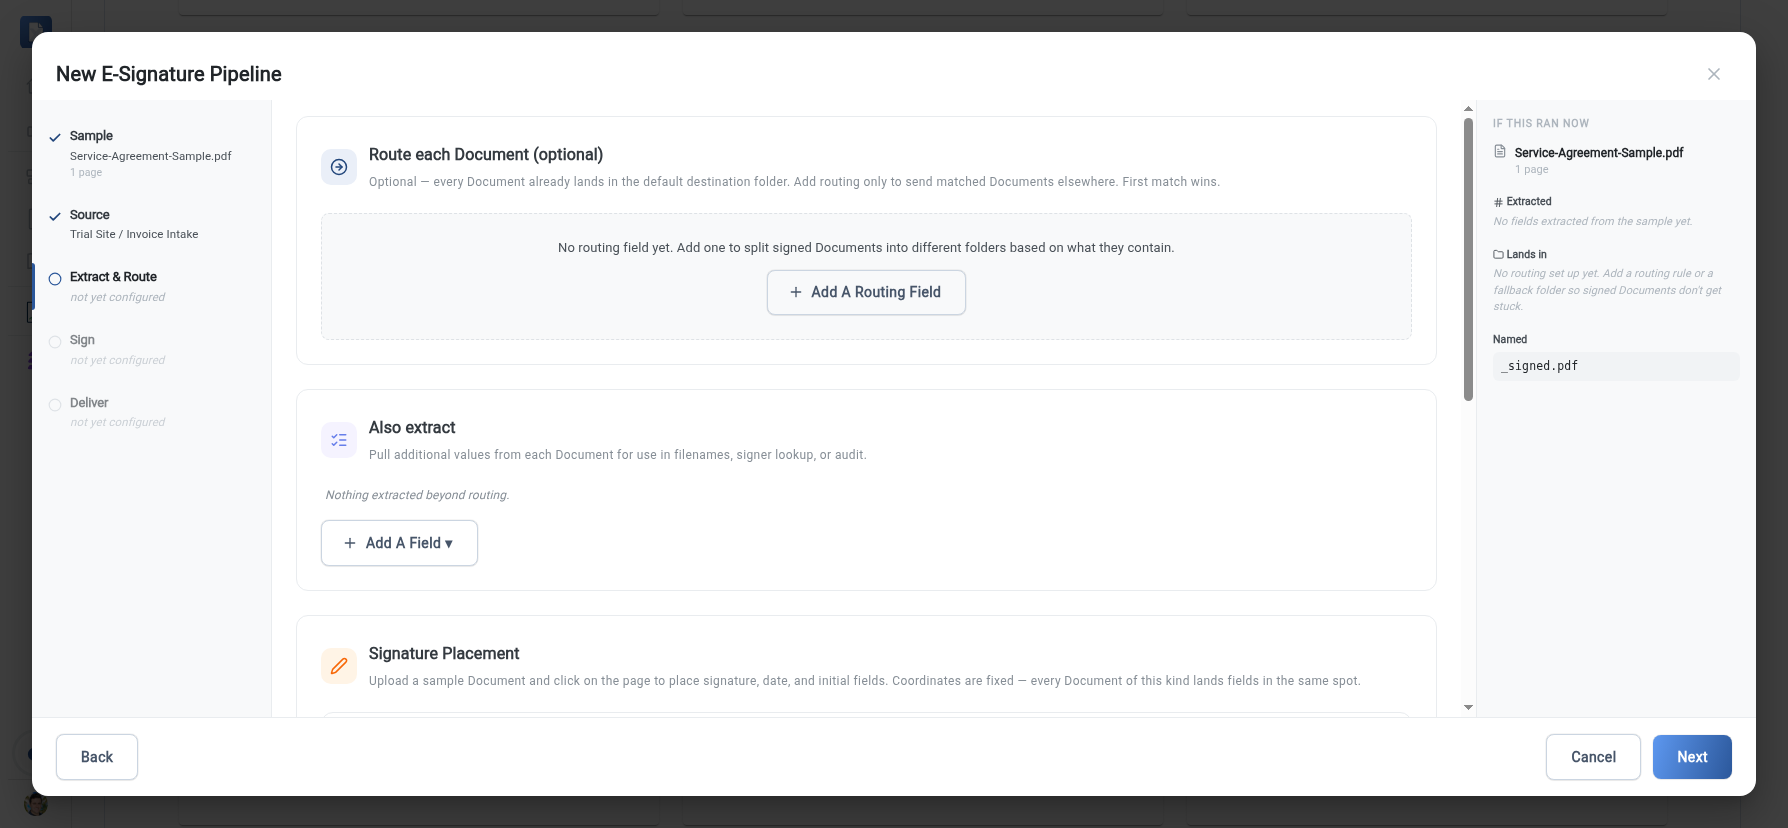
If every document should land in the same place, skip routing and everything goes to the default destination folder. You must still place at least one signature field before you can continue.
Step 4: Signers (the "Sign" step)
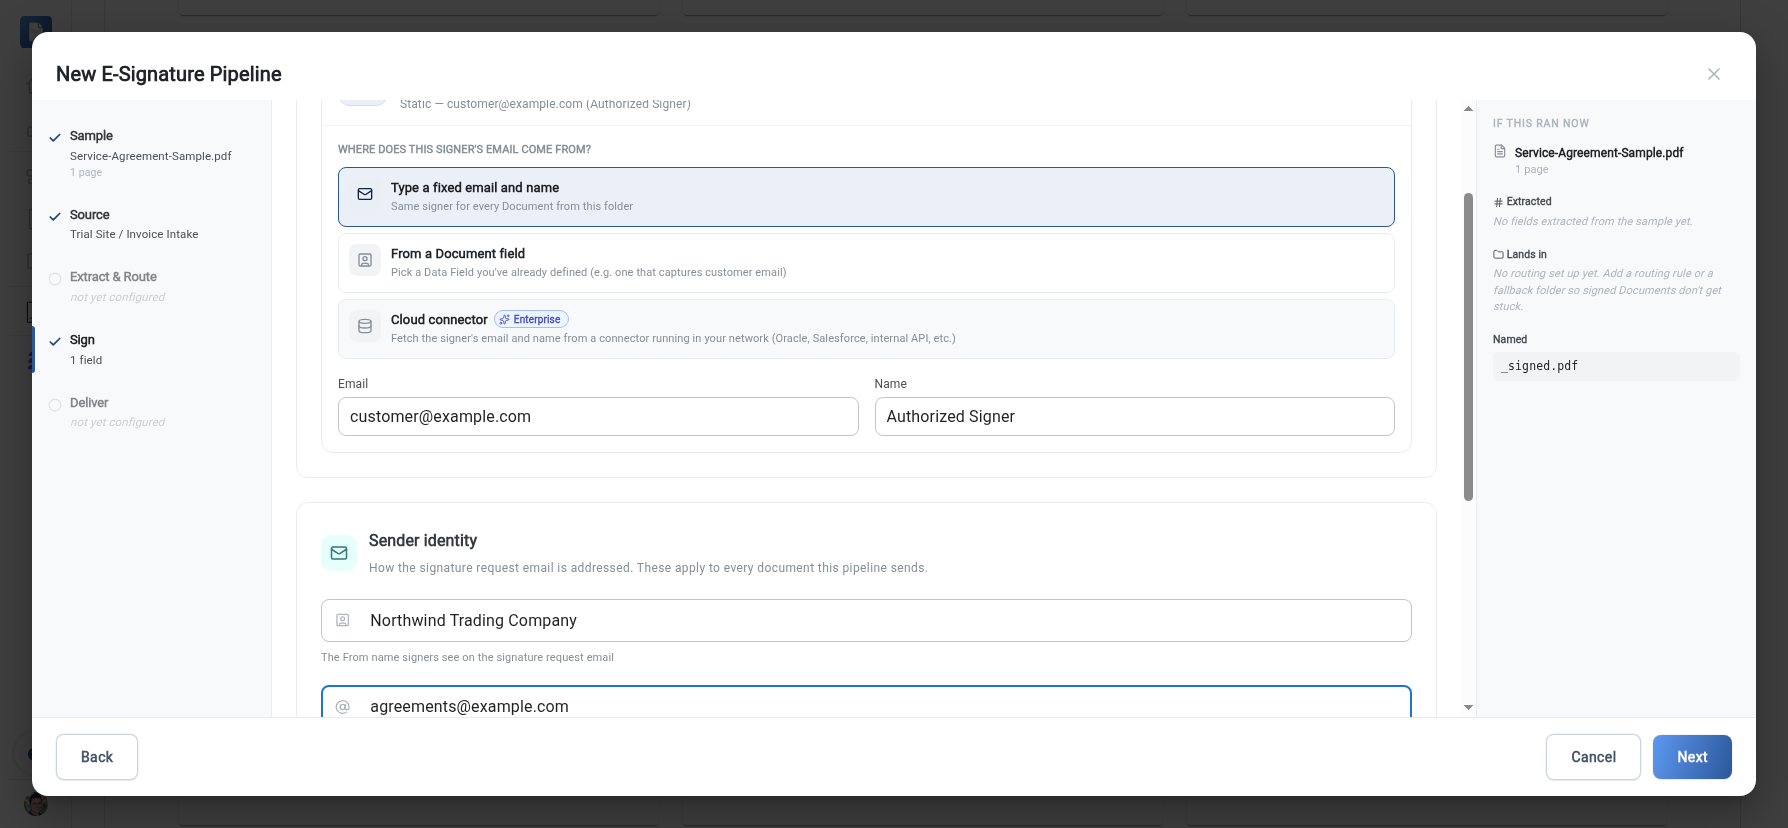
Tell the pipeline who should sign each document. Choose how the signer is resolved:
- Static signer: the same person signs every document that flows through this pipeline.
- An extracted field: use a value the pipeline read from the document itself (for example, an email address found in the PDF) to determine the signer per document.
- A Cloud connector (Enterprise): look the signer up in one of your own systems, such as an internal database or API. See Cloud Connectors for how this works.
Then set the sender identity recipients will see on the signature email:
- Sender name: the name that appears as the sender of the signature request.
- Reply-to email: the address recipients reach if they reply to the signature email.
Recipients are more likely to trust and act on an email when the sender name and reply-to address clearly identify your organization.
What Signers See (Optional)
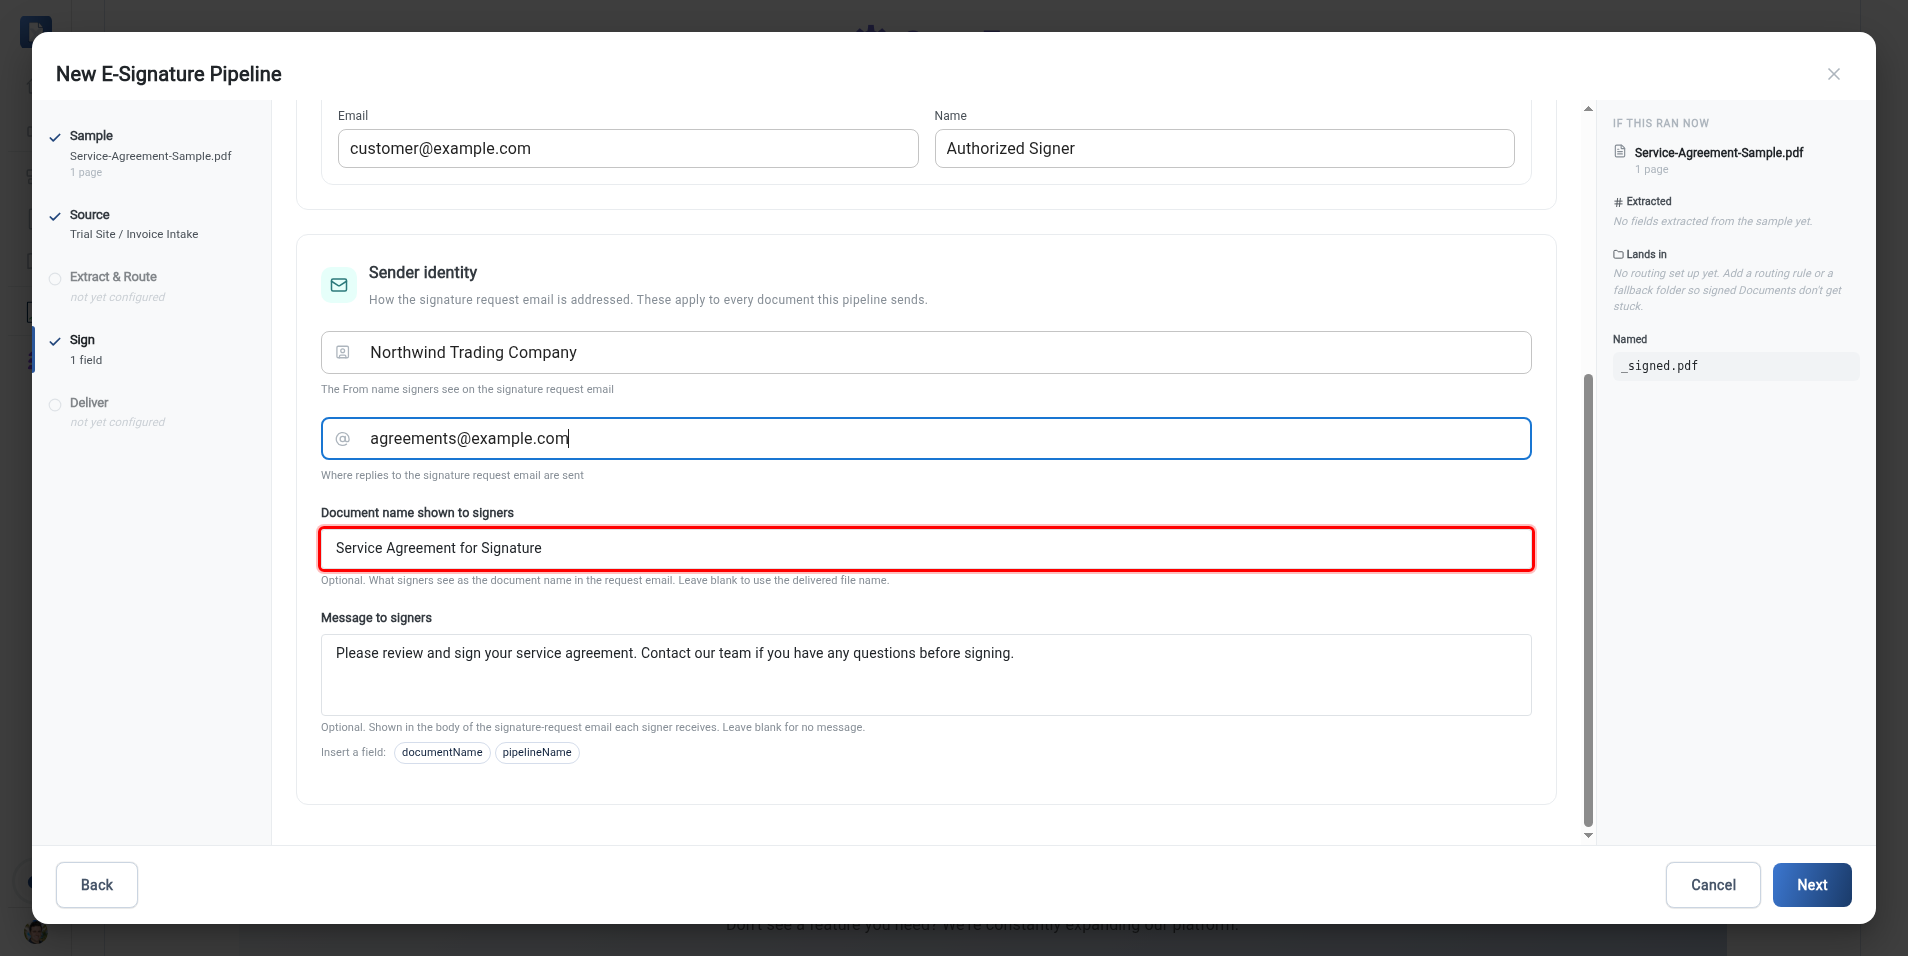
Two optional fields control how the signature request appears to each signer:
- Document name shown to signers: the name signers see for the document in the request email. Leave it blank to use the delivered file name. This is useful when the source file name is a code or an ID that wouldn't mean anything to the signer.
- Message to signers: a short note shown in the body of each signer's request email. Leave it blank for no message.
Both fields accept insert-field chips, so you can drop in values like the document name or the pipeline name and have them fill in for each document.
Step 5: Destination & Review (the "Deliver" step)
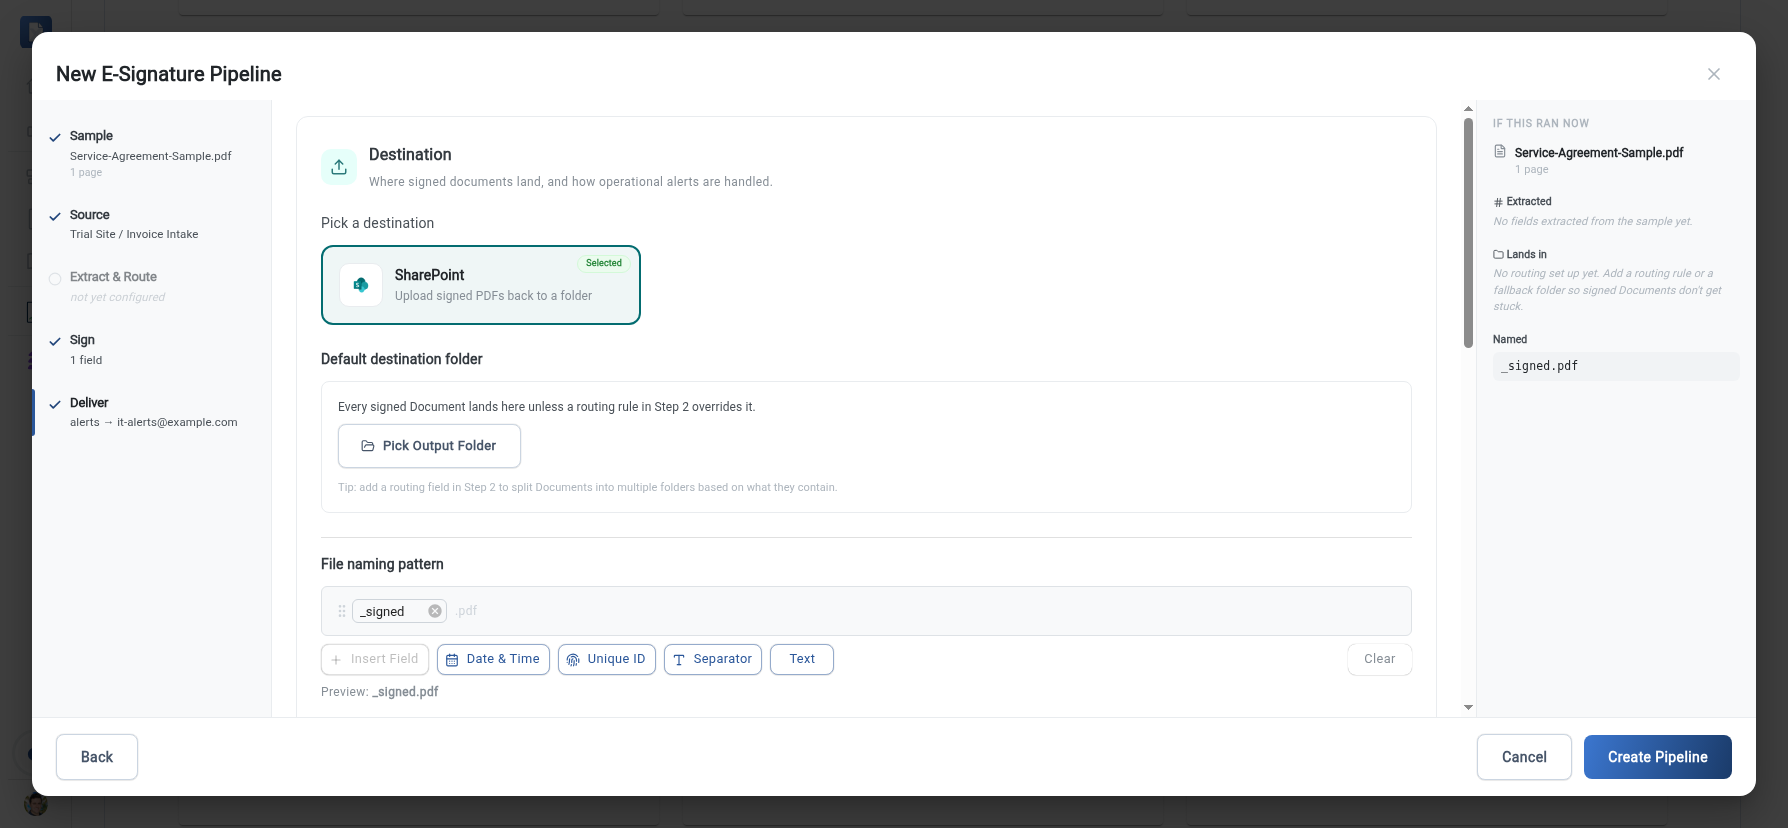
The final step decides where finished documents go and lets you review everything before saving. When everything looks right, click Create Pipeline to save and activate it.
- Default destination folder: the fallback folder where signed PDFs are filed. Each Step 2 routing rule can send matches to its own folder; anything that matches no rule lands here.
- Filename pattern: how each signed file is named. You can build the name from extracted values (for example, a customer code or date) so files are easy to find later.
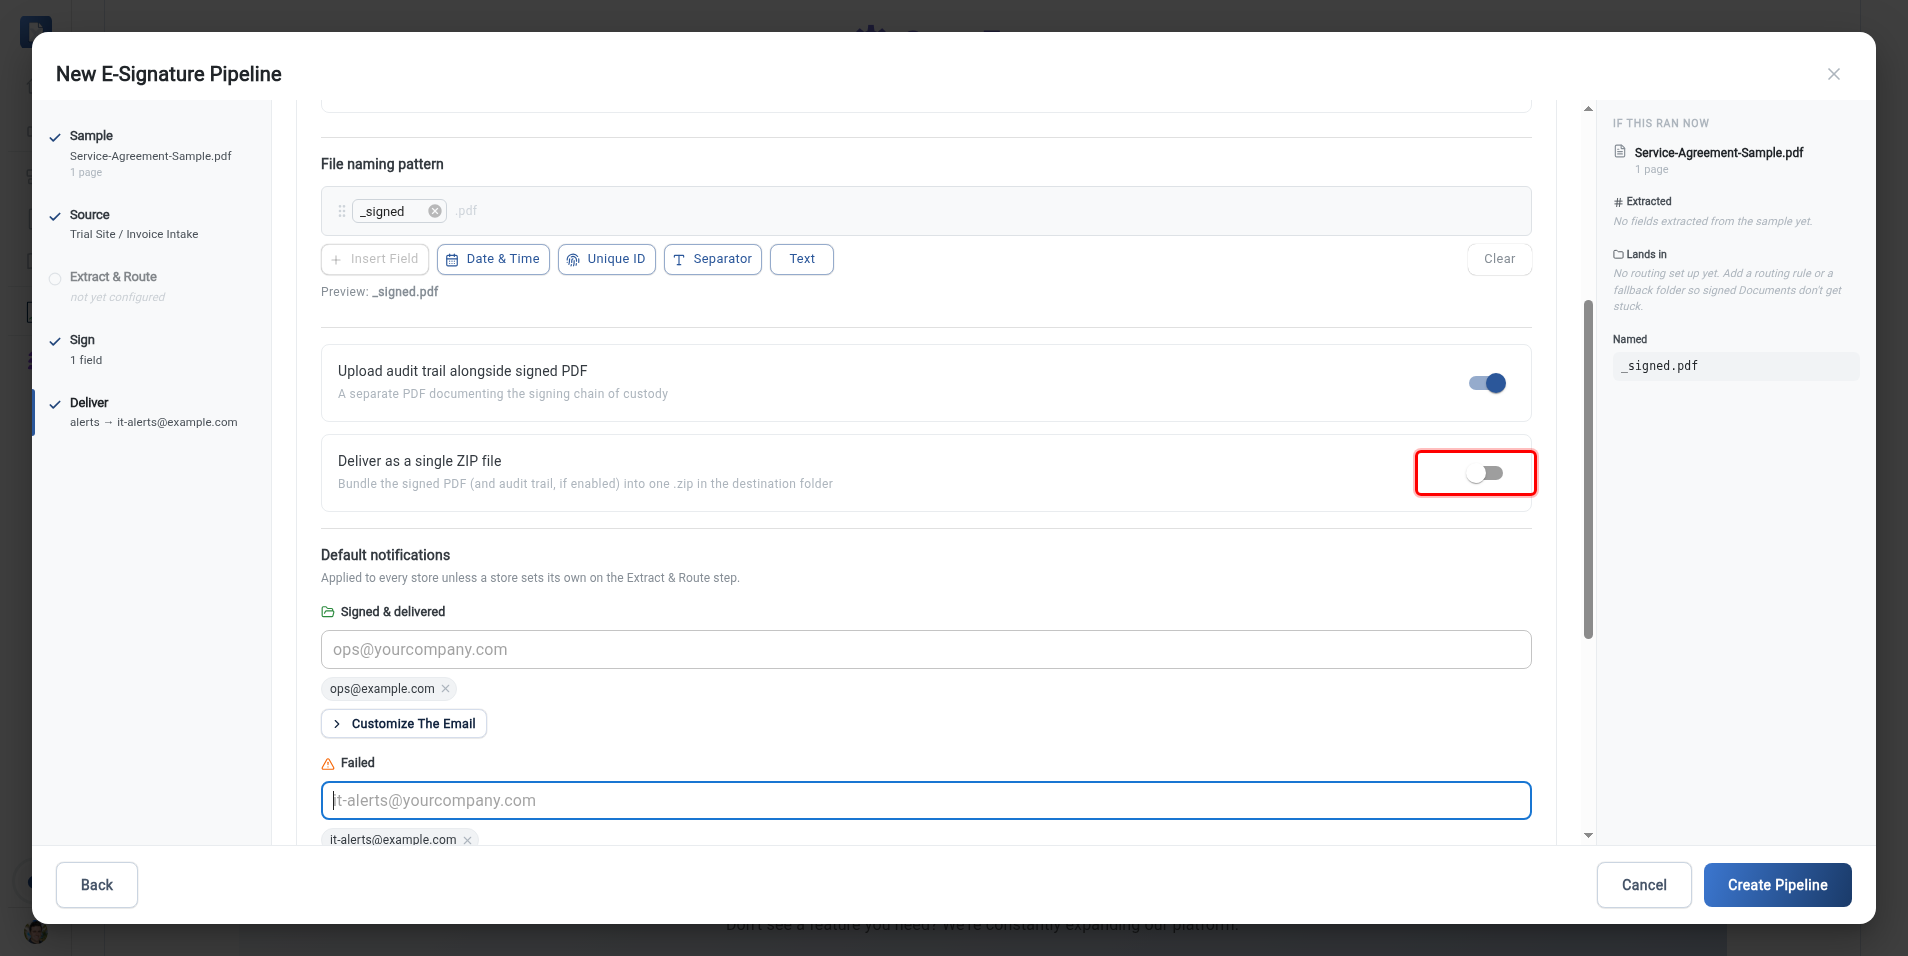
- Audit-trail upload: toggle on to file the signing audit trail (a separate PDF documenting the signing chain of custody) alongside each signed PDF.
- Deliver as a single ZIP file: toggle on to bundle the signed PDF (and the audit trail, if enabled) into one
.zipin the destination folder, instead of filing them as separate files. - Notifications: set who is emailed when a document is signed and delivered, and who is alerted when one fails. A failure recipient is required, so problems never go unnoticed. See Pipeline Notifications for default recipients, per-store overrides (a "store" is one routing rule), and how to customize the completion email.
- Review and save: confirm the source, extraction, signer, and destination settings, then save to activate the pipeline.
To file everything as one archive instead of separate files, turn on Deliver as a single ZIP file.
You're Live 🎉
Once saved, the pipeline starts watching its intake library. From now on, every PDF dropped there is read, signed, and filed automatically, and you'll be alerted by email if anything needs attention.
What's Next?
- Pipeline Notifications: choose who is alerted on success and failure, and customize the completion email.
- Field Extraction: pull data out of each document with patterns.
- Field Placement: position signature and form fields on the sample.
- Cloud Connectors: resolve signers from your own internal systems.