How to Configure One-Time Passcode (OTP)
A one-time passcode (OTP) verifies a signer's identity before they can open your document. The signer receives a short code by email or text message and enters it on the signing page.
This guide covers requiring a passcode, choosing the default channel, connecting an SMS provider, and setting up delivery-failure alerts.
Before you start
- Who: you need an admin account for your organization.
- Where: everything lives on the One-time passcode tab of the Identity Verification section in your E-Signature settings.
- Saving: changes on this tab save as you make them. The one exception is the SMS provider form, which needs Save SMS provider.
To reach the tab:
- Go to Settings > Features and integrations > Signatures card > Configure E-Signature to open E-Signature Settings.
- Click Identity Verification.
- Stay on the One-time passcode tab.
For screenshots of these first clicks, see How to Enable Embedded Signing, Steps 1-2.
These settings decide when signers are verified by default and which channels are available.
The default applies to signatures created in the app and to documents sent through the API or SDK. Automated sends (Pipelines, bulk signature sending, TurboQuote, and the Wrike integration) are exempt. They verify a recipient only when the request asks for it.
At a glance
| Step | What you do | Needed for |
|---|---|---|
| 1 | Turn on Enable identity verification | Everyone |
| 2 | Choose when to verify signers | Everyone |
| 3 | Use email | Email only (no setup) |
| 4 | Allow SMS | SMS only |
| 5 | Connect your SMS provider | SMS only |
| 6 | Set up delivery-failure alerts | Optional (on by default) |
| 7 | Understand wrong-code alerts and lockout | Reference |
Step 1: Turn on Enable identity verification
On the One-time passcode tab, turn on Enable identity verification.
The rest of the passcode settings stay hidden until this is on, so turn it on first.
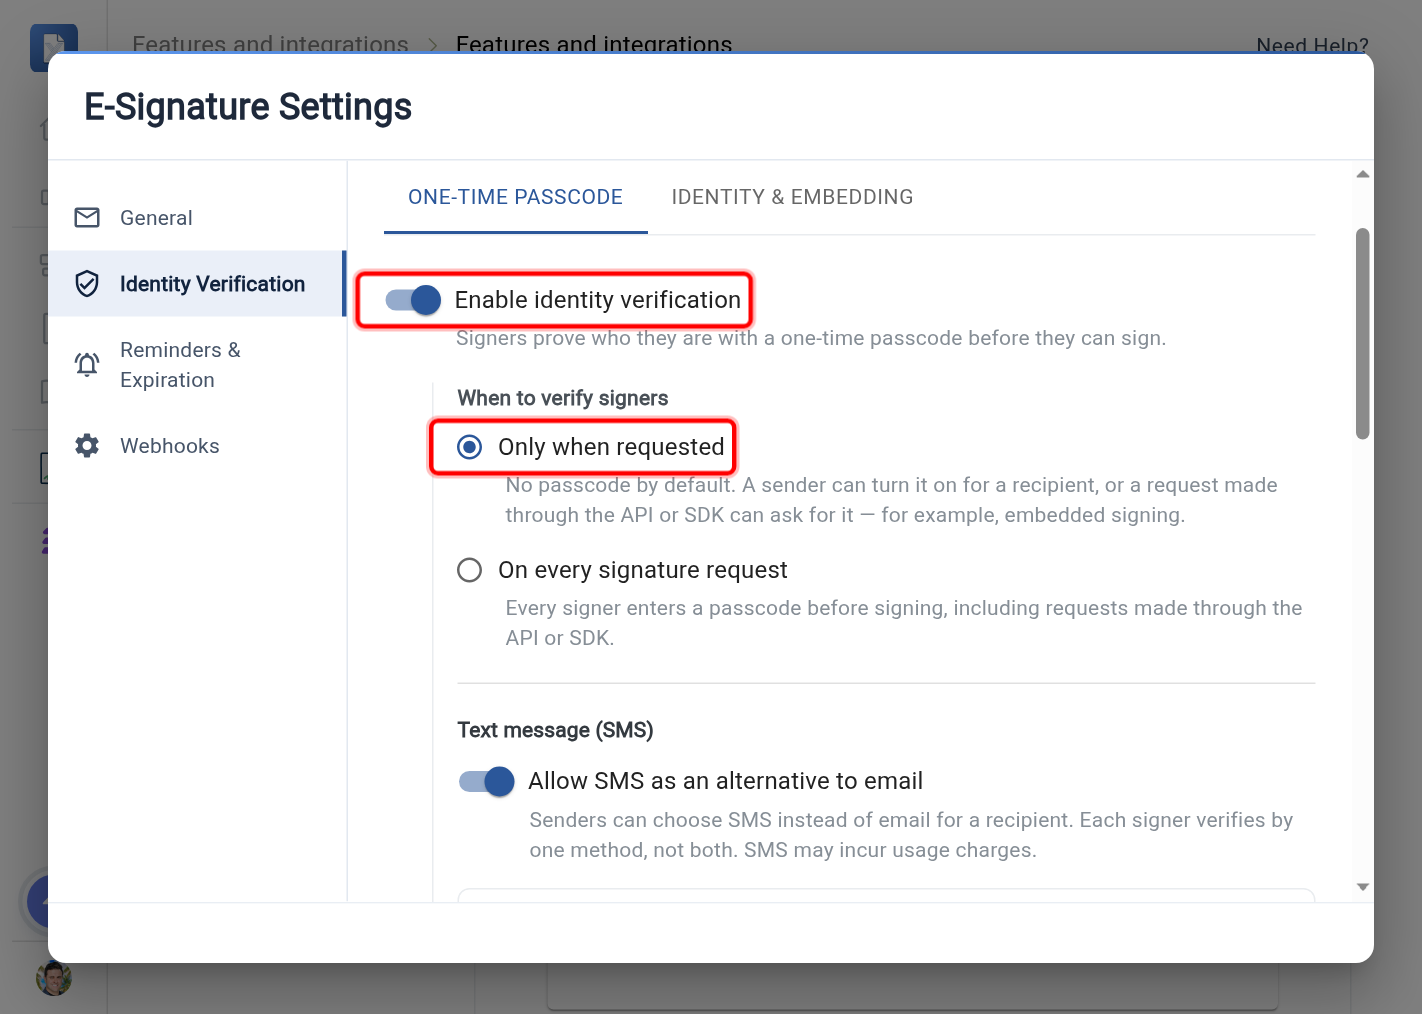
Turning it on makes passcode verification available. Whether every signer gets a passcode depends on the choice in Step 2.
Step 2: Choose when to verify signers
Under When to verify signers, choose one:
| Option | What happens |
|---|---|
| Only when requested (the default) | No passcode by default. A sender can turn it on for a recipient, and a request made through the API or SDK (for example, embedded signing) can ask for it. This option is never locked, so a request can always turn verification on. |
| On every signature request | Every signer enters a passcode before signing, including on documents sent through the API or SDK. |
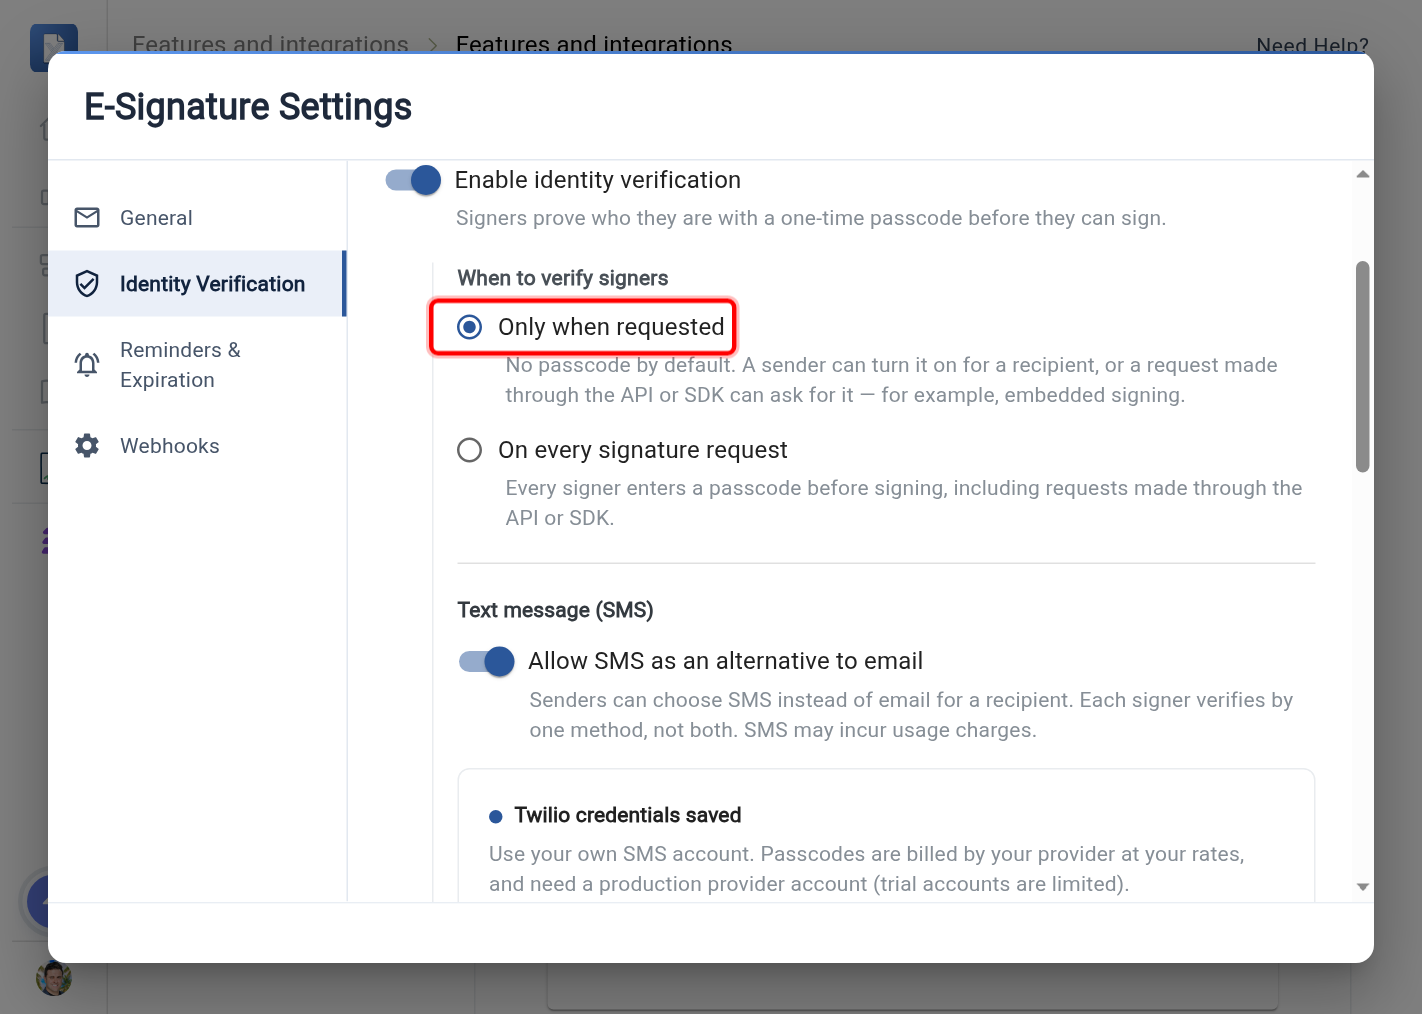
If you choose On every signature request
Two more settings appear.
Method sets how the passcode reaches signers:
- Email sends the passcode to the signer's email address. Email is available on every plan.
- SMS texts the passcode to the signer's mobile number. SMS requires a connected provider and is available on Pro and Enterprise plans (see Steps 4-5).
SMS cannot be selected until SMS is turned on and provider credentials are saved (Steps 4-5). Check that the provider status reads Connected to Twilio (or RingCentral) before you rely on it.
Let senders change the method per recipient is off by default.
- Off locks the method. Every request uses the method above, and an API or SDK request that sets a different channel for a recipient is rejected with
OtpOverrideNotAllowed. - On lets a sender pick another method, or no verification, for a recipient.
This setting applies to the email channel too, so it is not tied to your SMS plan.
If only the signers in your own app should verify, keep Only when requested. Turn on SMS and connect a provider (Steps 4-5), then have your integration request SMS on each recipient it embeds.
Other signature requests, including Pipelines, stay passcode-free. See Verify only your embedded signers by SMS.
Check the result from your integration
Your integration can read the result with GET /turbosign/embedded-signing-settings:
defaultChannelisnone,email, orsms.allowChannelOverridetells it whether a different channel is accepted.
See The organization default for details.
Step 3: Use email (the simplest path)
Email passcodes work on every plan and need no setup. If Email is your method, you are done: signers receive their passcode by email.
Next, continue to Step 6 to set up delivery-failure alerts, or skip to What the signer sees.
Step 4: Allow SMS as an alternative to email
To let signers verify by text message, turn on Allow SMS as an alternative to email under Text message (SMS).
Senders can then choose SMS instead of email for a recipient. Each signer verifies by one method, not both, and SMS may incur usage charges.
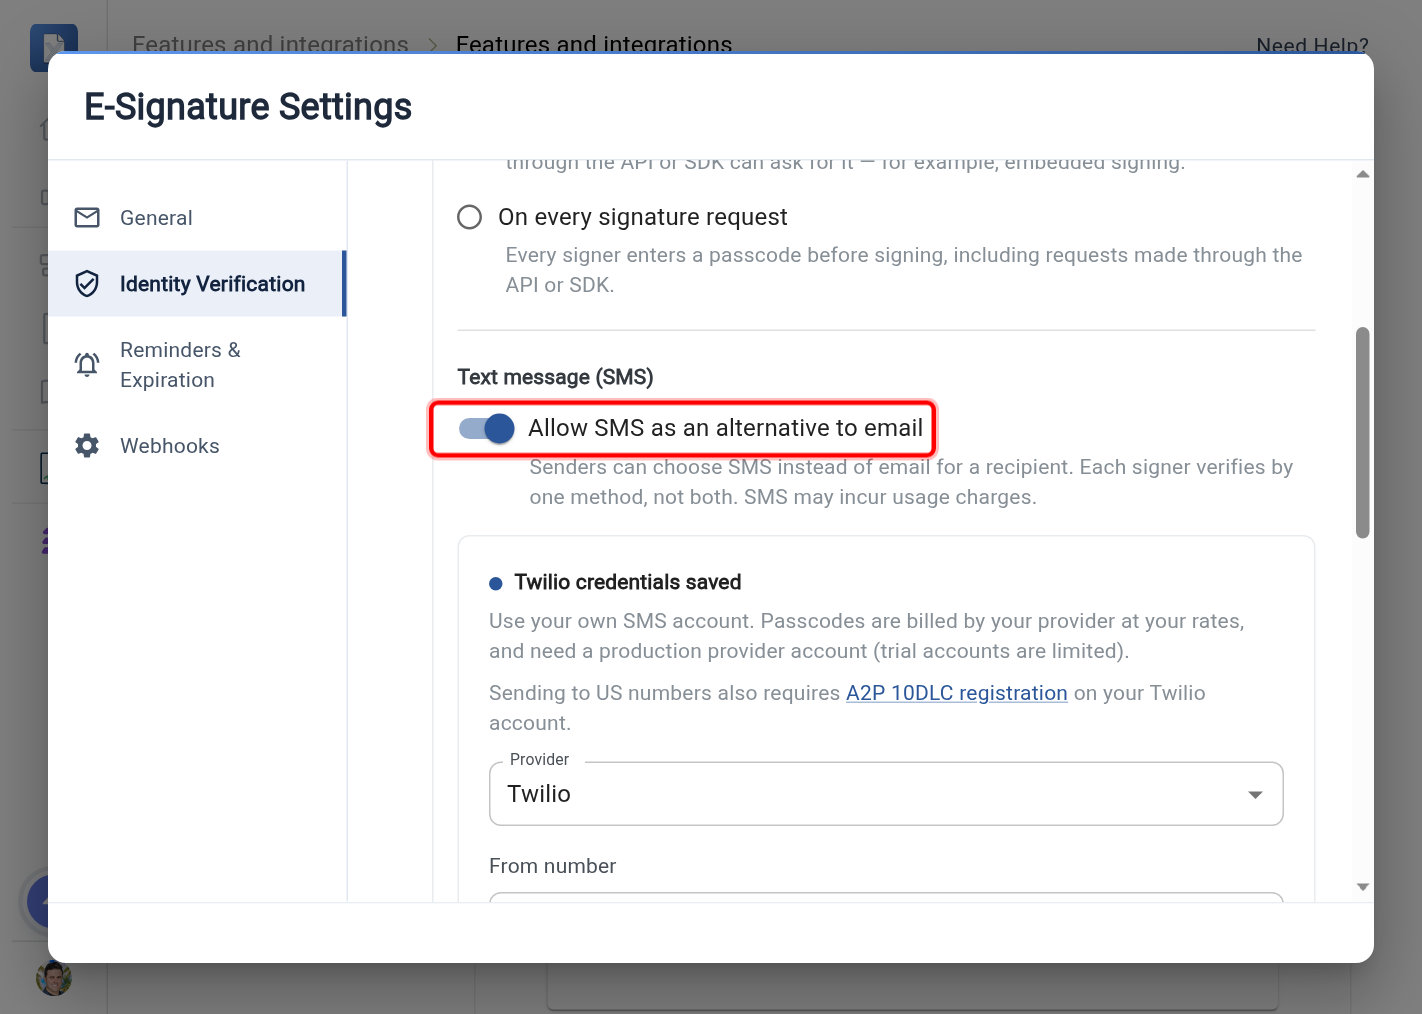
SMS verification is available on Pro and Enterprise plans. If your plan does not include it, the toggle is disabled and an Upgrade to unlock SMS verification card appears.
Signer mobile numbers
SMS verification needs a mobile number for each signer you verify this way. You enter it when you add the recipient to a signature request.
- The number must include the country code.
- The number must be one that can exist. A well-formed number that cannot exist is rejected when the request is created (
OtpPhoneInvalid), not later when the signer asks for a code.
Step 5: Connect your SMS provider
TurboSign sends SMS passcodes through your own SMS account, so your provider bills passcodes at your rates. Connect the provider under Text message (SMS) once the toggle from Step 4 is on.
- Choose your Provider: Twilio or RingCentral.
- Enter the From number in international format with the country code, for example
+13055551234. - Enter your provider credentials:
- Twilio: Account SID and Auth Token.
- RingCentral: Server URL, Client ID, Client Secret, and JWT. RingCentral needs some setup on its side first, so follow Set up RingCentral below.
- Click Save SMS provider.
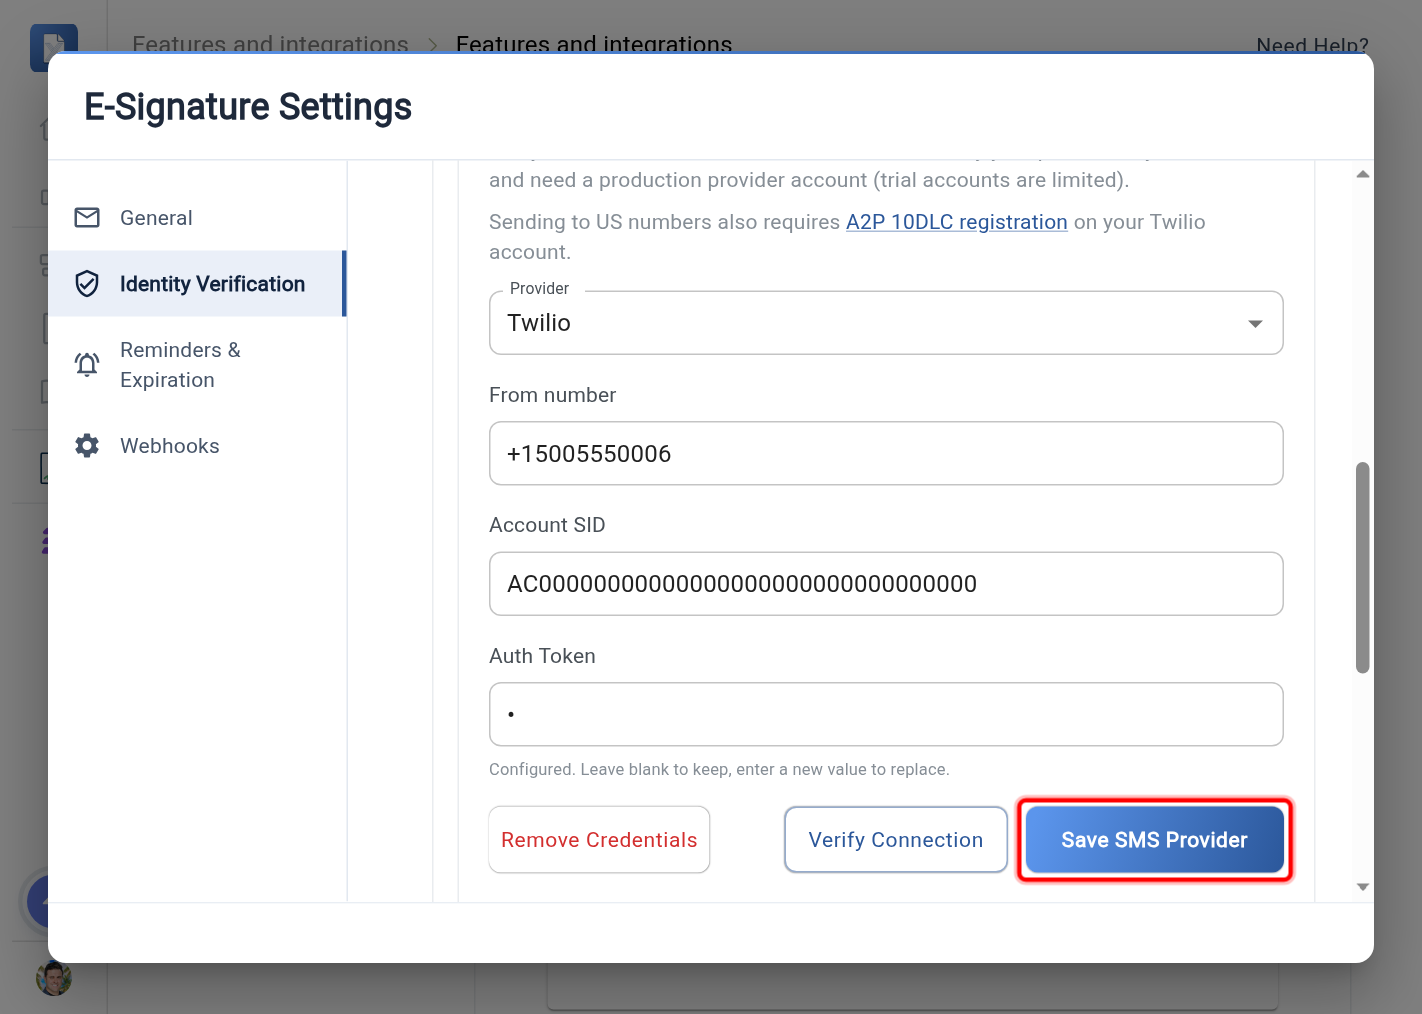
Confirm the connection
When you click Save SMS provider, TurboSign checks the account straight away. The check is free and no text is sent.
- Check the status at the top of the box. It should read Connected to Twilio.
- If it reads Twilio rejected these credentials, read the alert below the fields for the provider's reason.
- Use Send a test message to text a number you control and confirm delivery end to end.
Verify connection re-runs the check at any time.
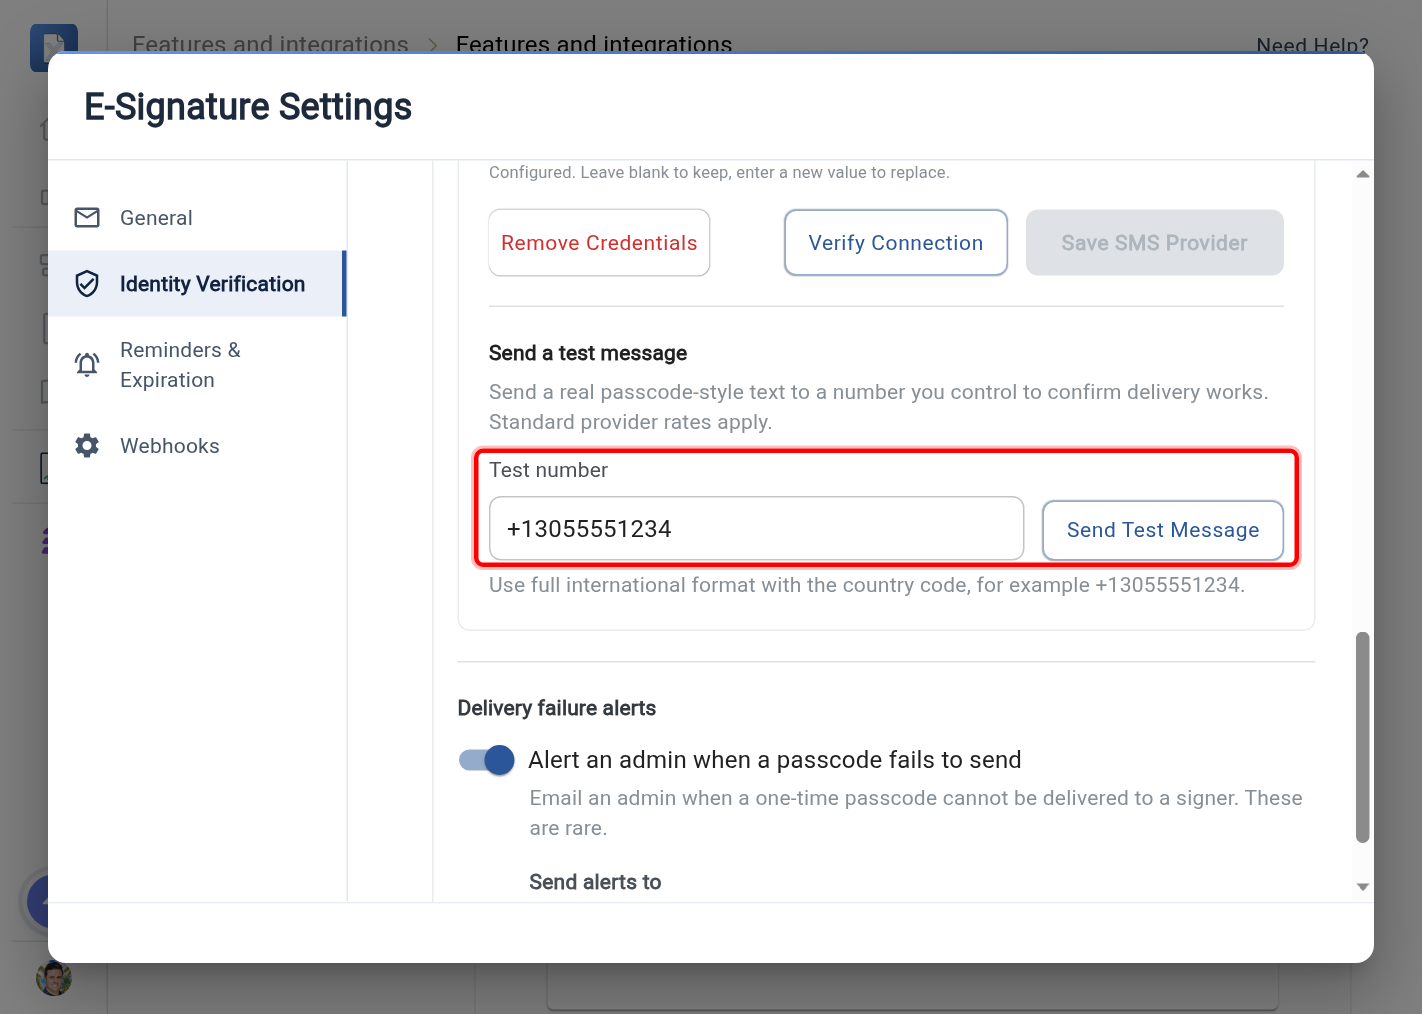
Provider status
The status at the top of the box is one of these. With RingCentral, the status names RingCentral instead of Twilio.
| Status (Twilio) | Status (RingCentral) | Meaning |
|---|---|---|
| SMS provider not connected | SMS provider not connected | No credentials are saved yet. |
| Twilio credentials saved | RingCentral credentials saved | Credentials are saved but have not been checked in this session. |
| Connected to Twilio | Connected to RingCentral | The provider accepted the credentials. This is the state you want. |
| Twilio rejected these credentials | RingCentral rejected these credentials | Fix the credentials and save again. |
SMS passcodes use a custom message body, which trial accounts (for example a Twilio trial) block. Use a paid, production provider account.
Sending to US numbers also requires A2P 10DLC registration on your provider account. TurboSign links to your provider's registration flow next to the credential fields.
The SMS method (Step 2) stays disabled until SMS is turned on, your plan includes it, and provider credentials are saved.
Saving does not prove the credentials work, so check that the status reads Connected to Twilio (or RingCentral). If you later remove the provider credentials while SMS is the method, the method switches to Email, so signers are still verified on every request through a channel that can deliver.
Set up RingCentral
With RingCentral, you bring your own RingCentral app and a JWT credential. Do these steps in the RingCentral Developer Console first, then enter the details in TurboSign.
1. Create a RingCentral app
- In the Developer Console, create a REST API app.
- In the app's Auth section, choose the JWT auth flow.
- Add the SMS permission to the app.
- Copy the app's Client ID and Client Secret. You enter both in TurboSign.
2. Create a JWT credential
- Sign in to the Developer Console as the RingCentral user who owns the number you will send from. The JWT acts as this user, and texts are sent from this user's numbers.
- Go to Credentials and create a JWT credential. We recommend restricting it to the Client ID of the app from the previous step.
- Choose an expiration date, or none. RingCentral JWTs never expire unless you set a date. If you set one, TurboSign shows it in the form (see Check when your JWT expires).
- Copy the JWT. You enter it in TurboSign.
3. Choose the From number
The From number must be:
- In international (E.164) format with the country code, for example
+13055551234. - A number that belongs to the user from the previous step and has the SmsSender feature in RingCentral.
- For US and Canada local numbers, registered to an approved 10DLC (TCR) brand and campaign before it can send. This applies to developer (sandbox) accounts too, and texts sent from a sandbox account carry a test watermark.
A number that only has the A2PSmsSender feature (RingCentral's high-volume SMS API) cannot send through TurboSign.
4. Enter the details in TurboSign
-
In the SMS provider form, choose RingCentral as the Provider.
-
Enter the From number from the previous step.
-
Enter the Server URL for the environment where you created the app and the JWT. Any other address is rejected when you save.
Environment Server URL Production https://platform.ringcentral.comSandbox https://platform.devtest.ringcentral.com -
Enter the Client ID, Client Secret, and JWT.
-
Click Save SMS provider. TurboSign checks the account straight away, without sending a text. The status at the top of the box should read Connected to RingCentral.
-
Use Send a test message to text a number you control and confirm delivery.
Check when your JWT expires
Each time you open the form, TurboSign shows when the saved JWT expires, under the JWT field. The JWT itself is never shown.
You see one of these:
| What you see | What it means |
|---|---|
| JWT expires on date, with a small calendar tile showing the date | Texts stop on that date until you save a new JWT. |
| An orange warning, JWT expires on date (in N days) | The date is 30 days away or less. Create a new JWT in RingCentral and save it in TurboSign before then. |
| A red This JWT expired on date | Text messages cannot be sent until you create a new JWT in RingCentral and save it in TurboSign. |
| No expiration set on this JWT. | It keeps working until it is revoked in RingCentral. |
| Couldn't read an expiration date from this JWT. | Check it in the RingCentral Developer Console. |
When you save a JWT that has an expiration date, the confirmation also tells you, for example SMS provider saved. Expiration detected on this JWT: JWT expires on date.
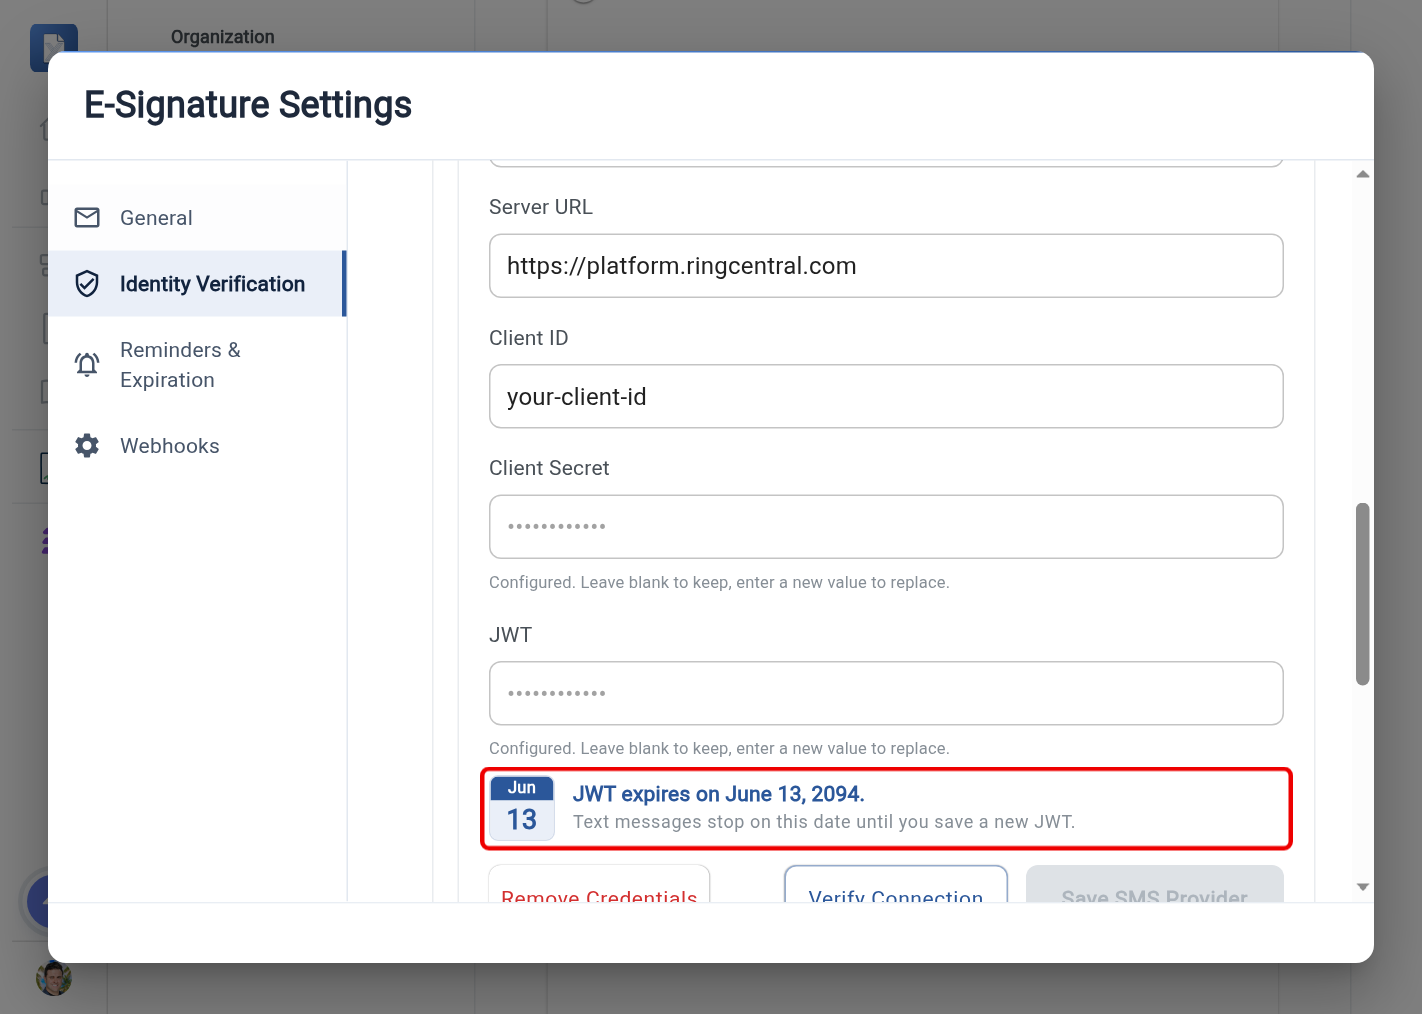
Create a new JWT in the Developer Console, paste it into the JWT field, and click Save SMS provider. Leave the other secret fields blank to keep their saved values.
Troubleshooting RingCentral
RingCentral rejects the credentials or reports "RingCentral auth failed". Check that:
- The Server URL matches where the app and JWT were created (sandbox or production).
- The app uses the JWT auth flow.
- The JWT is allowed for this app's Client ID.
The test message fails with a 403 error or MSG-242. The From number has one of these problems:
- It is missing the SmsSender feature.
- It is not on an approved 10DLC campaign.
- It does not belong to the user who created the JWT.
To check a number's features, call GET /restapi/v1.0/account/~/extension/~/phone-number with the RingCentral API (this needs the Read Accounts permission).
Step 6: Get alerted when a passcode cannot be delivered
Delivery-failure alerts email an admin when a one-time passcode cannot be delivered to a signer, so someone can step in for the blocked signer. These failures are rare.
Alerts are on by default. Turn off Alert an admin when a passcode fails to send if you do not want them.
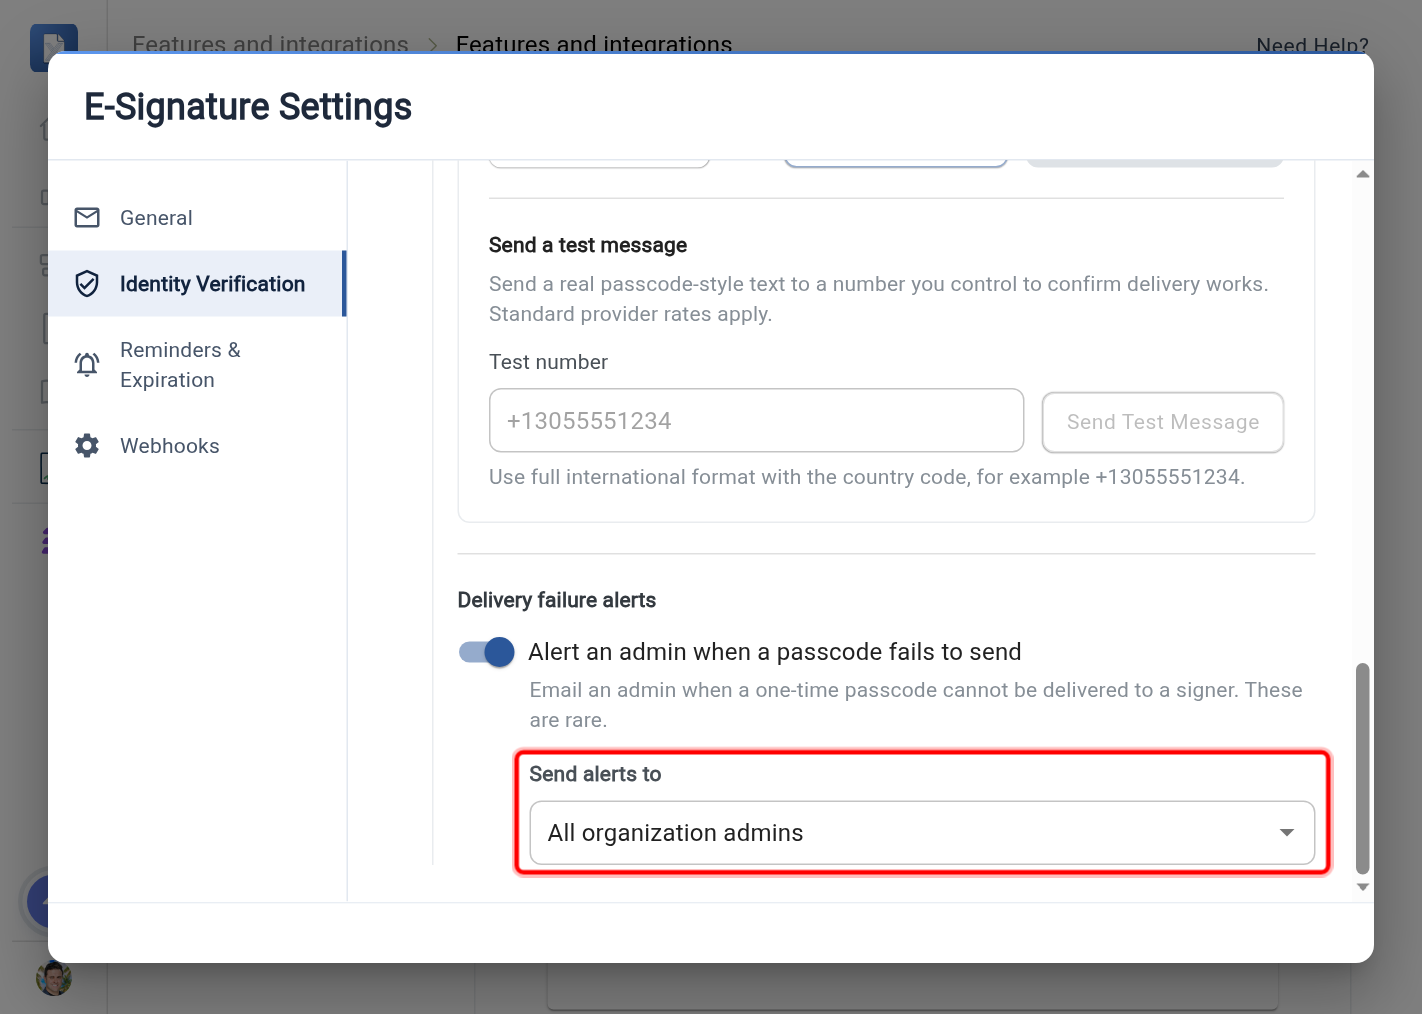
To choose who is notified, use Send alerts to:
- All organization admins: every admin receives the alert.
- Specific addresses: enter the exact addresses that should be alerted (for example
ops@example.com), one chip per address.
Step 7: Know what happens when a signer keeps entering the wrong code
Each passcode expires after 10 minutes and allows five wrong entries before the signer must request a new one. Wrong entries also add up across new codes:
| Wrong codes in total | What happens |
|---|---|
| 5 | The document's sender gets a "having trouble verifying" email, so they can check the signer's email address or phone number early. |
| 20 | The signer is locked out and the sender gets a "locked out" email. The signer cannot request or enter a code until the sender resends the signing request. |
To clear a lockout, the sender uses Resend Email in the document's menu (see Managing Your Signatures). Resending emails the signer a fresh link and clears the lock.
These alerts go to the sender of the document, not to the admins on the delivery-failure list.
What the signer sees
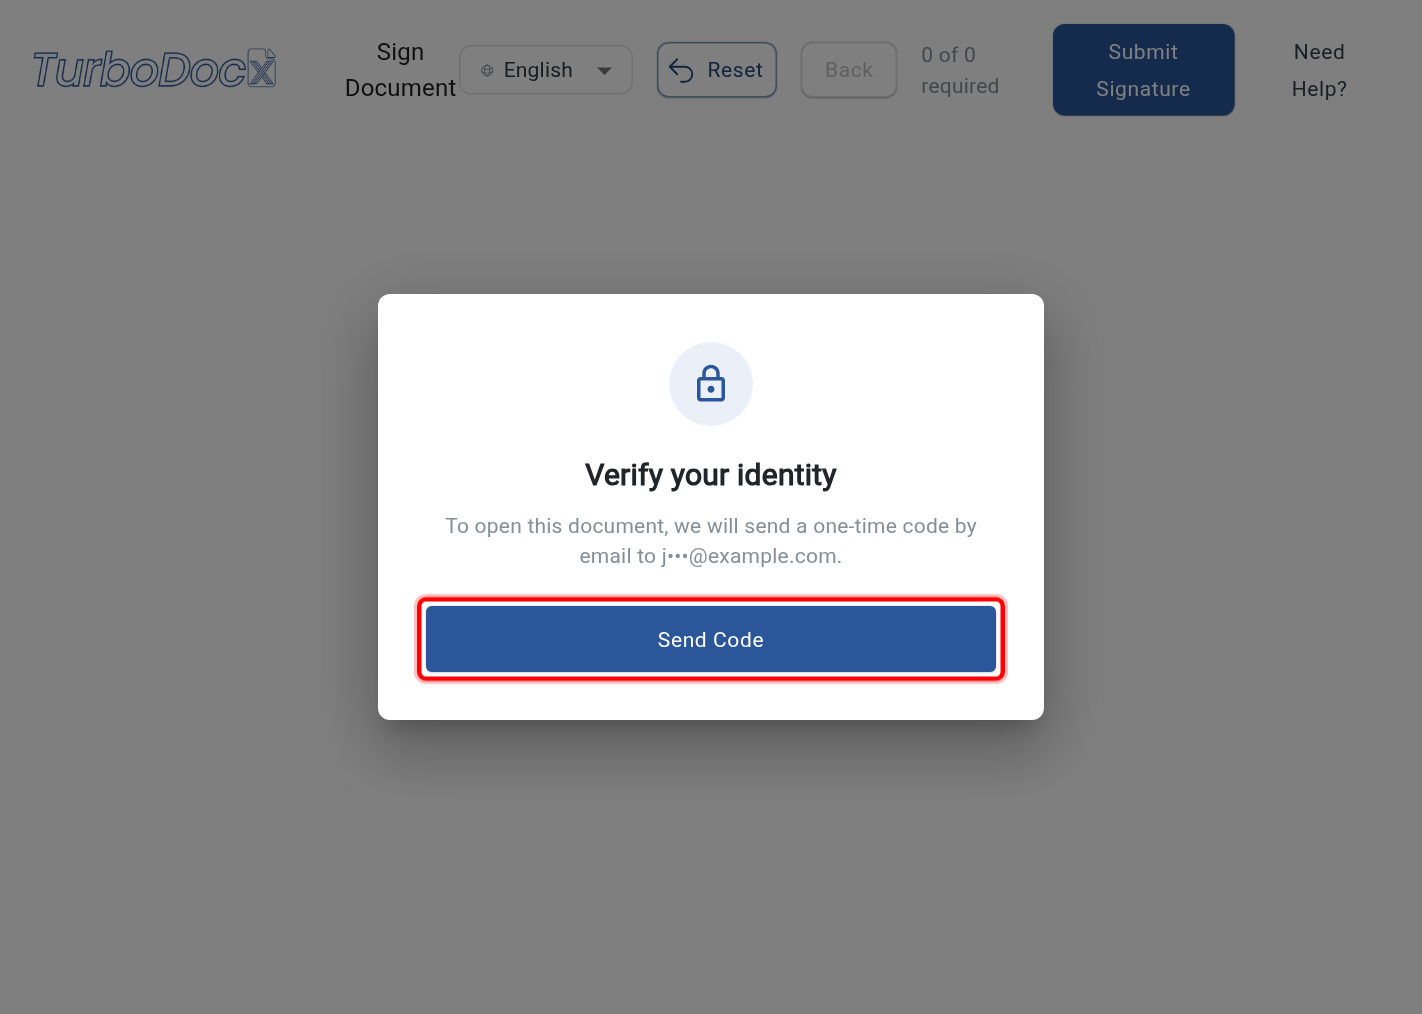
When a recipient requires a passcode, the signer meets the passcode gate on the signing page before the document loads.
- The signer clicks Send Code.
- They receive the one-time code by email (or SMS).
- They enter it and continue to the document.
What's next
- How to Enable Embedded Signing: turn on embedded signing, allow the origins that may embed the signing page, and understand the clickjacking and localhost rules.
- Embedded Signing and Identity Verification: request a signing URL, the three verification modes, and the SDK calls your backend makes.