How to Enable Embedded Signing
Embedded signing lets your application take a signer straight to a TurboSign signing page instead of sending signing-link emails, and verify each signer with a one-time passcode. Before your integration can request signing URLs (see Embedded Signing and Identity Verification), an organization admin turns the feature on in your E-Signature settings. This guide walks through every setting.
You need an admin account for your organization.
Step 1: Open your E-Signature settings
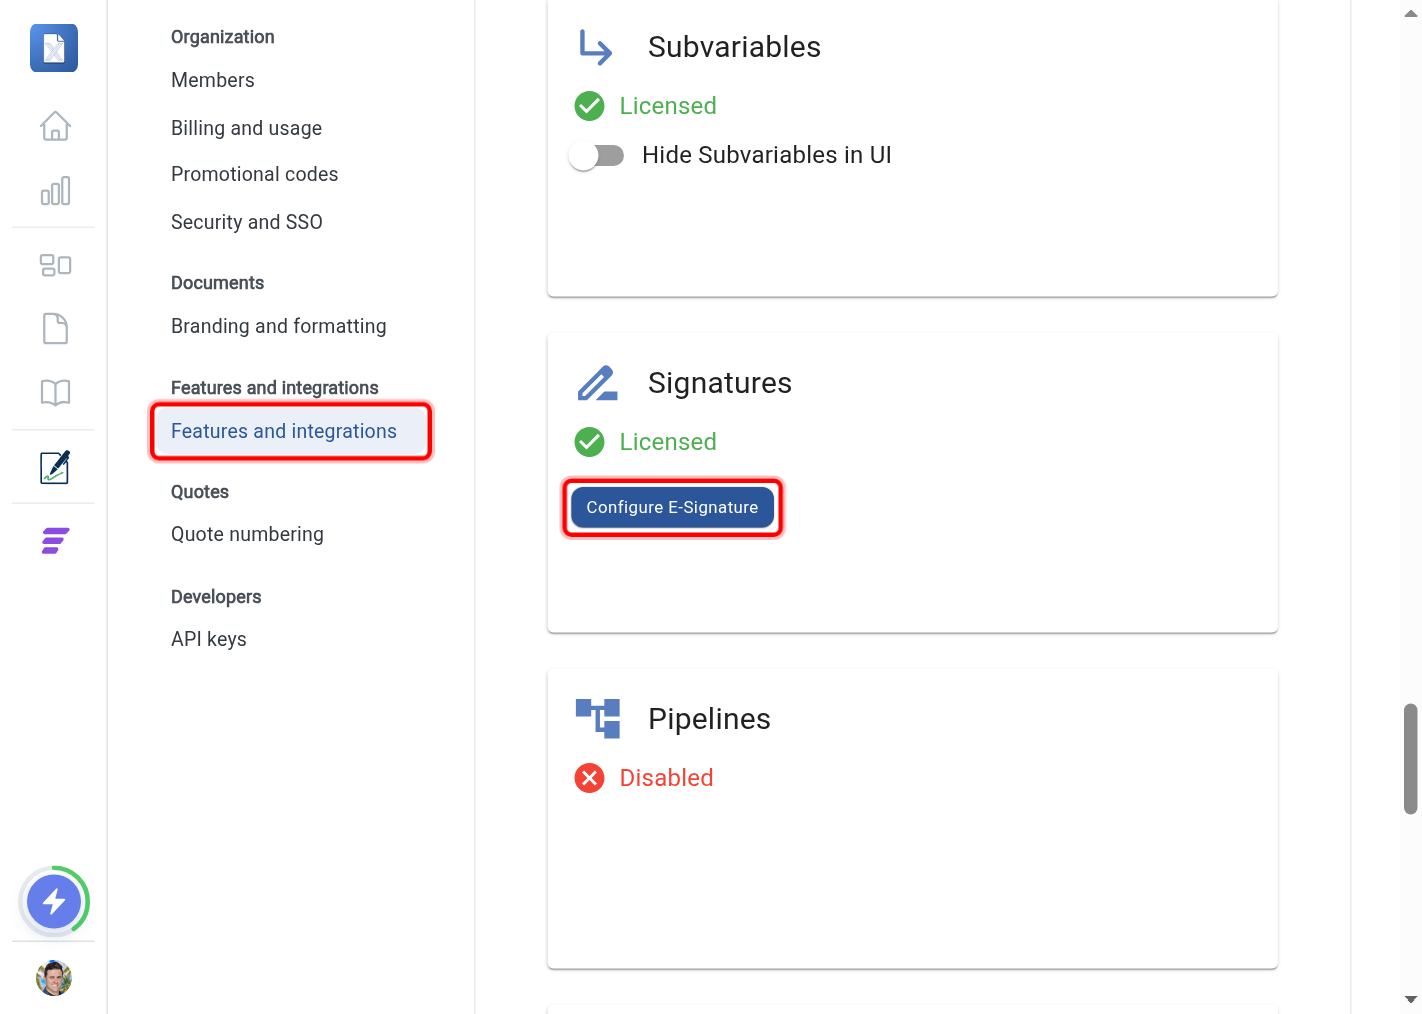
Go to Settings and click Features and integrations in the left-hand menu. Under Core Features, find the Signatures card and click Configure E-Signature.
Step 2: Open the Identity Verification section
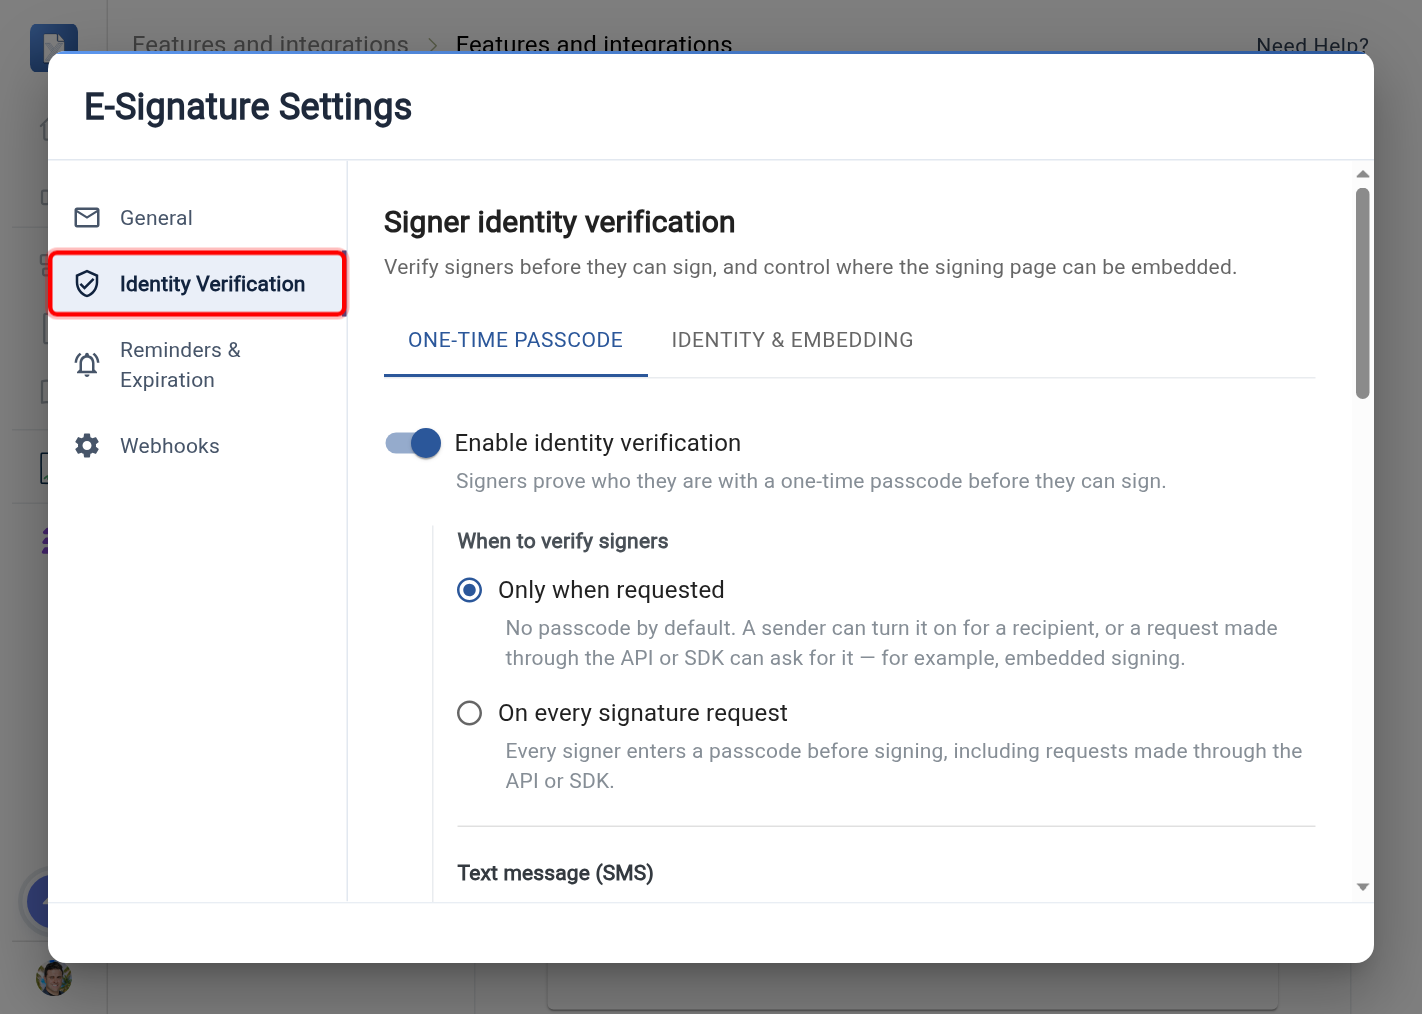
In the E-Signature Settings dialog, click Identity Verification in the left-hand section list. This section has two tabs: One-time passcode and Identity & embedding. Changes in this section save as you make them, except the SMS provider form, which needs Save SMS provider.
Step 3: Turn on passcode verification
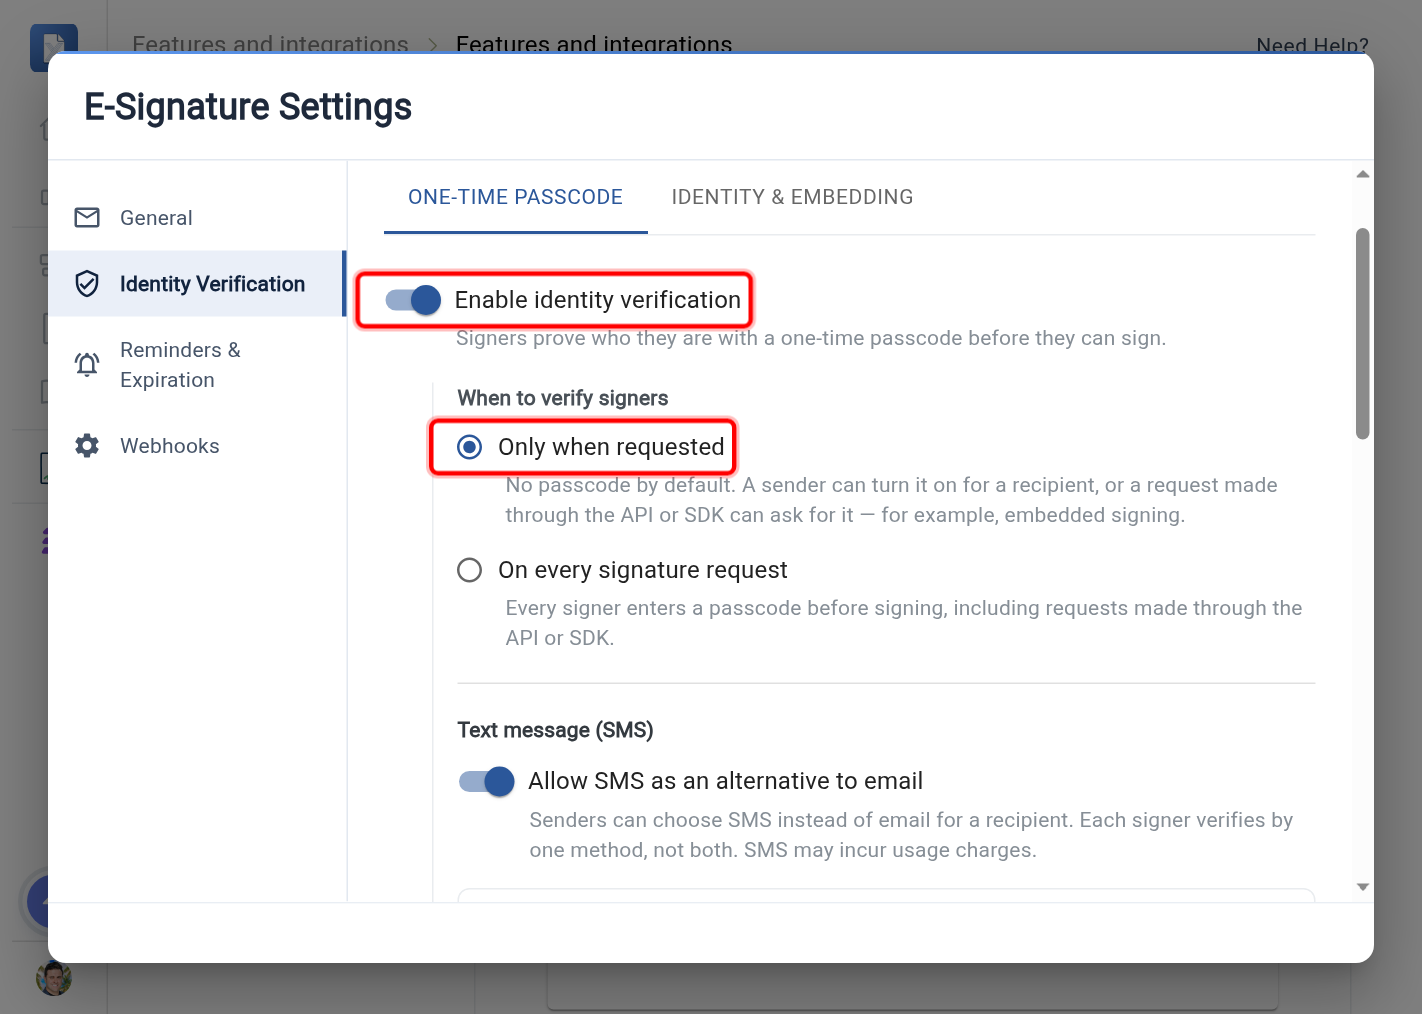
On the One-time passcode tab, turn on Enable identity verification. Then, under When to verify signers, keep Only when requested (a passcode only for recipients that ask for one, for example through the API) or choose On every signature request (every signer enters a passcode).
Choosing the passcode channel (email or SMS), connecting an SMS provider, and setting up delivery-failure alerts are covered in a dedicated guide: How to Configure One-Time Passcode (OTP).
With Only when requested, verification is set per recipient and a recipient sent without it signs with no extra step. With On every signature request, the method you pick applies to signatures created in the app and to documents sent through the SDK or API. Automated sends such as Pipelines and bulk signature sending are exempt.
Step 4: Allow external identity verification or an override
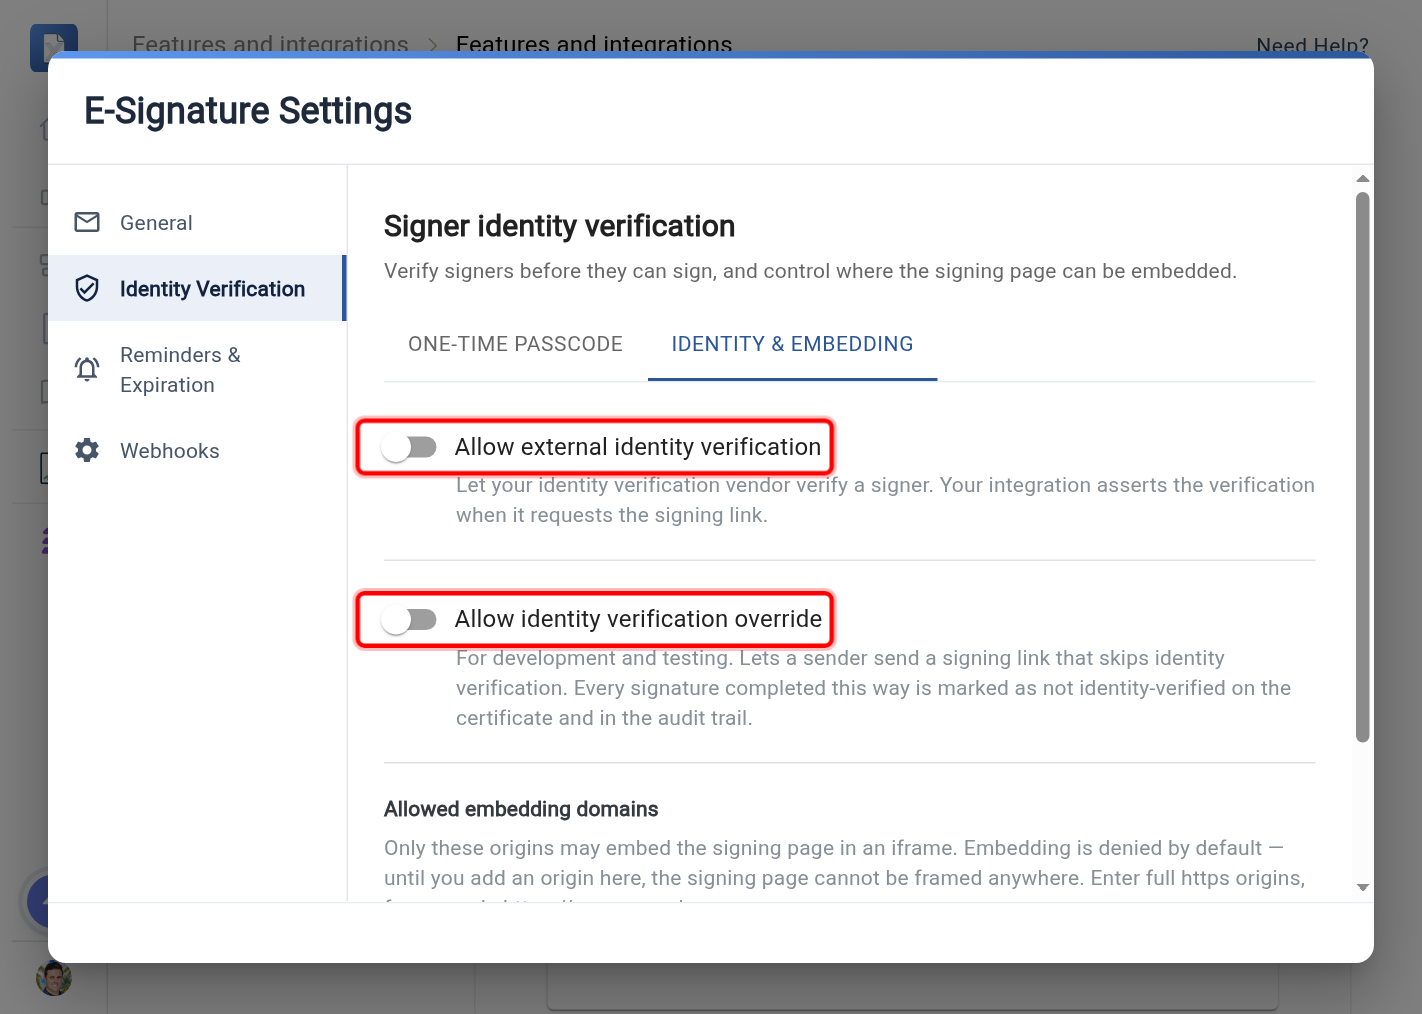
Switch to the Identity & embedding tab. Two optional switches change how a signer can be verified:
- Allow external identity verification lets your identity verification vendor verify a signer. Your integration asserts the verification when it requests the signing link, instead of TurboSign sending a passcode. See External Identity Verification (IdV) for Embedded Signing for the request shape and provider examples.
- Allow identity verification override lets a sender send a link that skips verification. This is for development and testing; every signature completed this way is marked as not identity-verified on the certificate and in the audit trail. While it is on, the settings show a persistent banner.
Step 5: Allow the origins that may embed the signing page
Under Allowed embedding domains, list the origins that may put the signing page in an iframe. This is the clickjacking control: only origins on this list can frame the page.
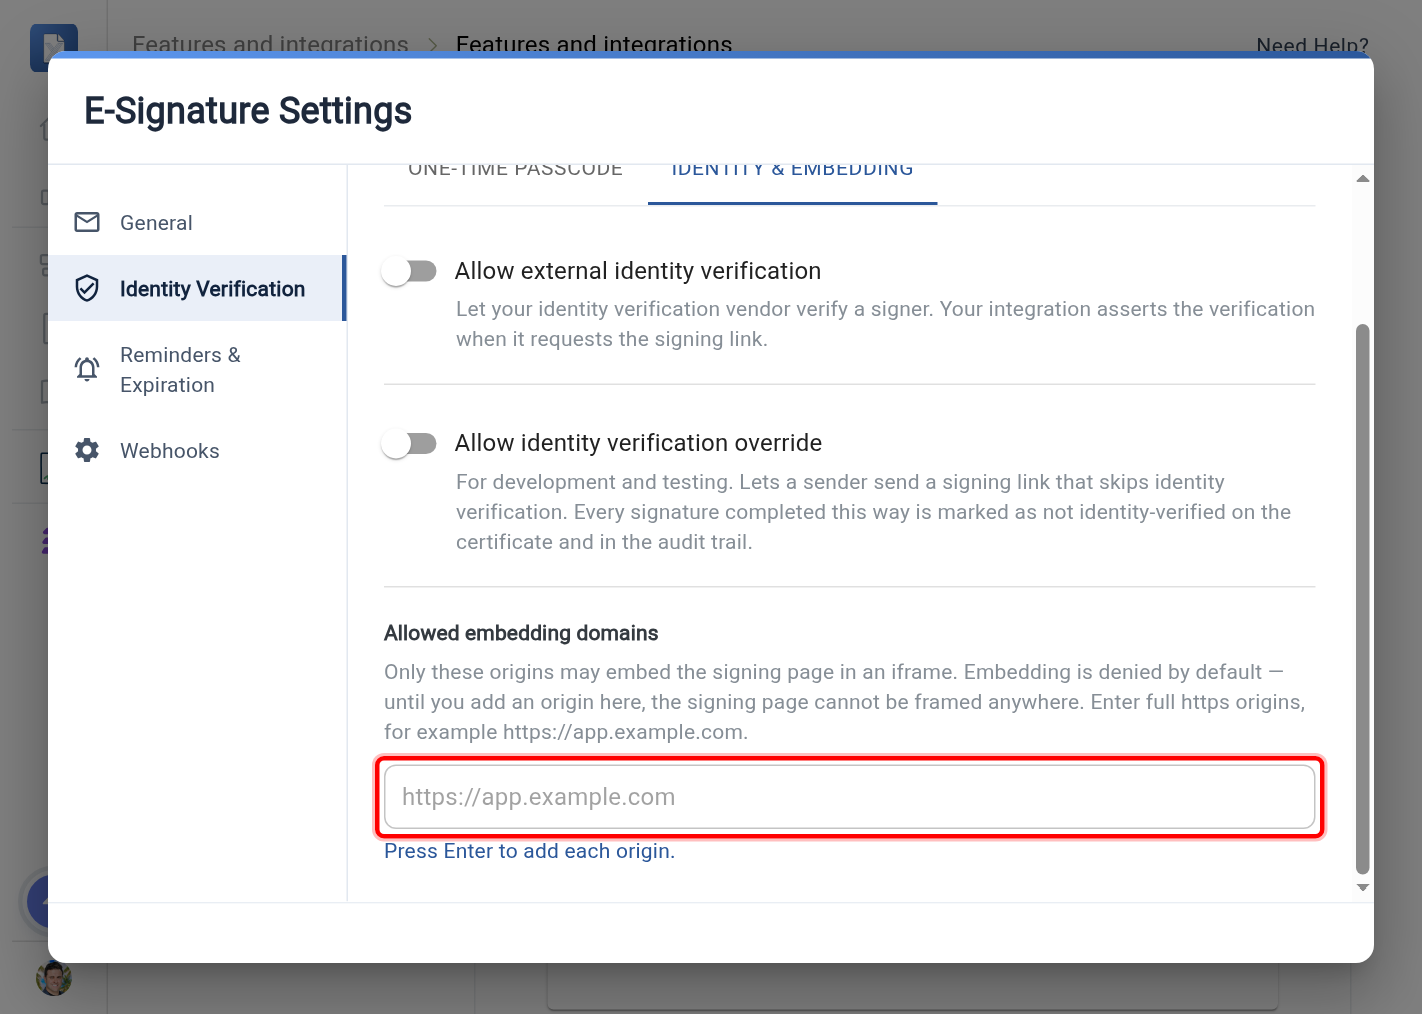
The list is empty by default, which means no site can embed the signing page at all: the iframe stays blank until you add your app's origin. Type a full https:// origin (for example https://app.yourcompany.com) and press Enter to add it; repeat for each origin. An empty list is the safest setting; add an origin only when you actually embed.
Step 6: localhost is for local development only
For local development you can add an http://localhost (or http://127.0.0.1) origin so you can test the iframe on your machine. When you do, the settings show a bright warning:
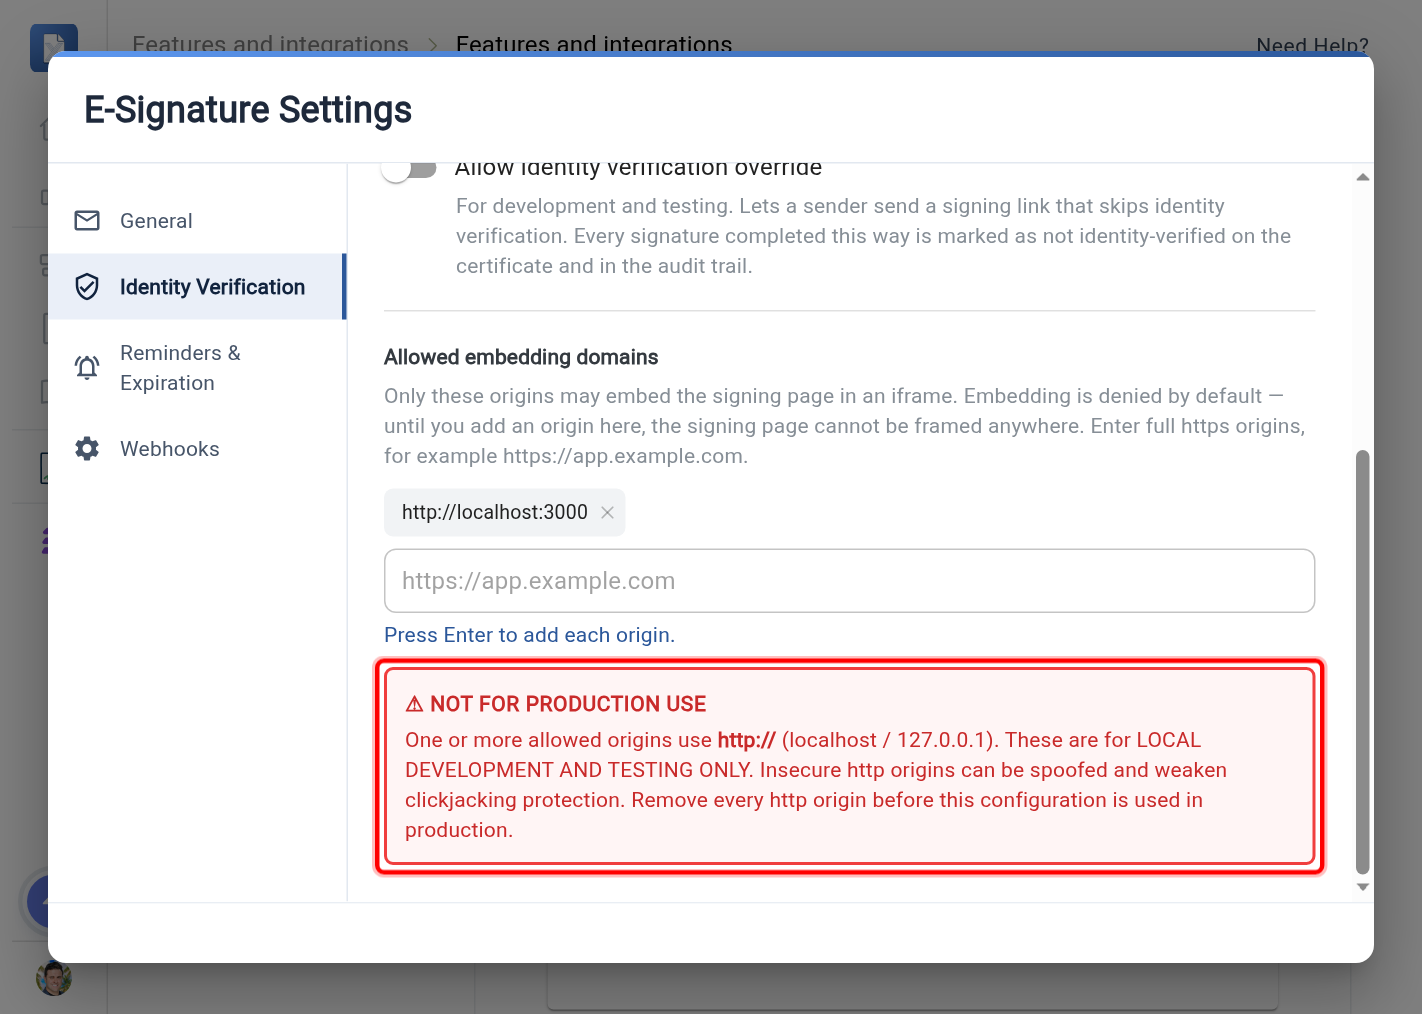
http:// origins can be spoofed and weaken clickjacking protection, so they are for local development and testing only. Remove every http:// origin and use https:// before the configuration is used in production. Production origins must be https.
What's next
- How to Configure One-Time Passcode (OTP) - choose email or SMS delivery, connect an SMS provider, set up delivery-failure alerts, and see what the signer sees.
- External Identity Verification (IdV) for Embedded Signing - assert a signer's identity from your own identity verification provider instead of a passcode.
- Embedded Signing and Identity Verification - request a signing URL, the three verification modes, and the SDK calls your backend makes.