How to Convert Documents to PDF (Task, Project & Folder Triggers)
The Convert to PDF automation action turns an attachment into a PDF and attaches the result back into Wrike when a status changes. It downloads the first attachment, converts it to PDF, uploads the PDF back, and leaves a comment with the conversion details.
This action now fires not only when a task changes status, but also when a project or folder changes status, so you can drive conversions from any level of your Wrike workspace.
Prerequisites
- A connected Wrike account (see Setting Up a Wrike Automation)
- A Wrike workflow status you want to use as the trigger, and the folder or project you want to monitor
This guide picks up at the automation's action step. If you have not connected Wrike or chosen a trigger status and folder yet, follow Setting Up a Wrike Automation first.
Open the Wrike automation builder
Step 1: Open the Wrike configuration
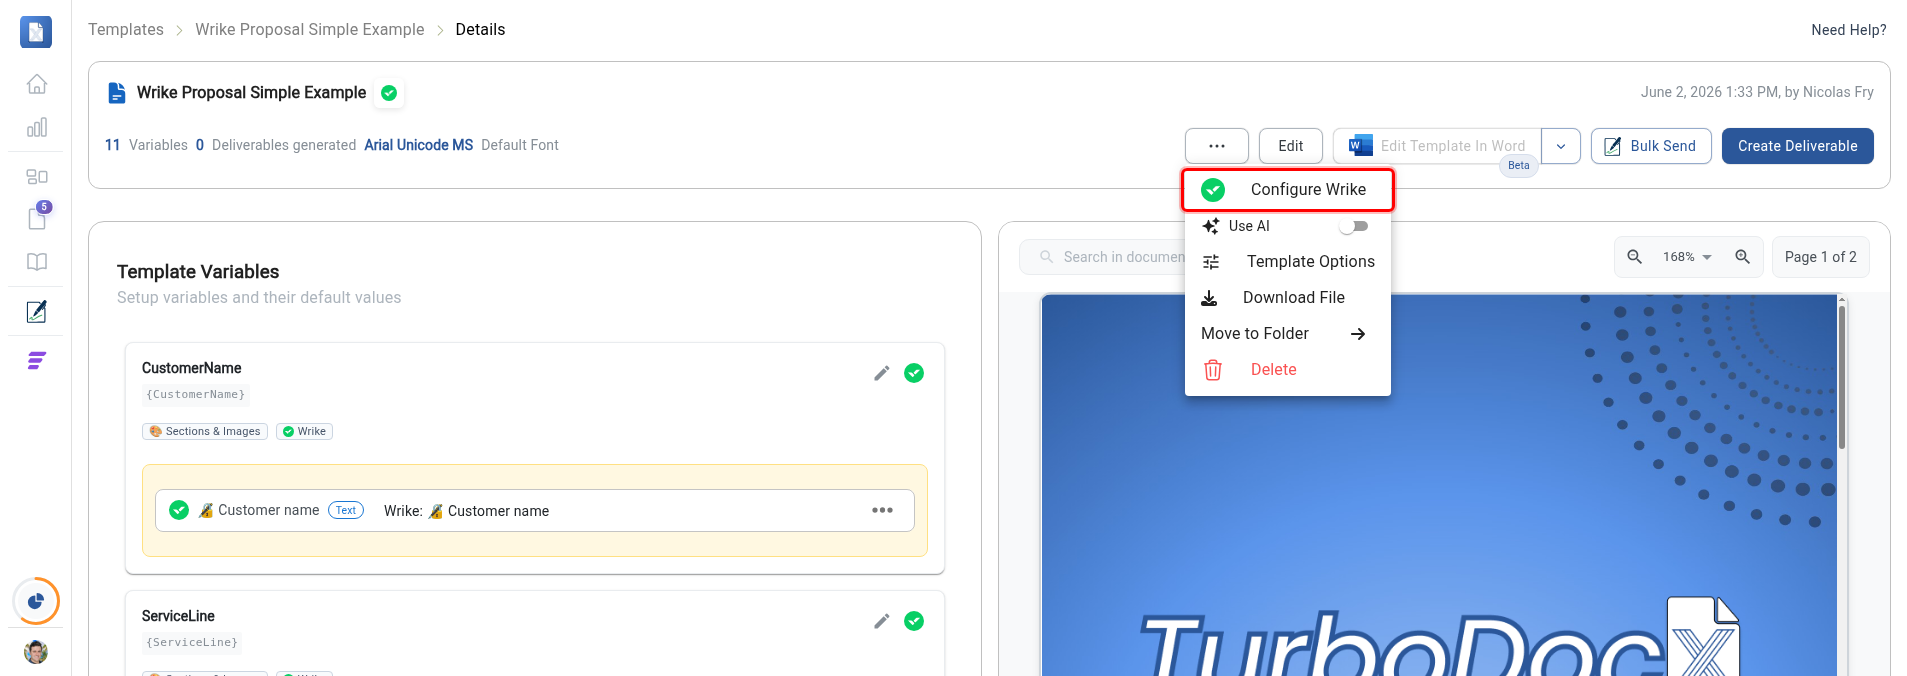
On your template's Details page, click the "..." (three-dot) button in the top toolbar, then click Configure Wrike in the menu that opens.
Step 2: Start a new automation
The Wrike Automations window opens and lists your existing automations. Click the Create Automation button near the top right.

Step 3: Choose a trigger status
On the When to trigger step, click the Trigger Status field and pick the workflow status that should start the automation. Then choose the automation scope (Folder Level or Account Level) and click Next.
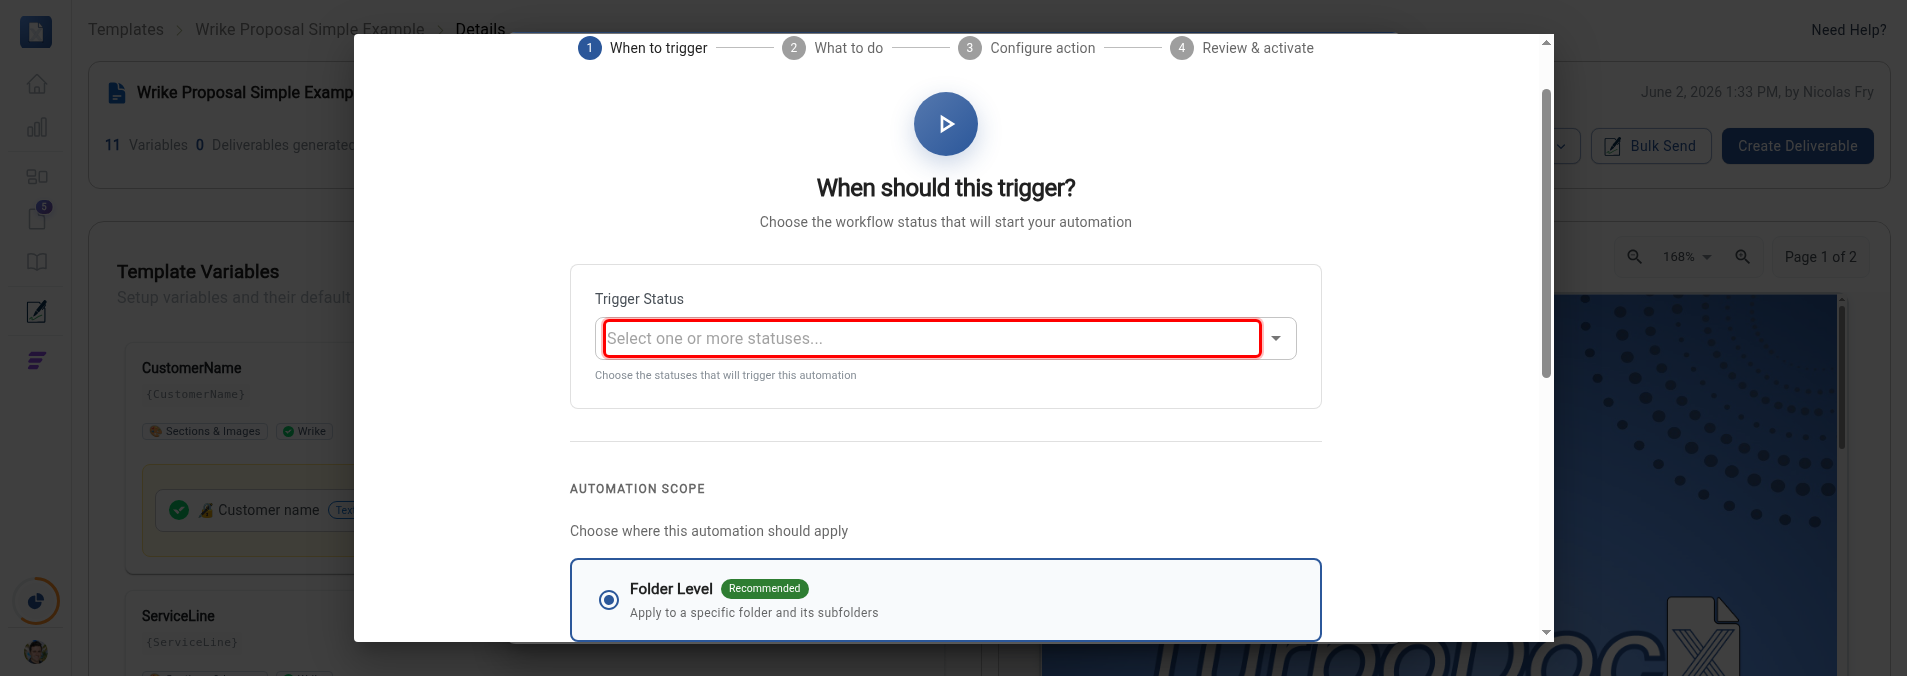
The automation runs whenever the chosen status is applied. The conversion now also runs when a project or folder (not just a task) reaches the trigger status. The scope option above controls where the automation watches; the status change is what fires it, regardless of whether a task, project, or folder changes status.
Configure the PDF conversion
Step 4: Select the Convert to PDF action
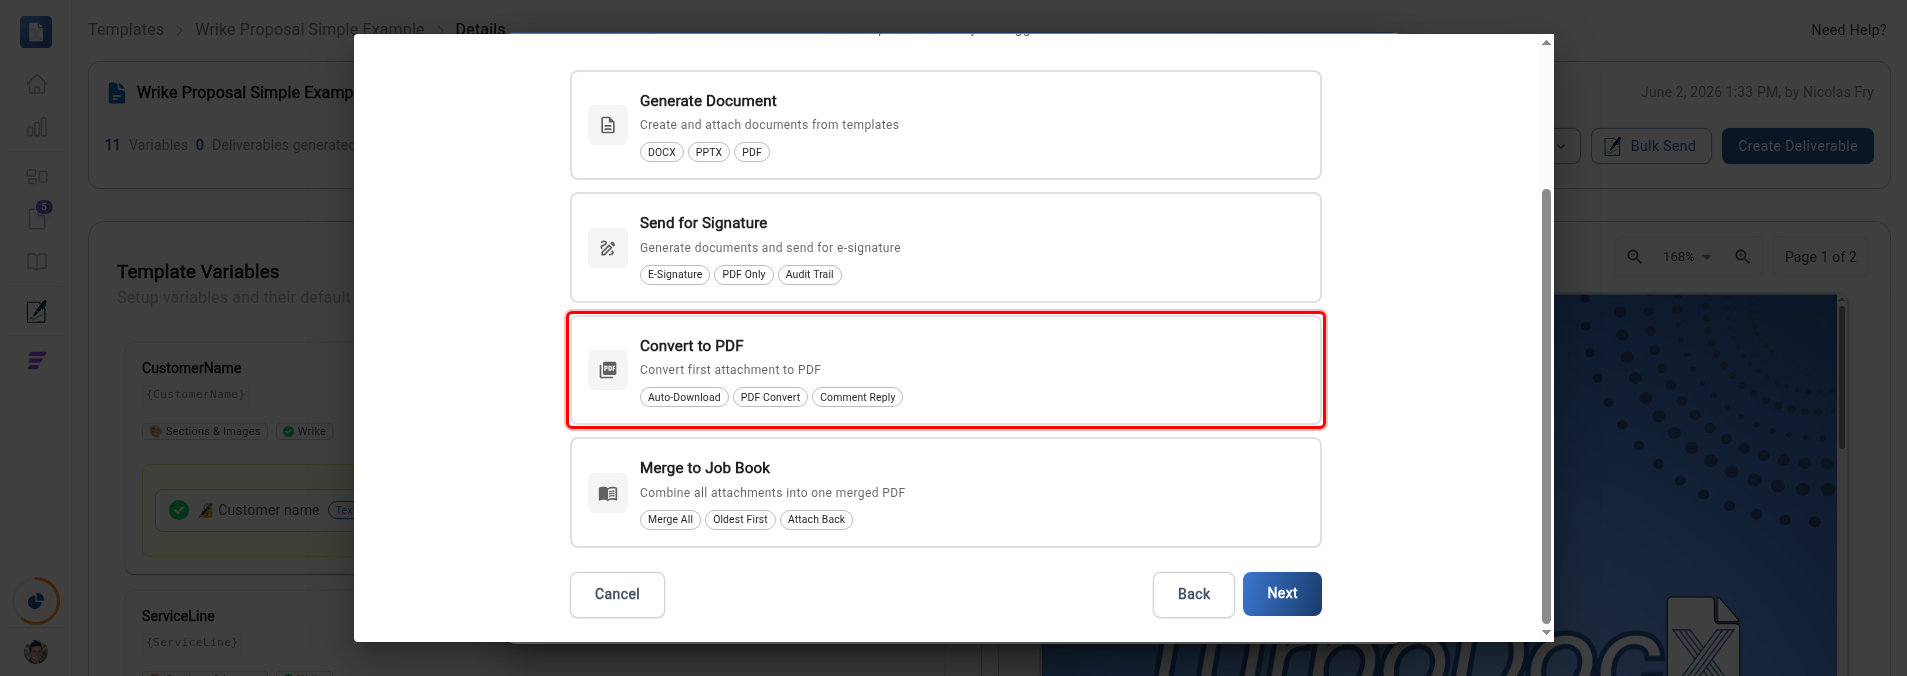
On the What to do step, click the Convert to PDF card. Its description reads "Convert first attachment to PDF." Then click Next.
Step 5: Review how the conversion works
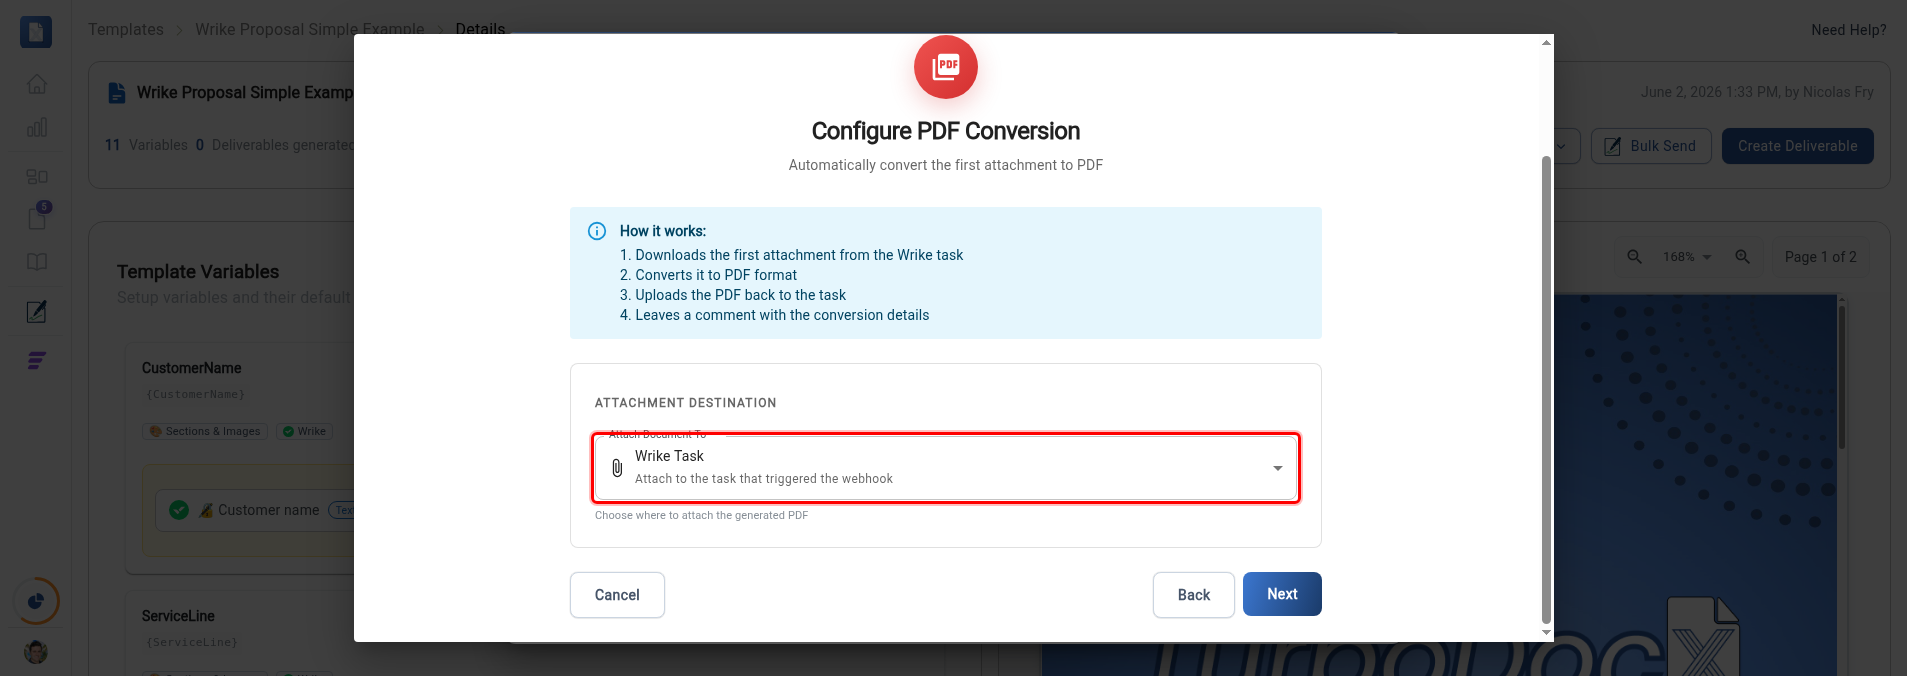
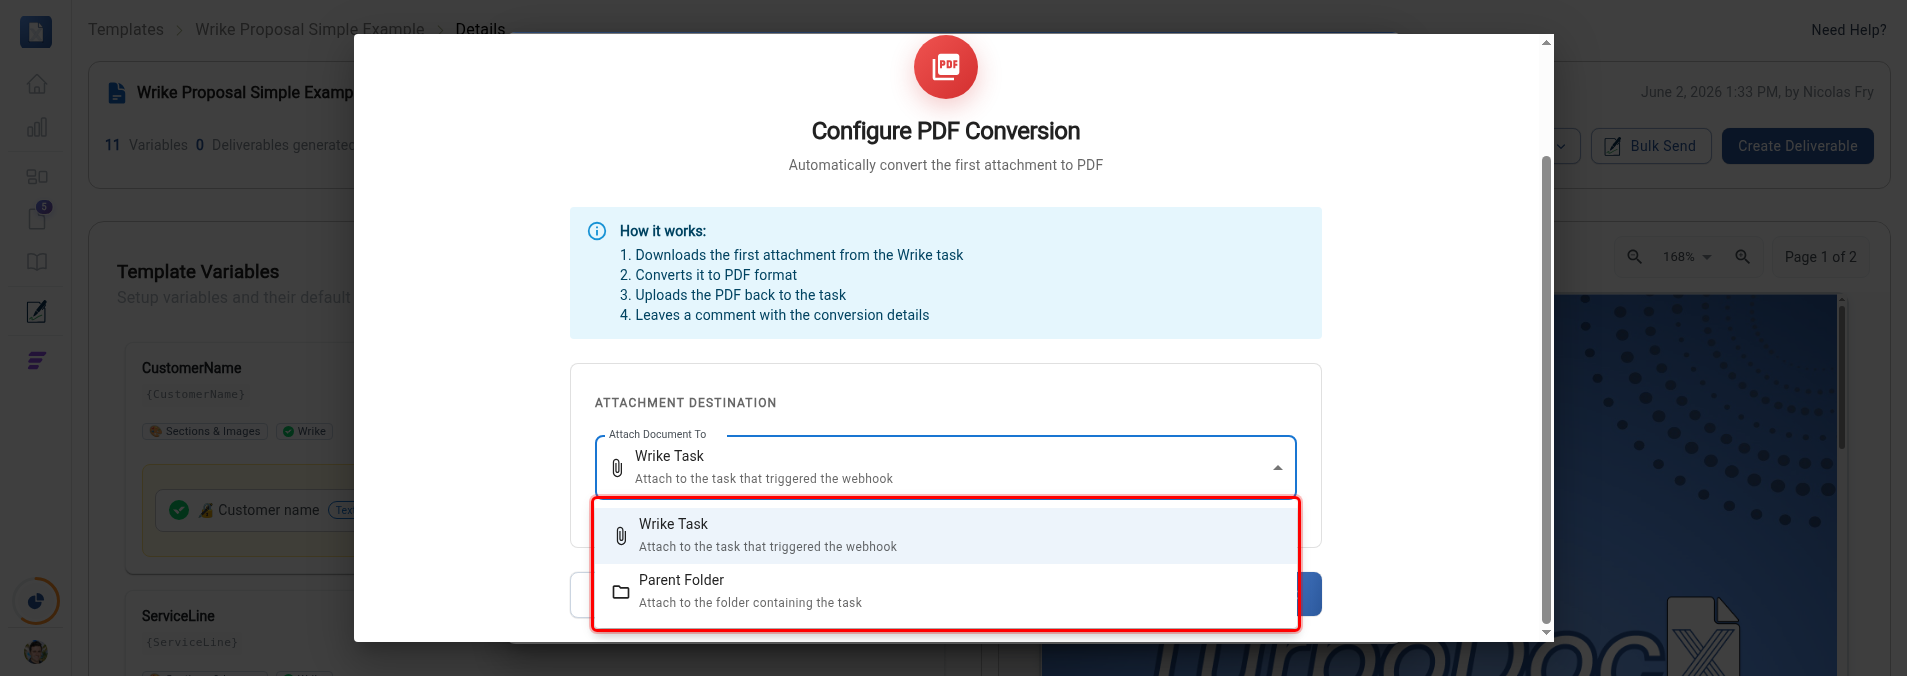
The Configure PDF Conversion step opens with a How it works summary at the top:
- Downloads the first attachment from the triggering item
- Converts it to PDF format
- Uploads the PDF back into Wrike
- Leaves a comment with the conversion details
Step 6: Choose where the PDF is attached
Under Attachment Destination, click the Attach Document To dropdown and choose where the converted PDF lands:
- Wrike Task — attach to the task that triggered the automation.
- Parent Folder — attach to the folder that contains the task.
Pick an option, then click Next.
Step 7: Name and create the automation
On the Review & activate step, the Automation Blueprint summarizes the trigger, scope, and action. Type a name for the automation in the Name Your Automation field, then click Create Automation to activate it.

In-place versioning on re-runs
If the automation runs again on the same task, project, or folder, the converted PDF is updated in place rather than added as a duplicate. The existing PDF attachment is replaced with the new version, so the item keeps a single, current PDF instead of accumulating copies each time the status changes.
Update the source attachment and move the item back through the trigger status to regenerate the PDF. The previous PDF is replaced automatically. (If the previous PDF was deleted in Wrike, a fresh one is created instead.)