Send a document for signature from Salesforce
This guide shows a rep how to send a document from an Opportunity, what each signer sees, and where the signed copy ends up. Your admin must finish Set up TurboSign for Salesforce first.
Step 1: Start the send
-
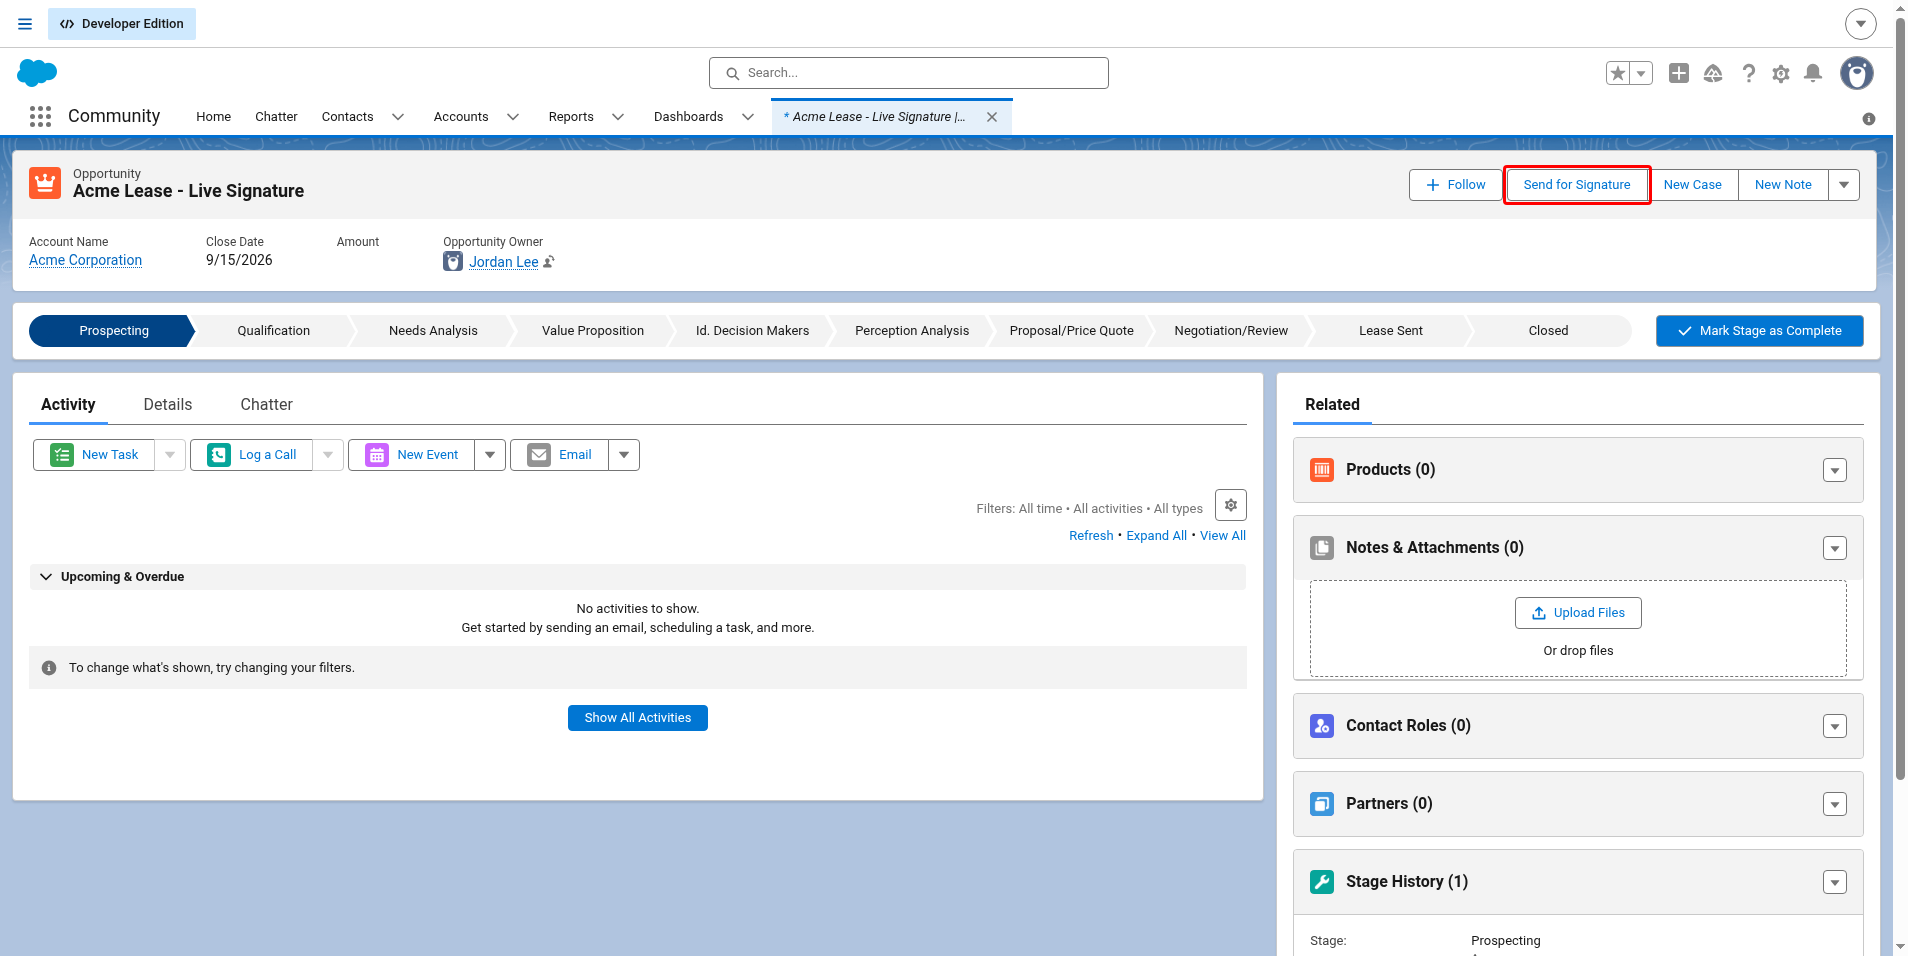
Open the Opportunity.
-
Click Send for Signature at the top right. If you don't see it there, click the ▼ menu next to the other buttons and pick it from the list.
-
Under Document, pick the document you want to send.
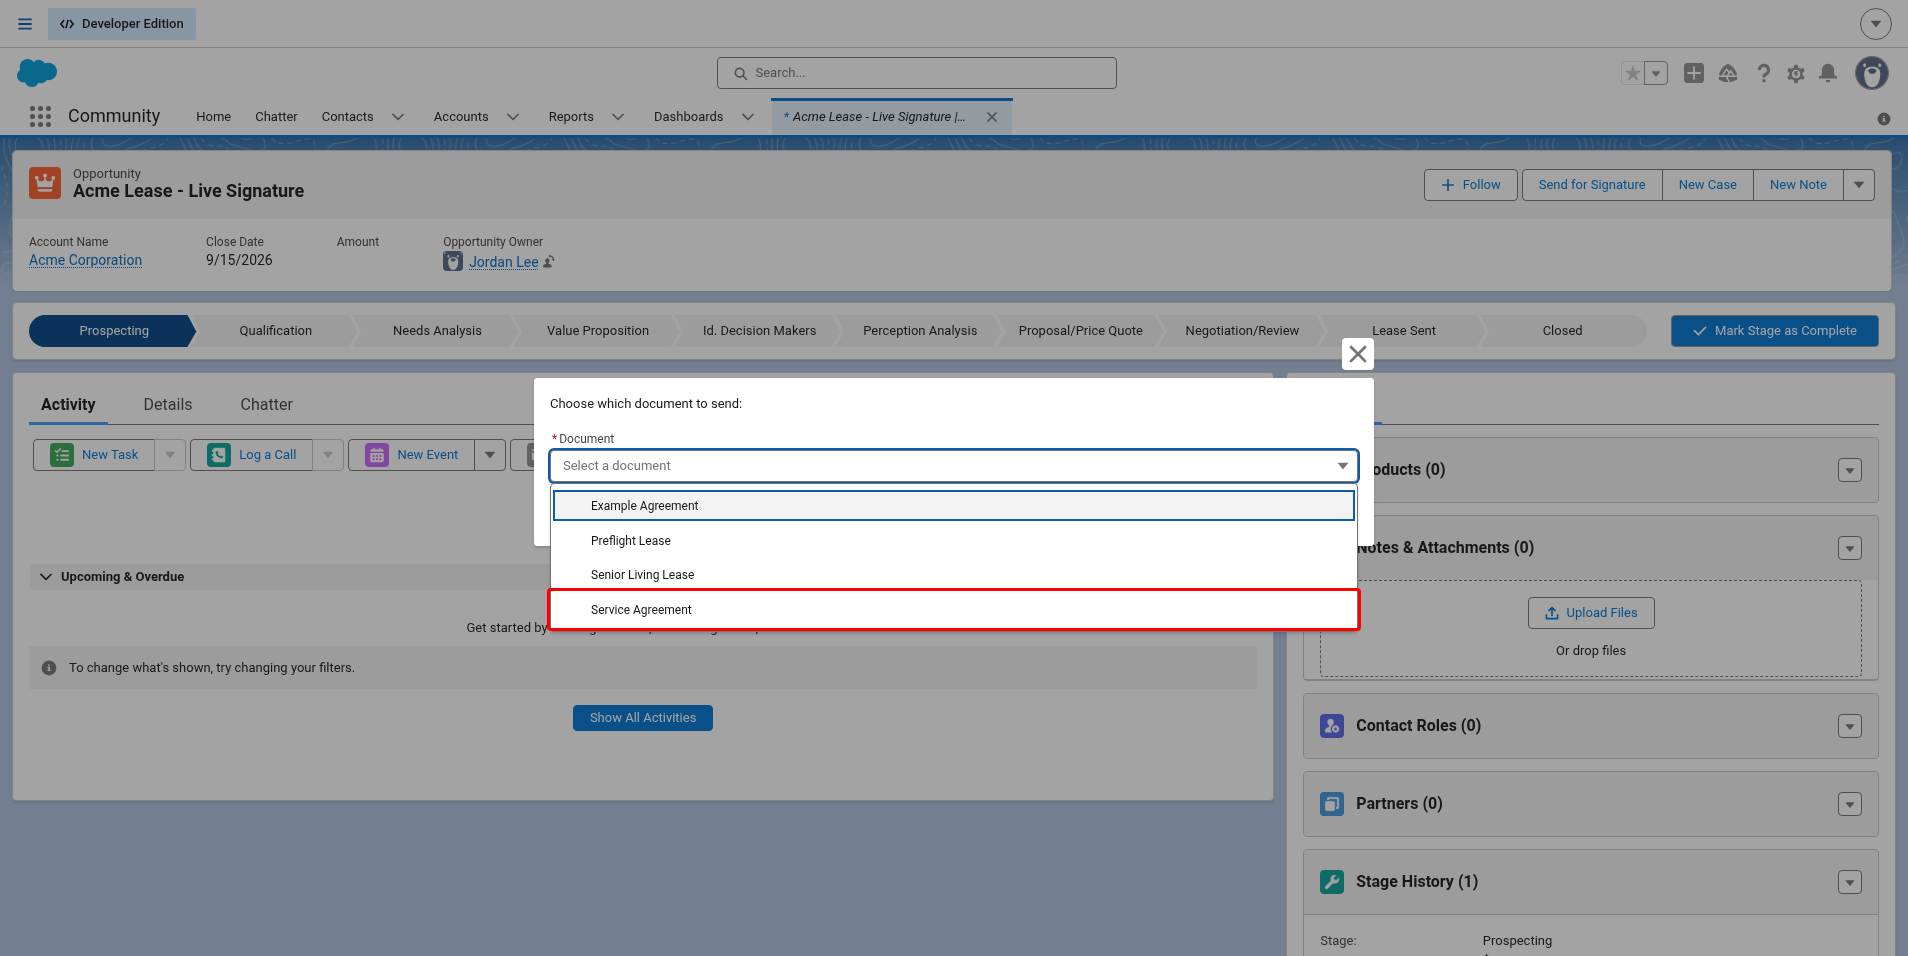
-
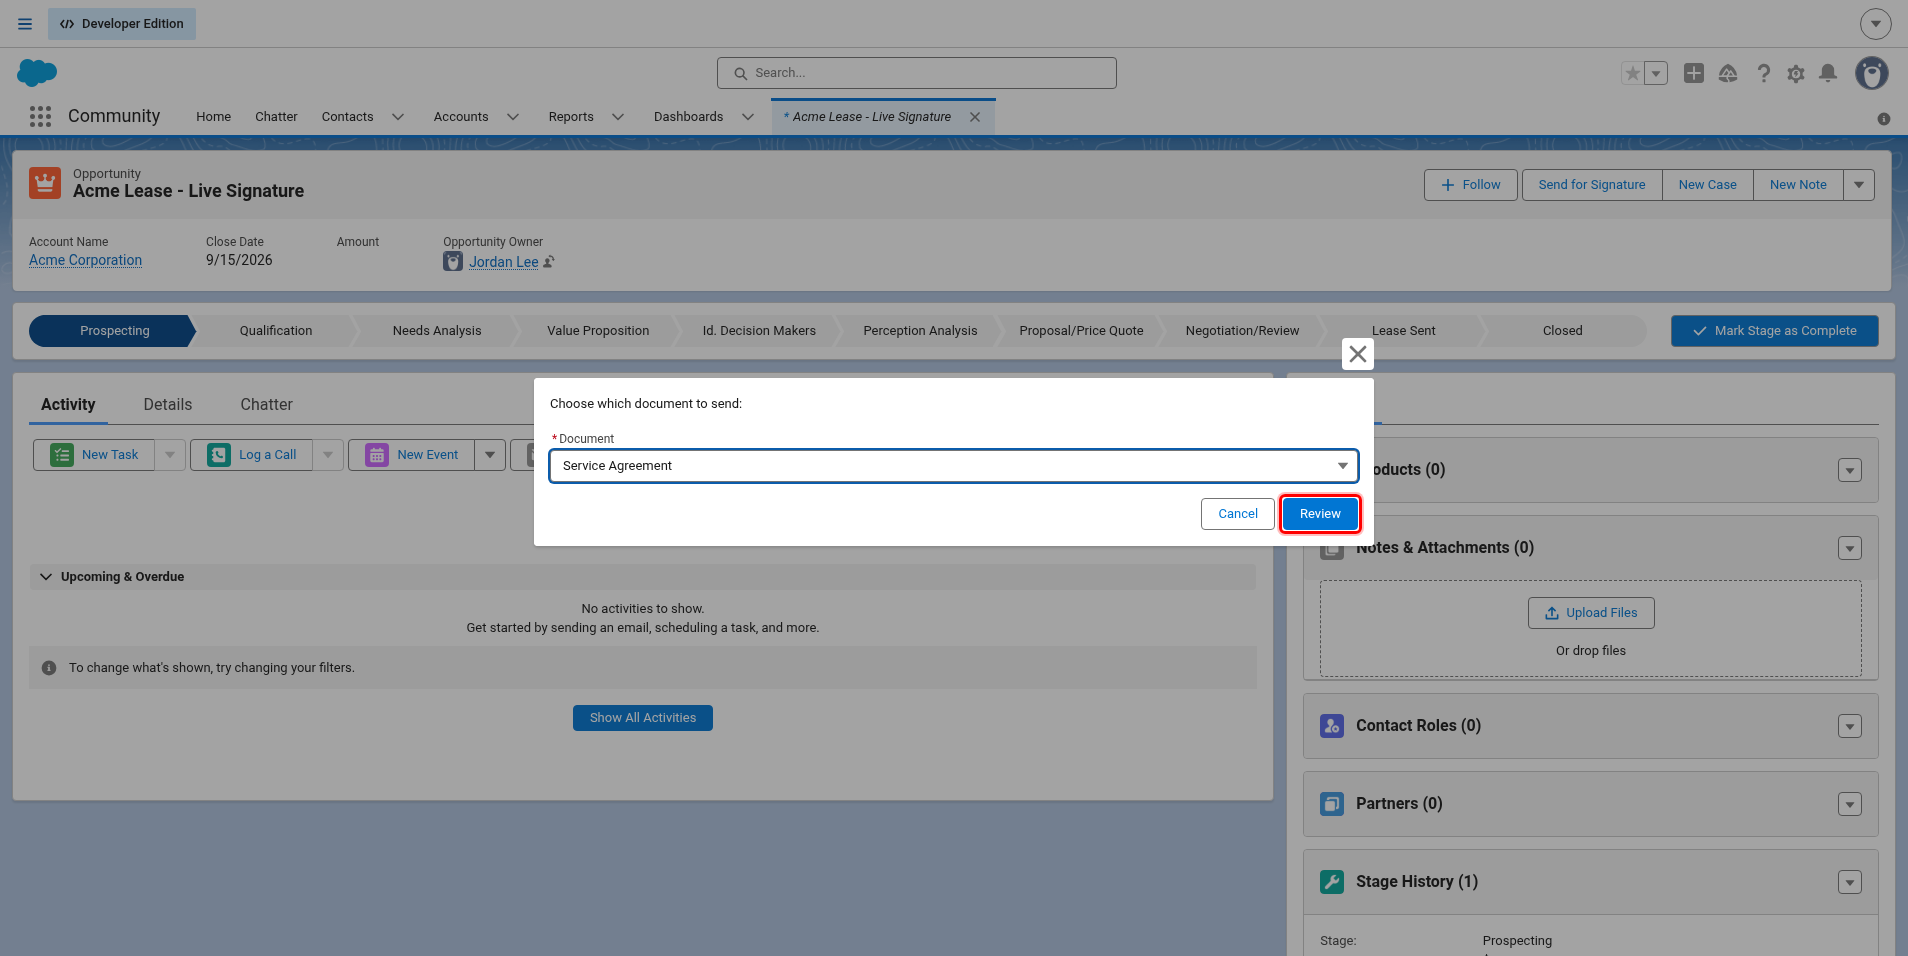
Click Review. TurboSign fills the document from the record. This can take a few seconds for long documents.
Step 2: Check the values and signers
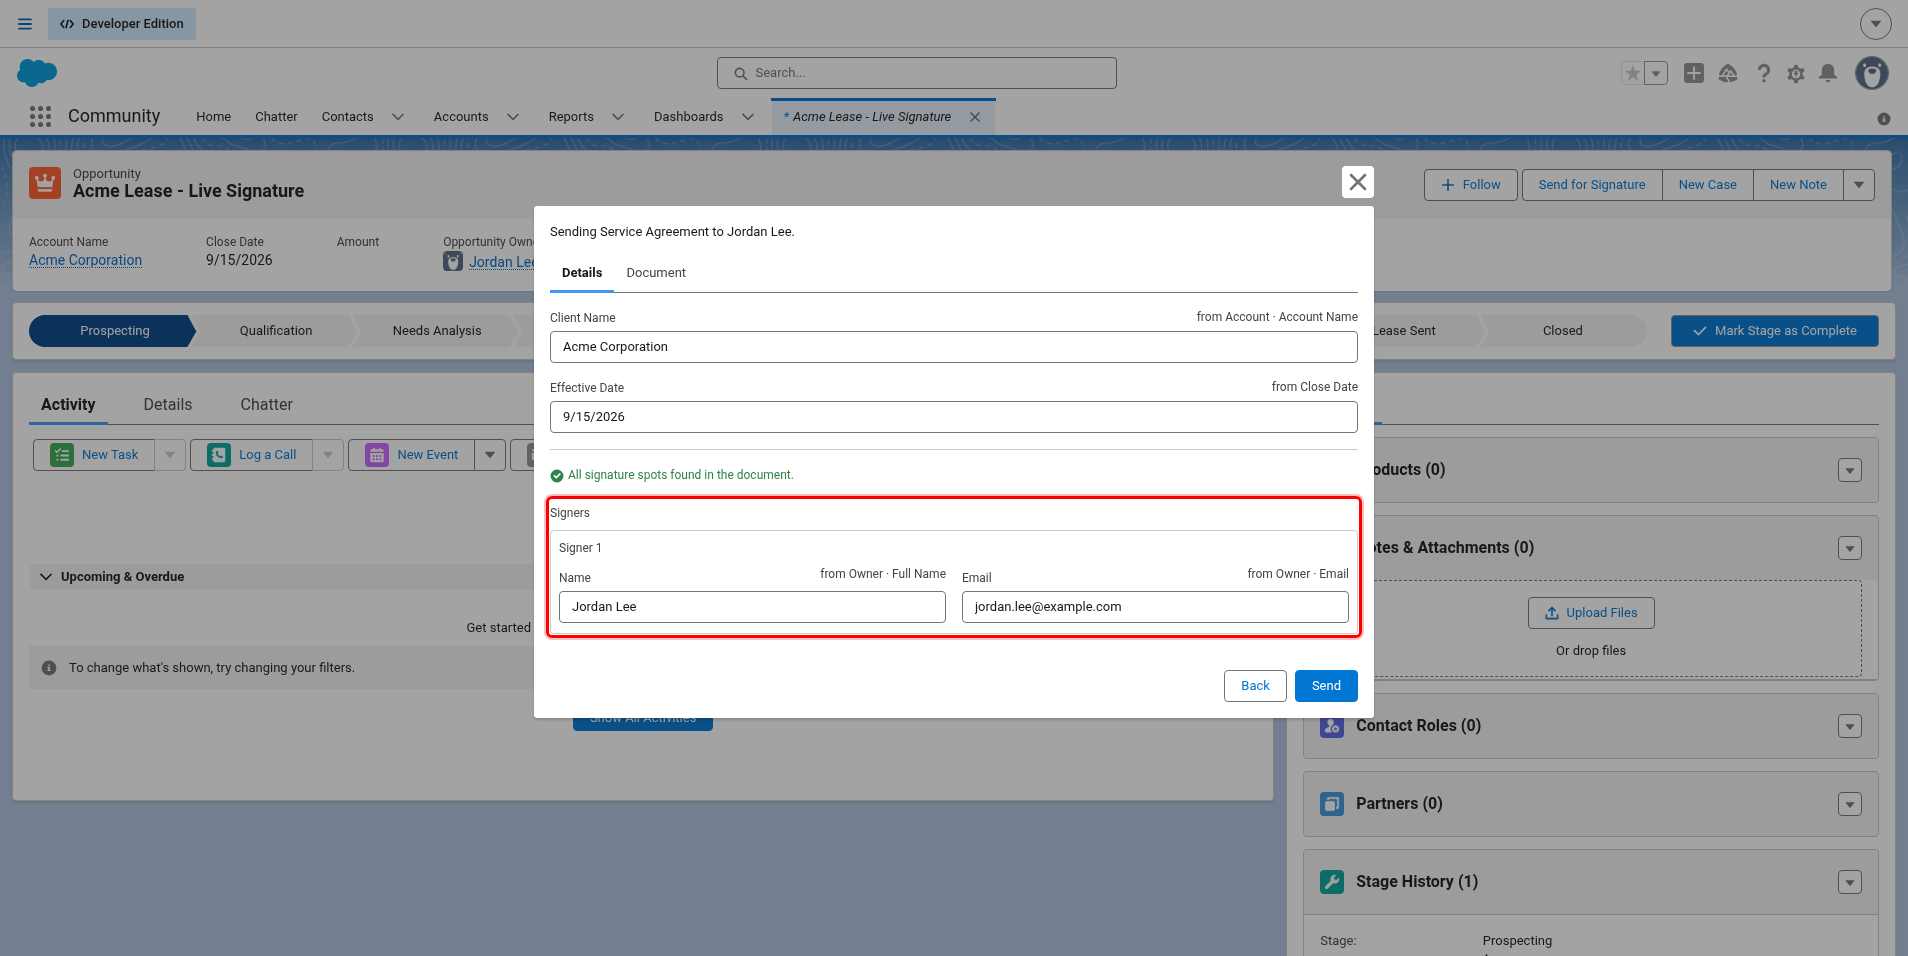
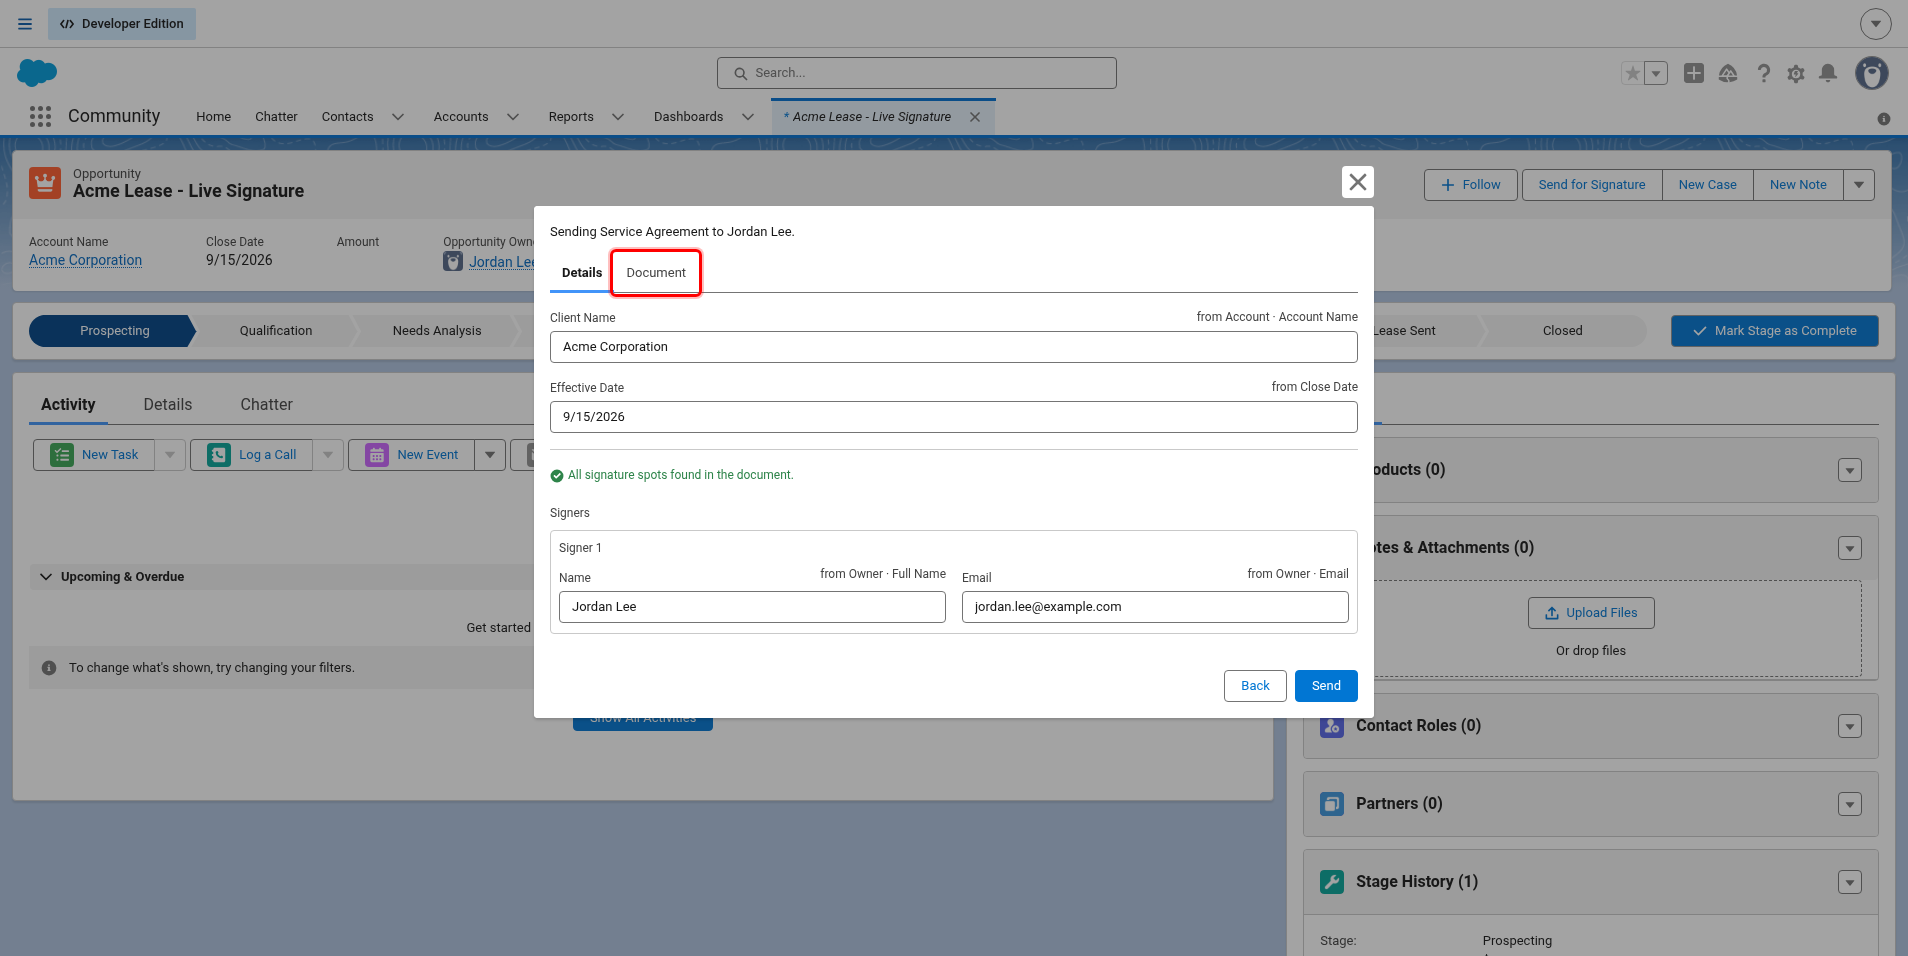
The review screen opens on the Details tab. It lists every value going into the document, with where it came from. You can correct any value here. Your change only affects this send, not the record.
Under Signers, check each person's name and email. You can correct these too.
Step 3: Check the document
Requires TurboSign for Salesforce 1.1.0 or later.
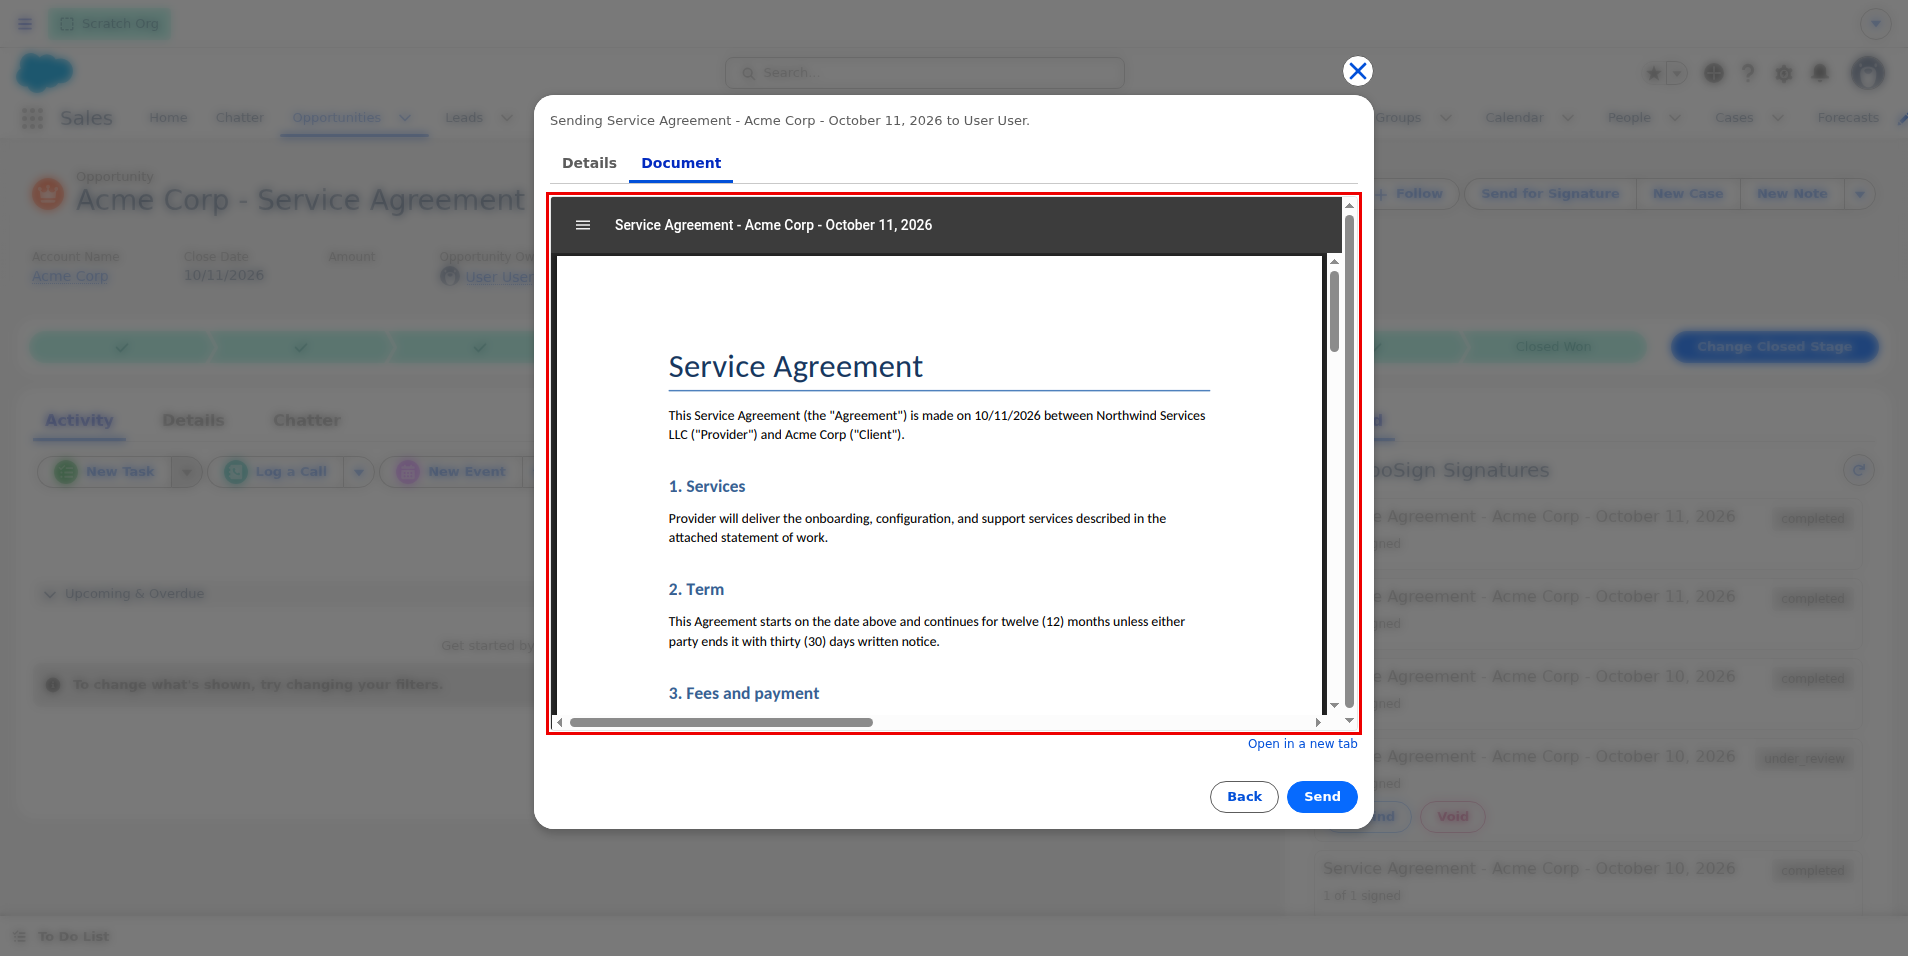
Click the Document tab to see the document as it will go out, with any corrections you made. TurboSign renders it the first time you open the tab, which can take a minute or two. Nothing is sent yet.
The document opens right in the window. Scroll through it to check every page. Your browser's PDF controls, if it shows them, let you zoom or print.
-
Signing spots of any kind (signature, initials, date, text, and so on) look blank in the preview. Each signer gets a box in that spot when the document goes out.
-
The render also checks the signing spots. Details lists every spot, and after the render it says All signature spots found in the document. If a spot is missing, it names the token and the signer instead. Ask your admin to fix the template or the setup before you send.
-
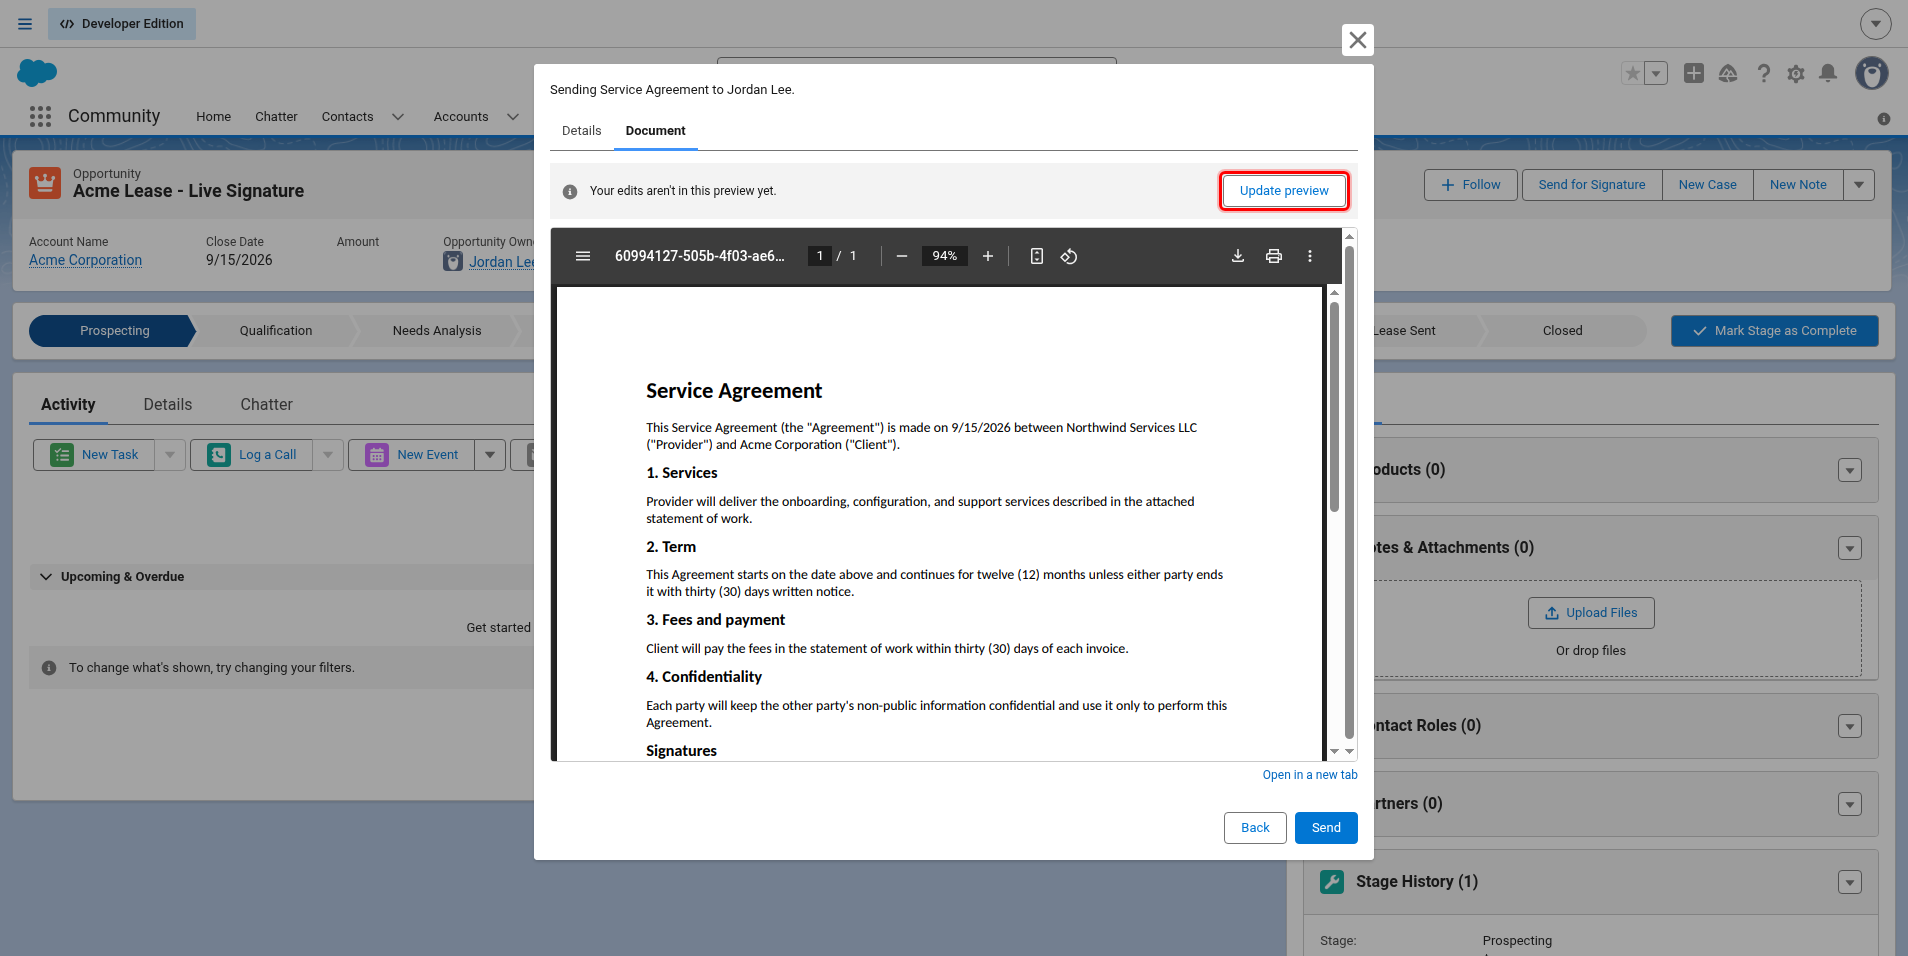
If you change a value after it renders, the tab shows Your edits aren't in this preview yet. Click Update preview to see the new version. Send always uses your latest values, even if you didn't update the preview.
-
To view it full size, click Open in a new tab.
-
In the Salesforce mobile app, the tab asks you to open the record on a computer instead. You can still send from your phone.
Step 4: Send
Click Send.
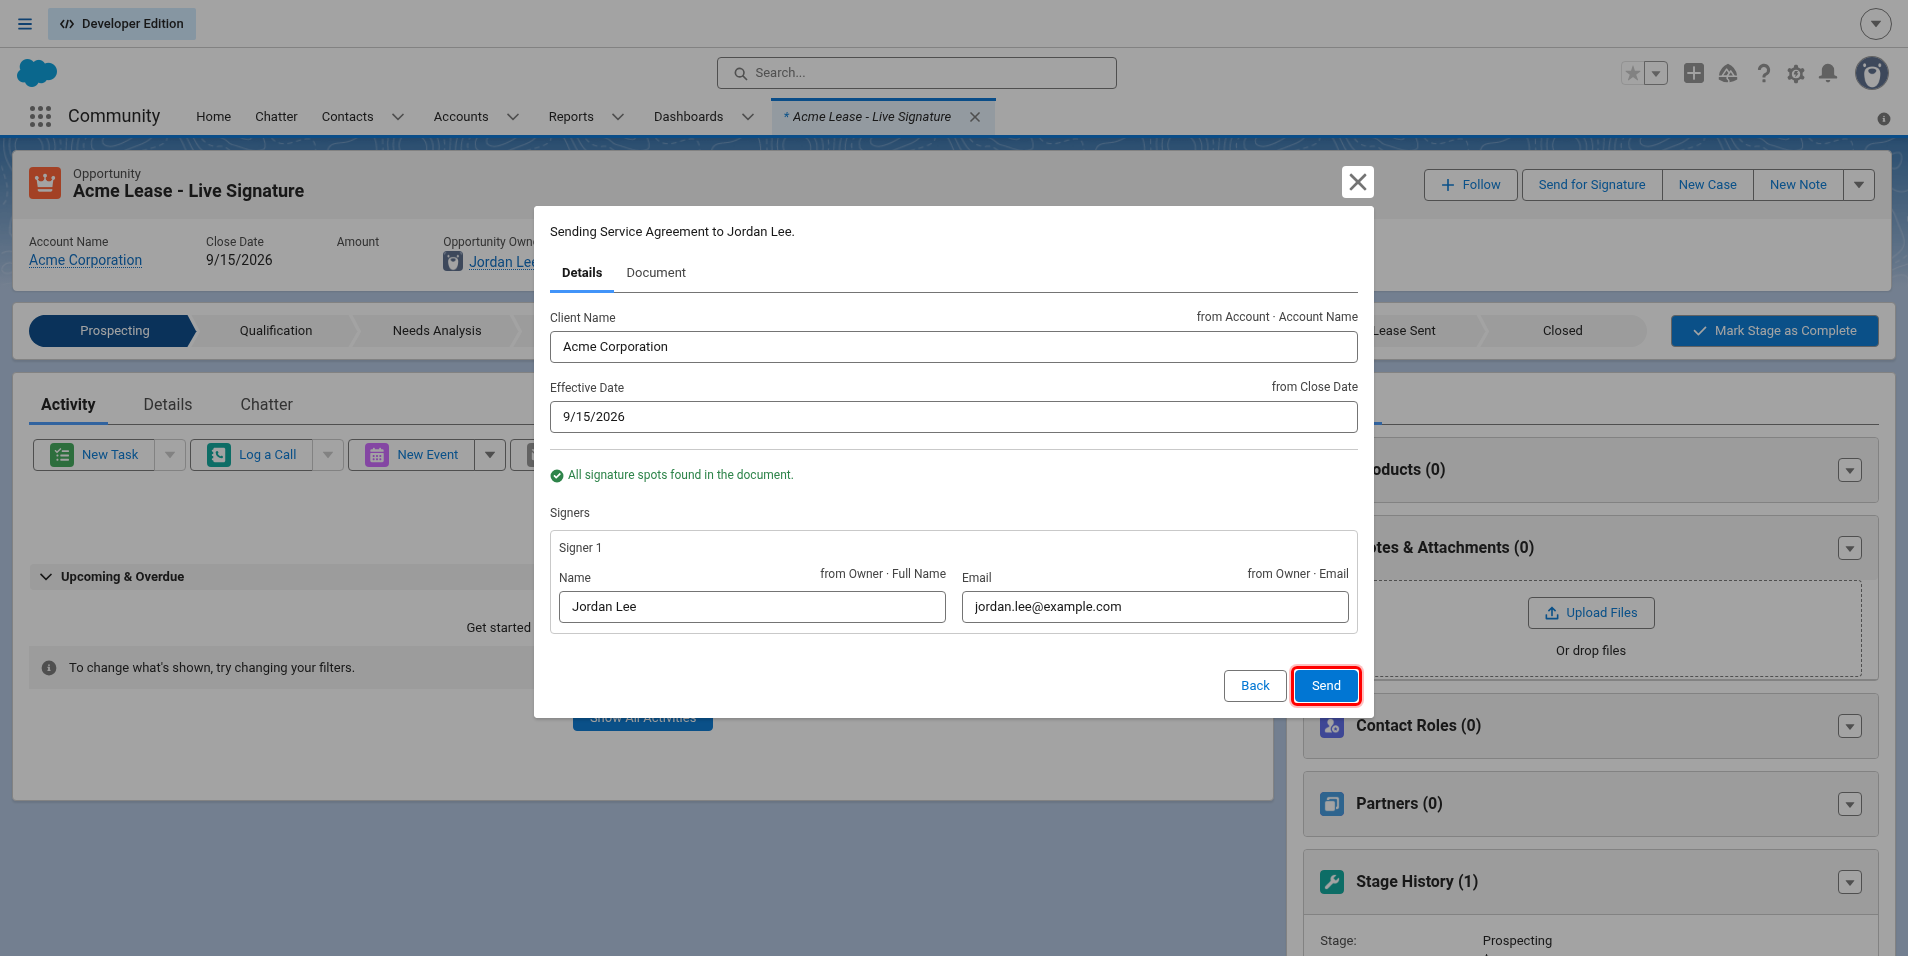
You see Sent for signature only after TurboDocx has accepted the document and emailed the first signer. If something is wrong, you see the reason instead, for example Required value {MonthlyRent} is empty on this record. Fix the record (or ask your admin) and send again.
If you see a message telling you to check before sending again, don't click Send yet. See what to do.
What signers see
Each signer gets an email with a link. Signers sign in order, so the second signer's email arrives after the first signer finishes.
-
If your organization requires identity verification, the signer clicks Send Code and gets a six-digit code by email or text message, depending on your settings. See one-time passcodes.

-
They type the code and click Verify And Continue.

-
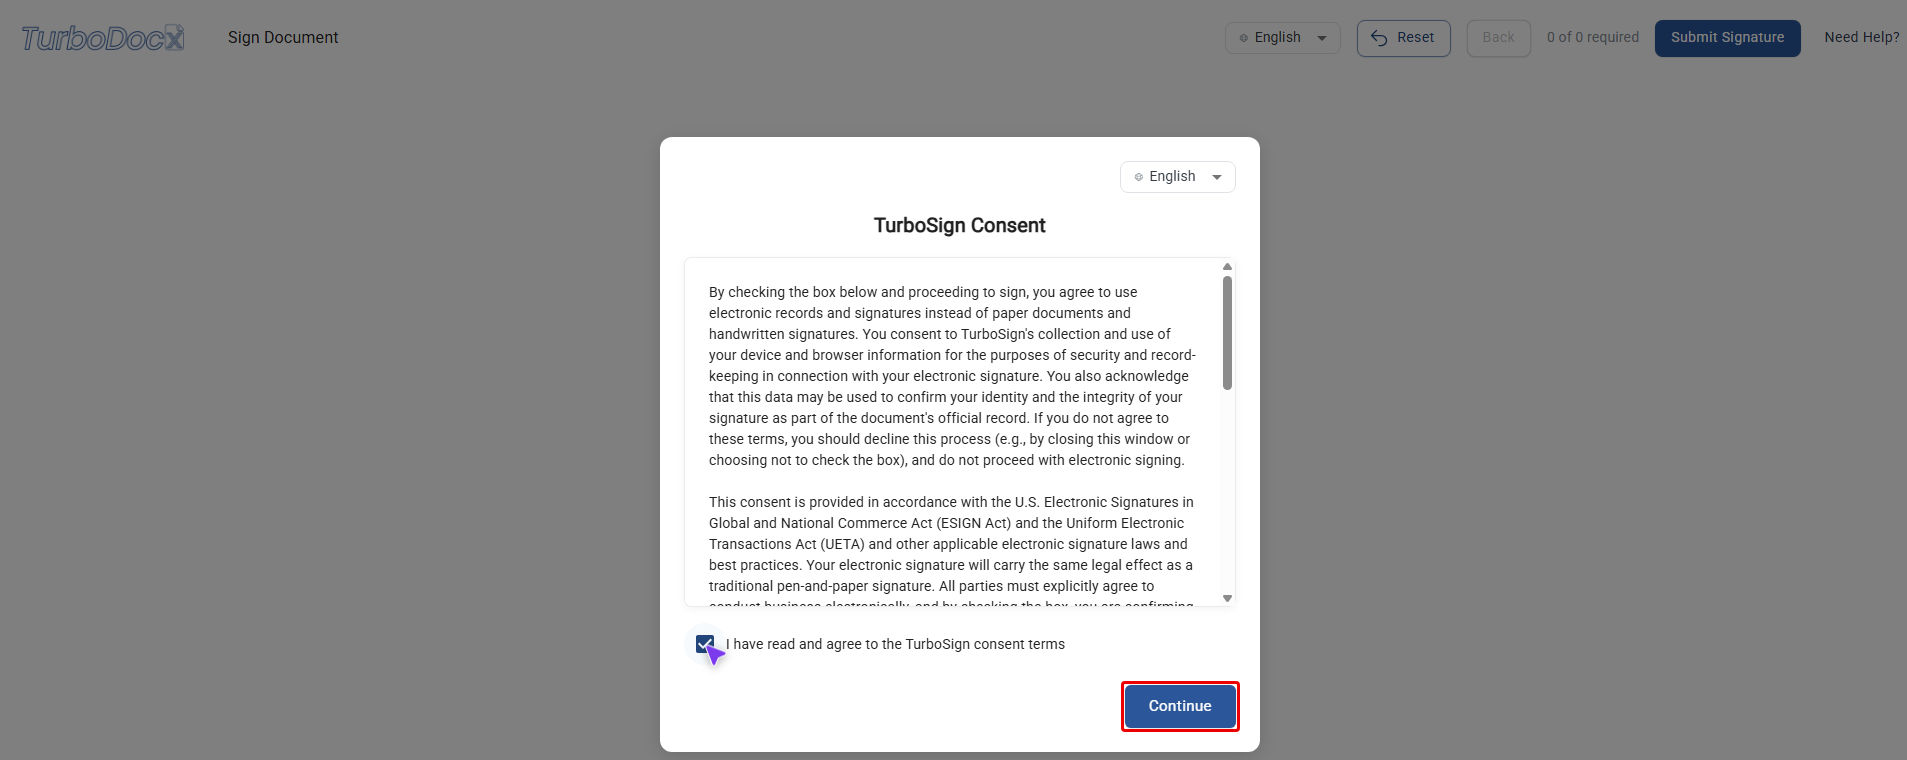
They agree to sign electronically and click Continue.
-
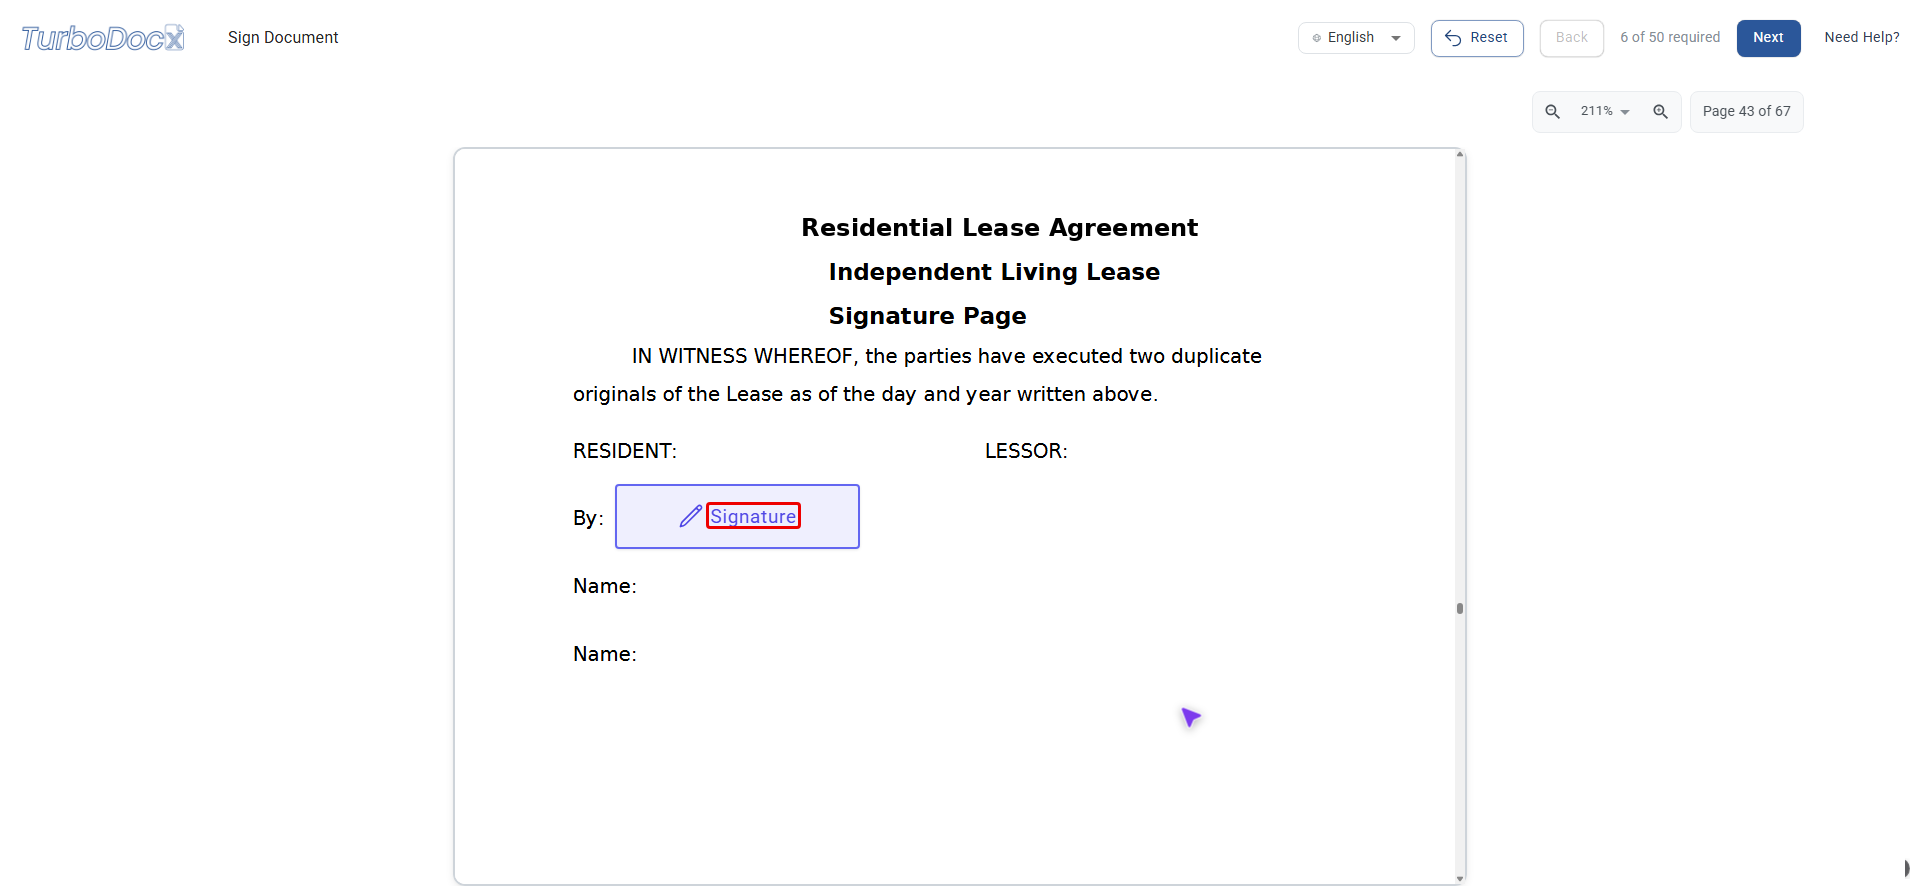
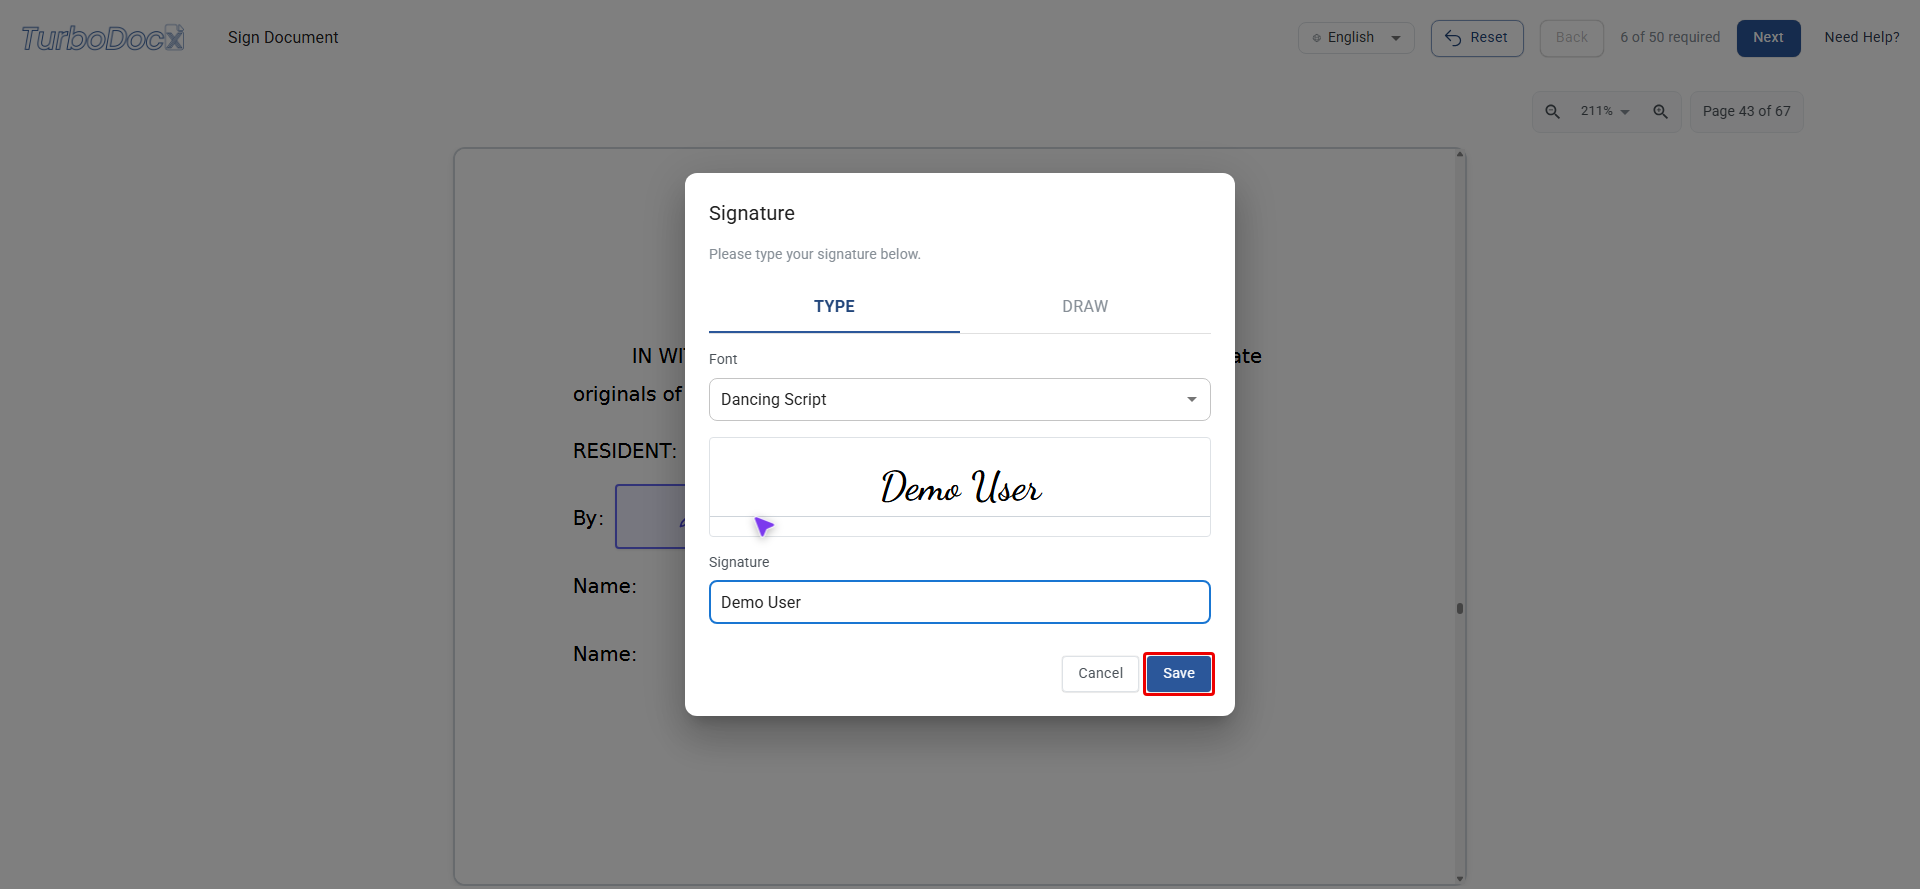
They click each Signature or Initial box. The first time, they type or draw their signature and click Save. The counter at the top shows how many spots are left.
-
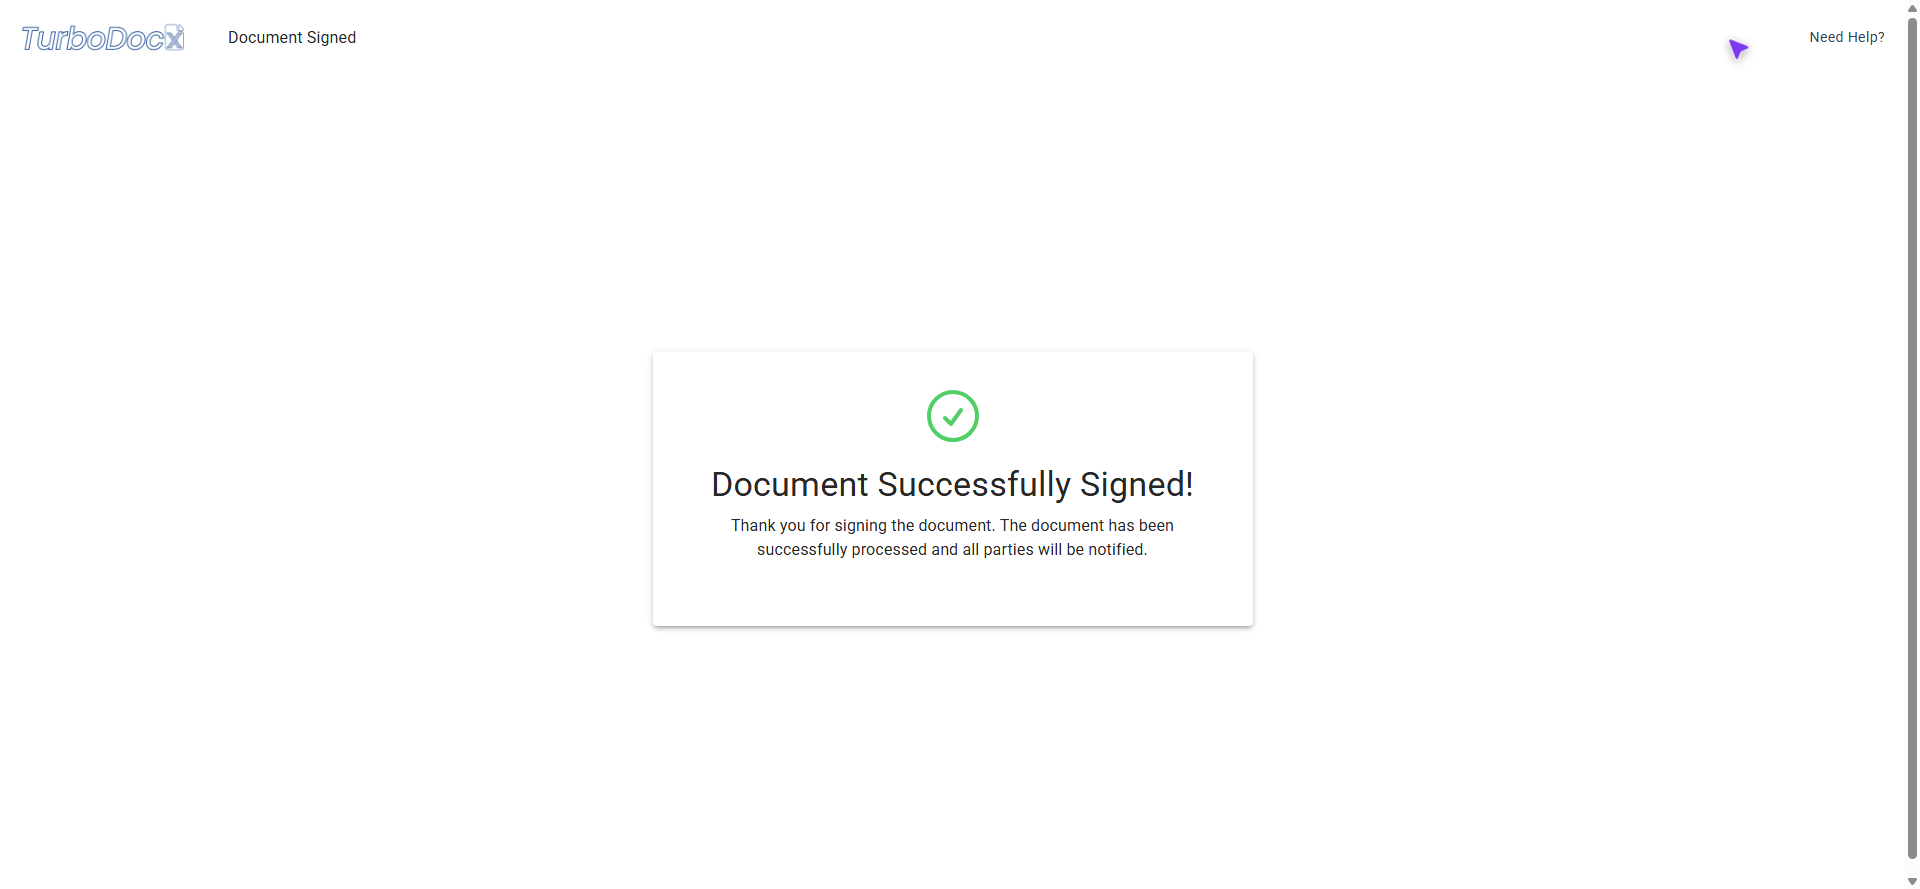
When every required spot is filled, they click Submit Signature.

Where the signed copy goes
TurboDocx saves files only after every signer has signed and the document is sealed. Saving can take a minute after the last signature. A declined, voided, or expired document saves nothing to the record.
When the document is complete, TurboDocx saves two files to the record:
- the signed PDF, named like the document, and
- the Audit Trail PDF, which records who signed, when, and from where.
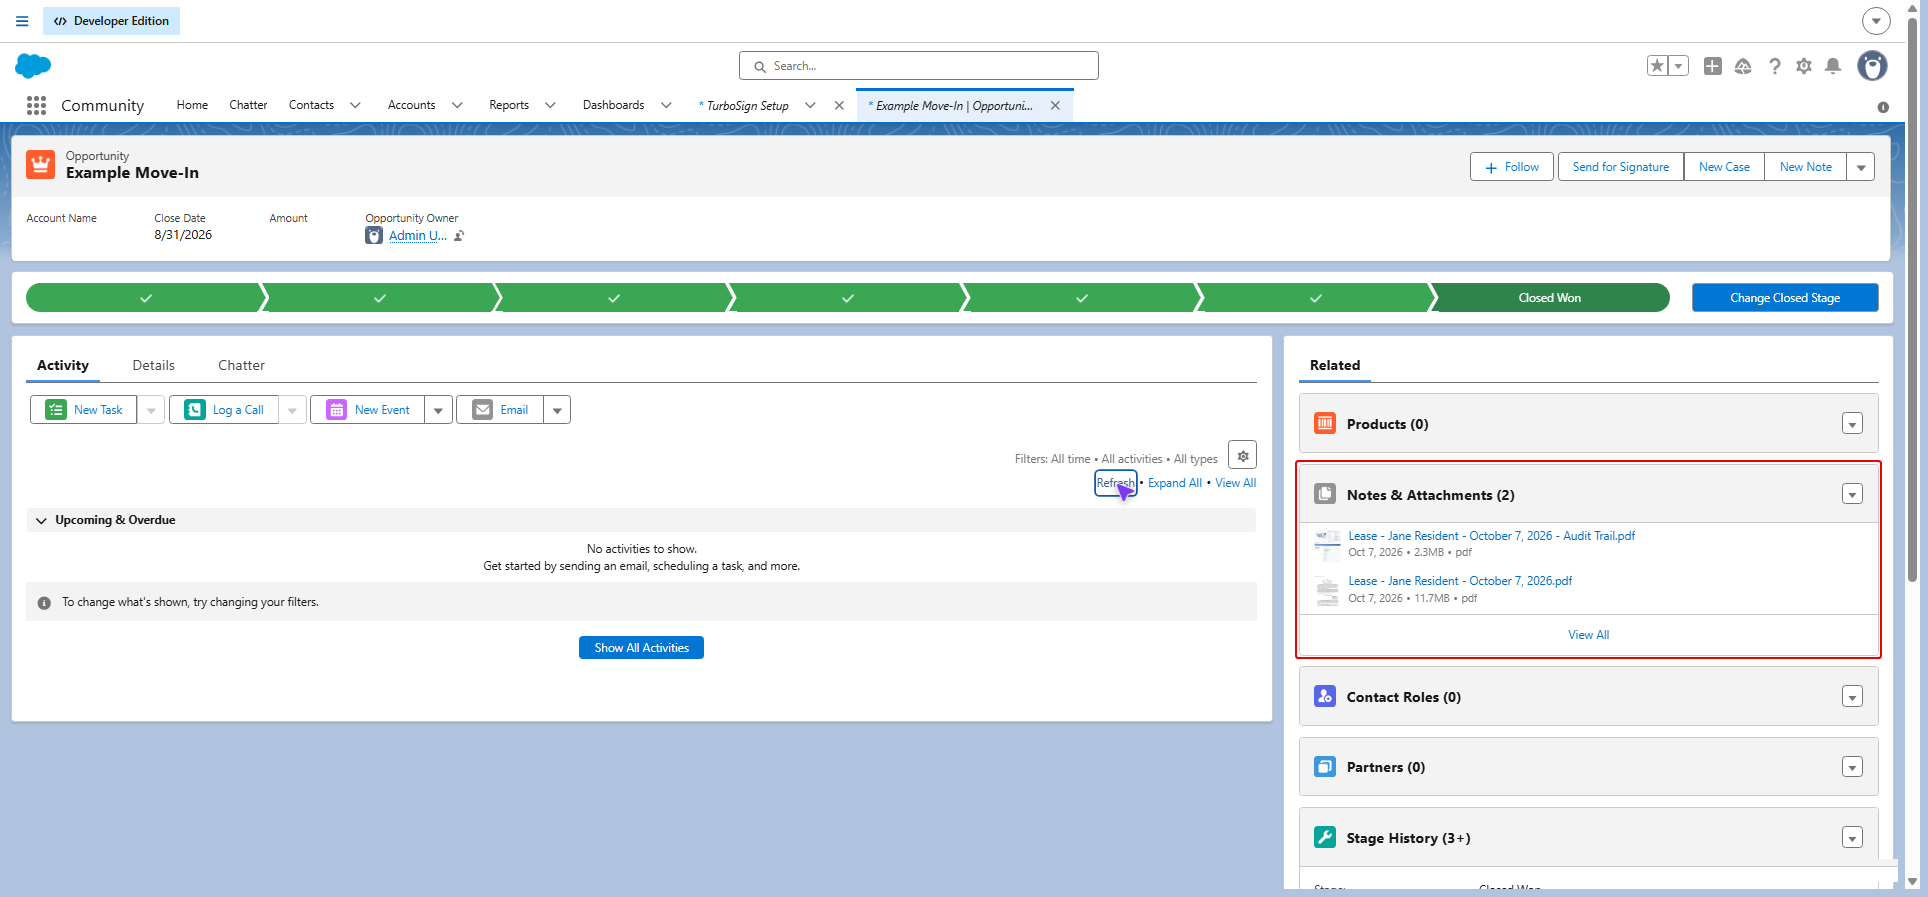
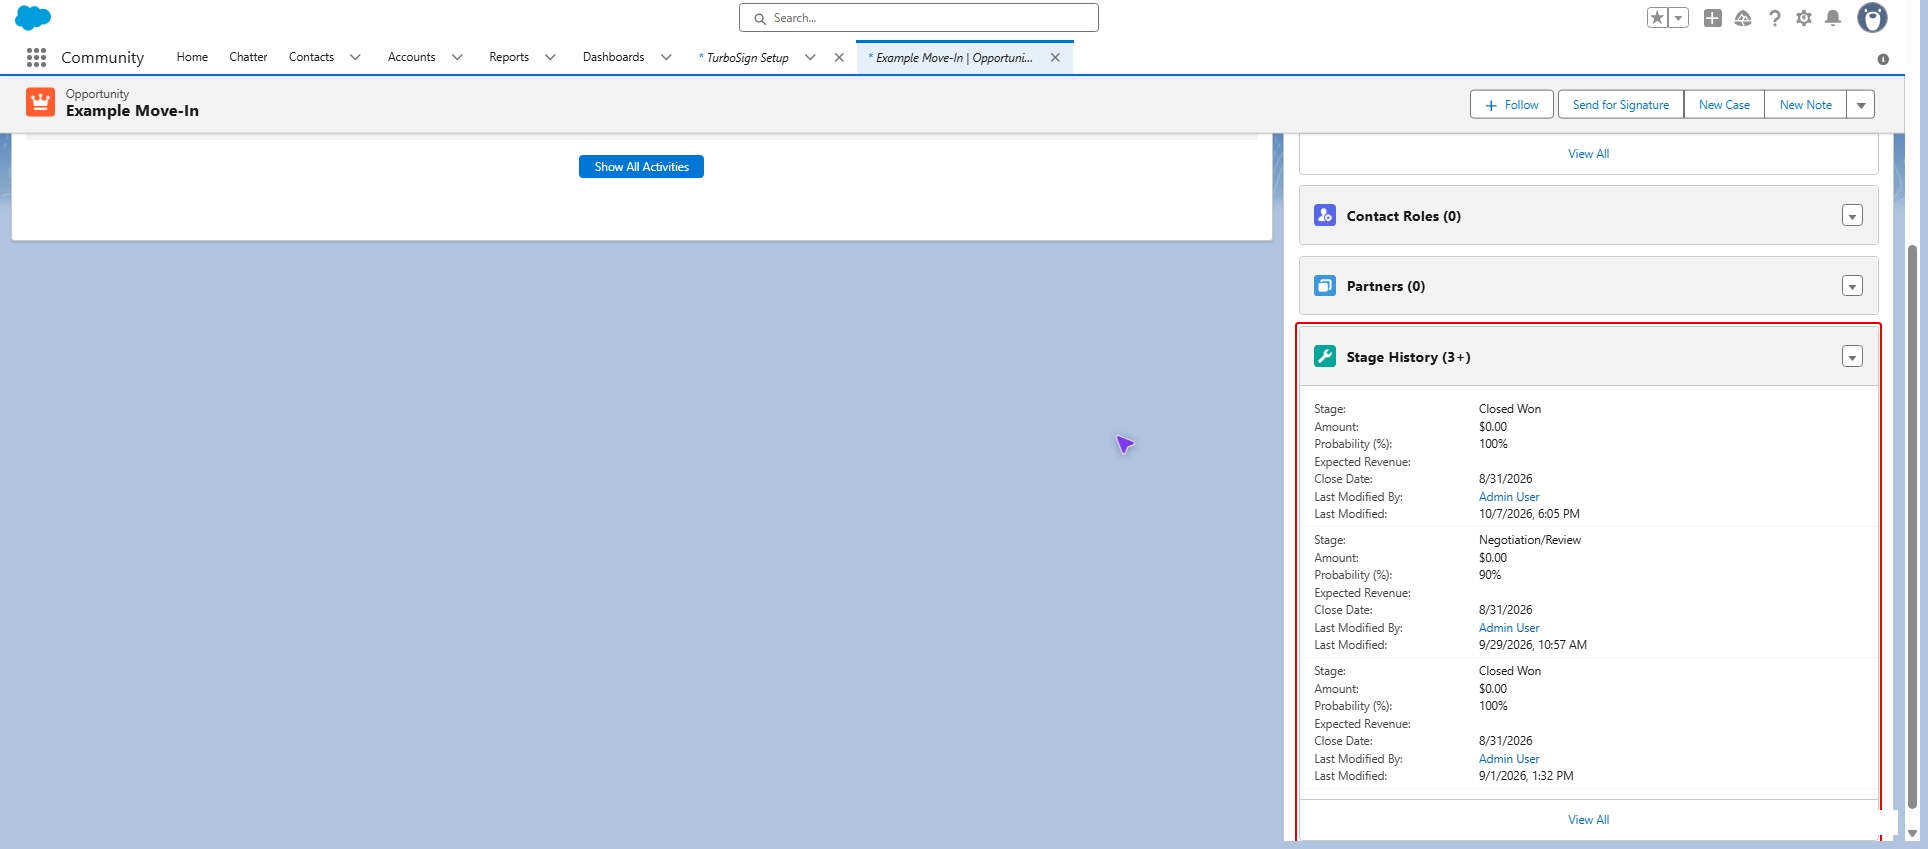
If your admin turned on On Completion, the record also moves forward, for example to Closed Won.
Follow up on a sent document
The TurboSign Signatures panel on the record lists the documents sent from it. If you don't see the panel, ask your admin to add it. In the panel you can:
- click Refresh to pull the latest status and see how many people have signed,
- click Remind to email signers who haven't signed yet, or
- click Void to cancel the document. Type a Reason, then click Void request. Void can't be undone.
Nothing is saved to the record when a document is declined or voided. To act on those outcomes today, ask your admin to build a Flow on the TurboSign Envelope record's Status field. The status updates when a rep clicks Refresh in the TurboSign Signatures panel.