How to Build a PowerPoint Status Deck from Wrike
Slide automation turns a single PowerPoint template into a full status deck. When the Wrike automation runs, TurboDocx does two things:
- It fills a summary slide — one table row for each of your Wrike projects, grouped into tables you define.
- It repeats a looping slide — one copy for each project, filled with that project's own details.
So a two-slide template can produce a fifteen-slide deck, without anyone copying and pasting a slide per project.
This page covers the PowerPoint-specific setup. For the basics of connecting Wrike and creating an automation, start with Setting Up a Wrike Automation.
Prerequisites
- A PowerPoint (.pptx) template uploaded to TurboDocx
- A connected Wrike account (see Setting Up a Wrike Automation)
- A Wrike folder that contains the projects you want in the deck
- Variables on your template mapped to Wrike fields (see Static Field Mapping)
Slide automation only applies to PowerPoint templates. Word templates use document generation instead.
Part 1: Tell TurboDocx which slides do what
TurboDocx needs to know which slide is your summary and which slide repeats. You mark this on the template itself, so it is remembered for every run.
Step 1: Open the slide preview
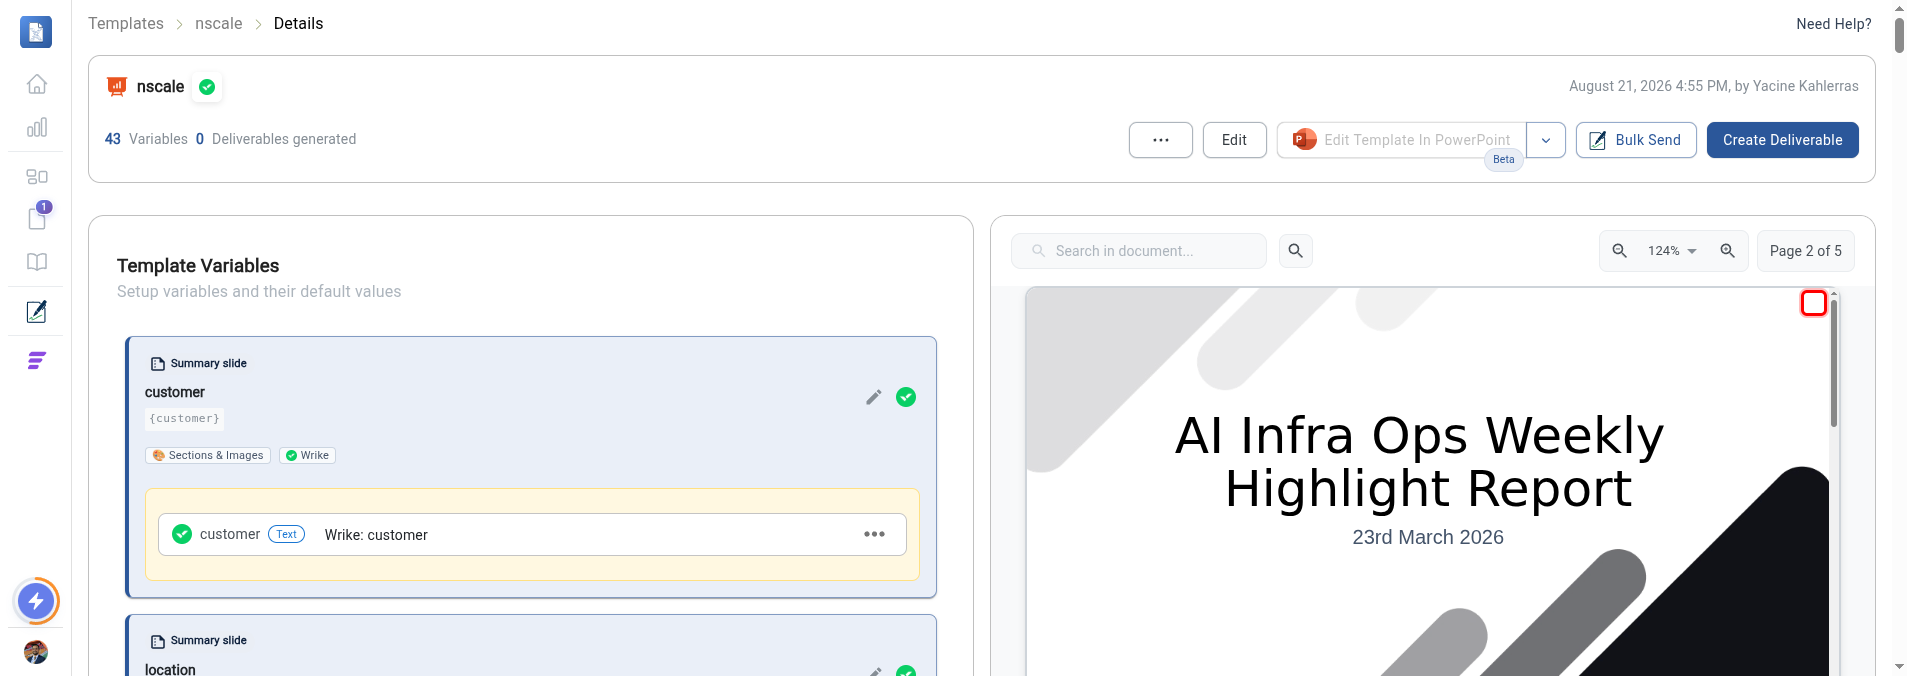
Go to your template's Details page. On the right you'll see a page-by-page preview of your PowerPoint file. Each page here is one slide — page 3 in the preview is slide 3 in your deck.
Hover over the slide you want to mark, and click the small tag button in its top-right corner.
Step 2: Choose the slide's role
A short menu opens with the two roles you can give a slide.
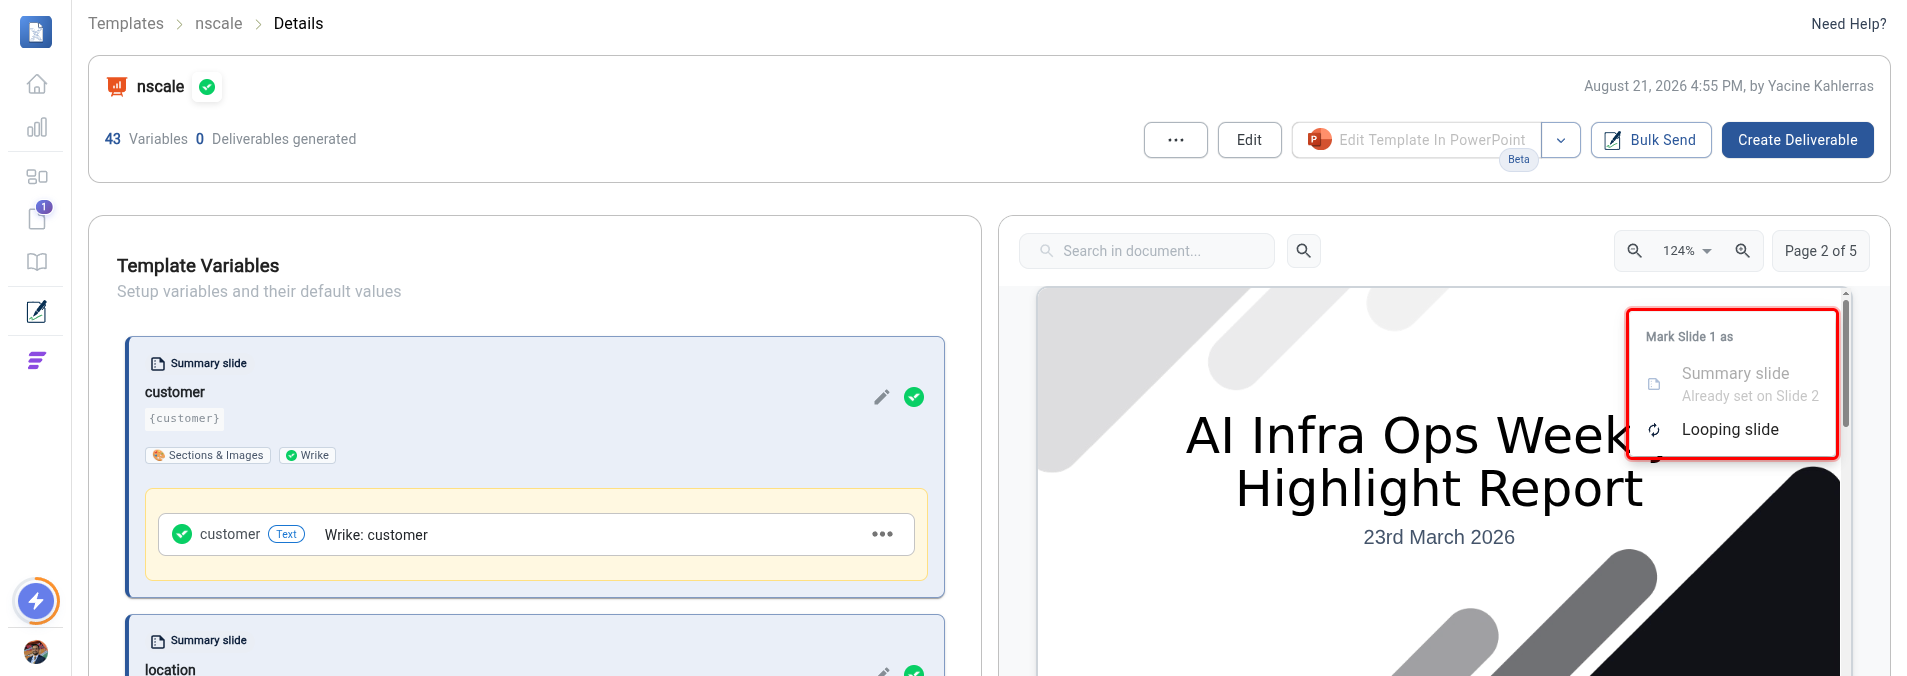
- Summary slide — the slide holding the tables you want filled with one row per project. Only one slide can be the summary slide, so if another slide already has this role the menu tells you which one.
- Looping slide — a slide that gets repeated once for every project. You can mark several slides as looping, and each one repeats in place.
Click the role you want. Your choice saves straight away, and the slide's preview shows a label so you can see at a glance what is marked.
Mark your looping slide before you configure the automation. That way you can check the whole deck's shape in the preview first.
Part 2: Turn on slide automation
With the slides marked, switch on slide automation in the Wrike automation itself.
Step 3: Open your Wrike configuration
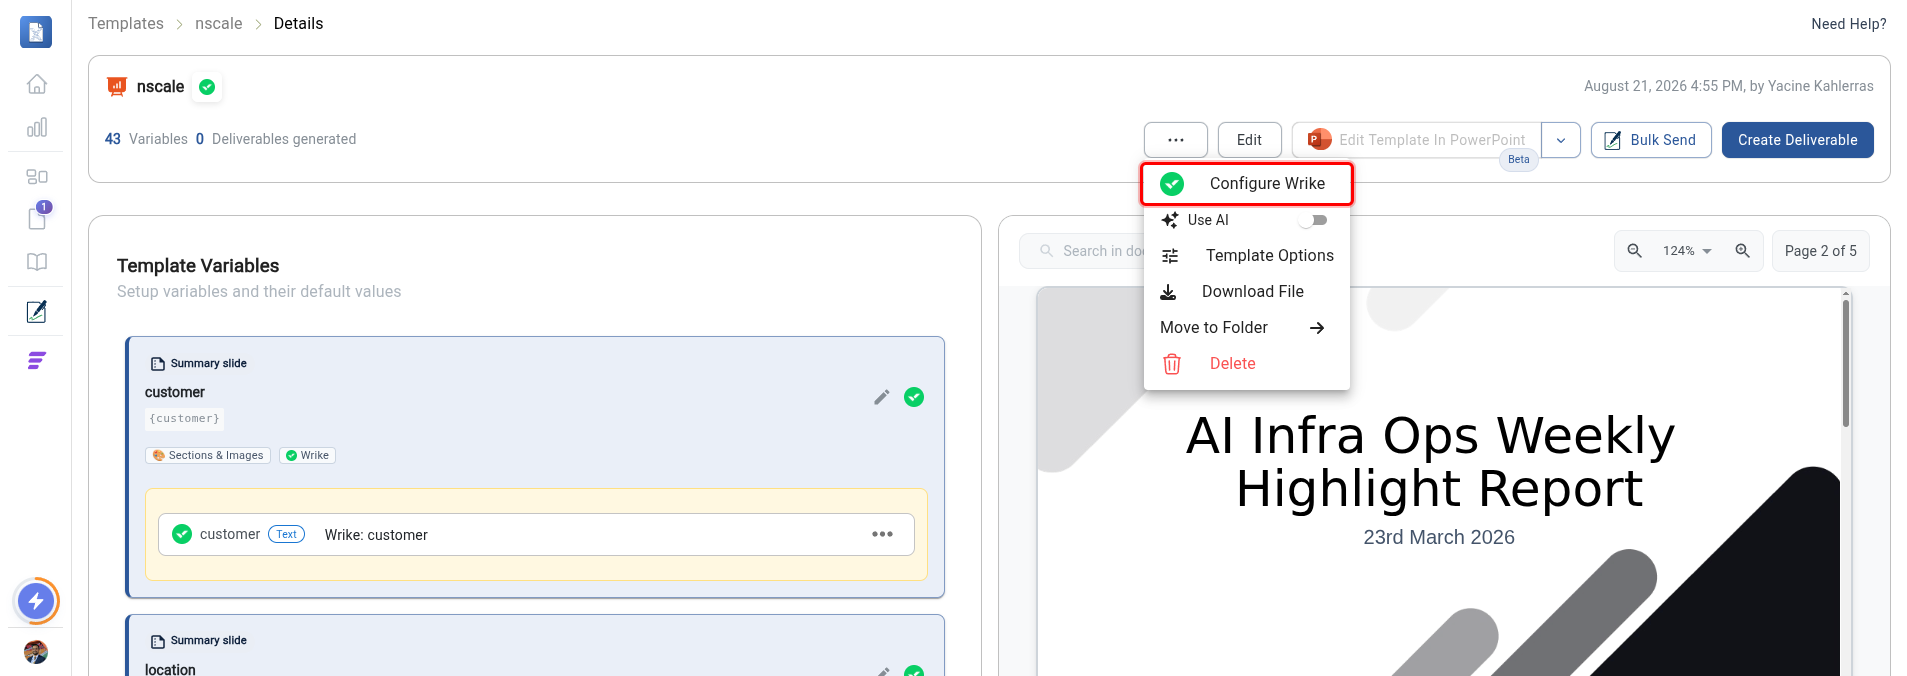
On the same Details page, click the "..." button next to Edit, then click Configure Wrike.
Step 4: Edit the automation
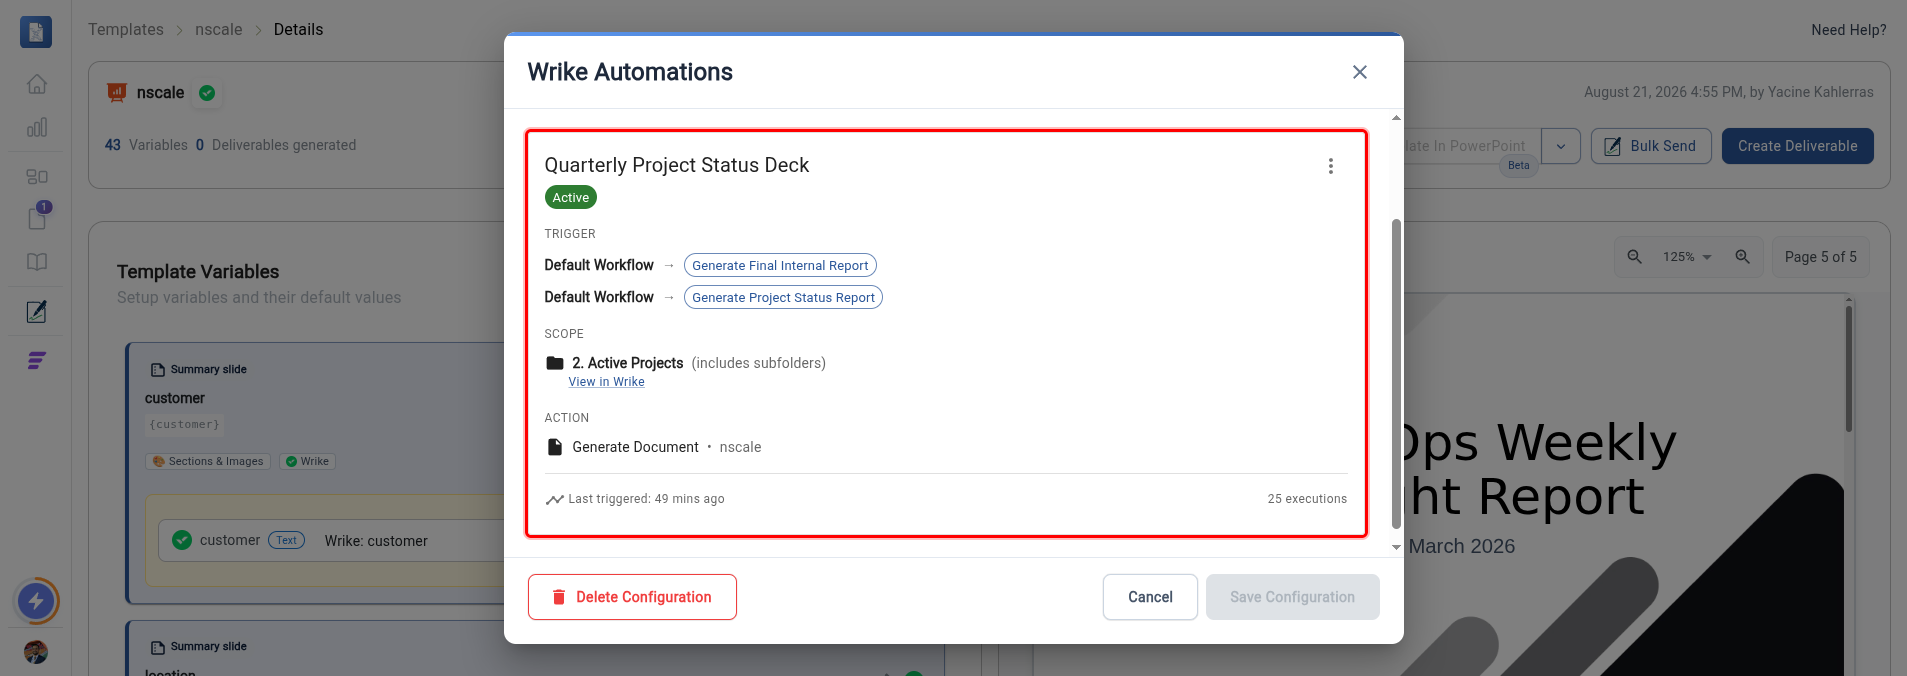
Your configured automations are listed here. Find the one that should build the deck, click its "..." button, and choose Edit.
Click Next until you reach the Configure action step.
Step 5: Switch on slide automation
Find the Slide Automation panel and turn its switch on.
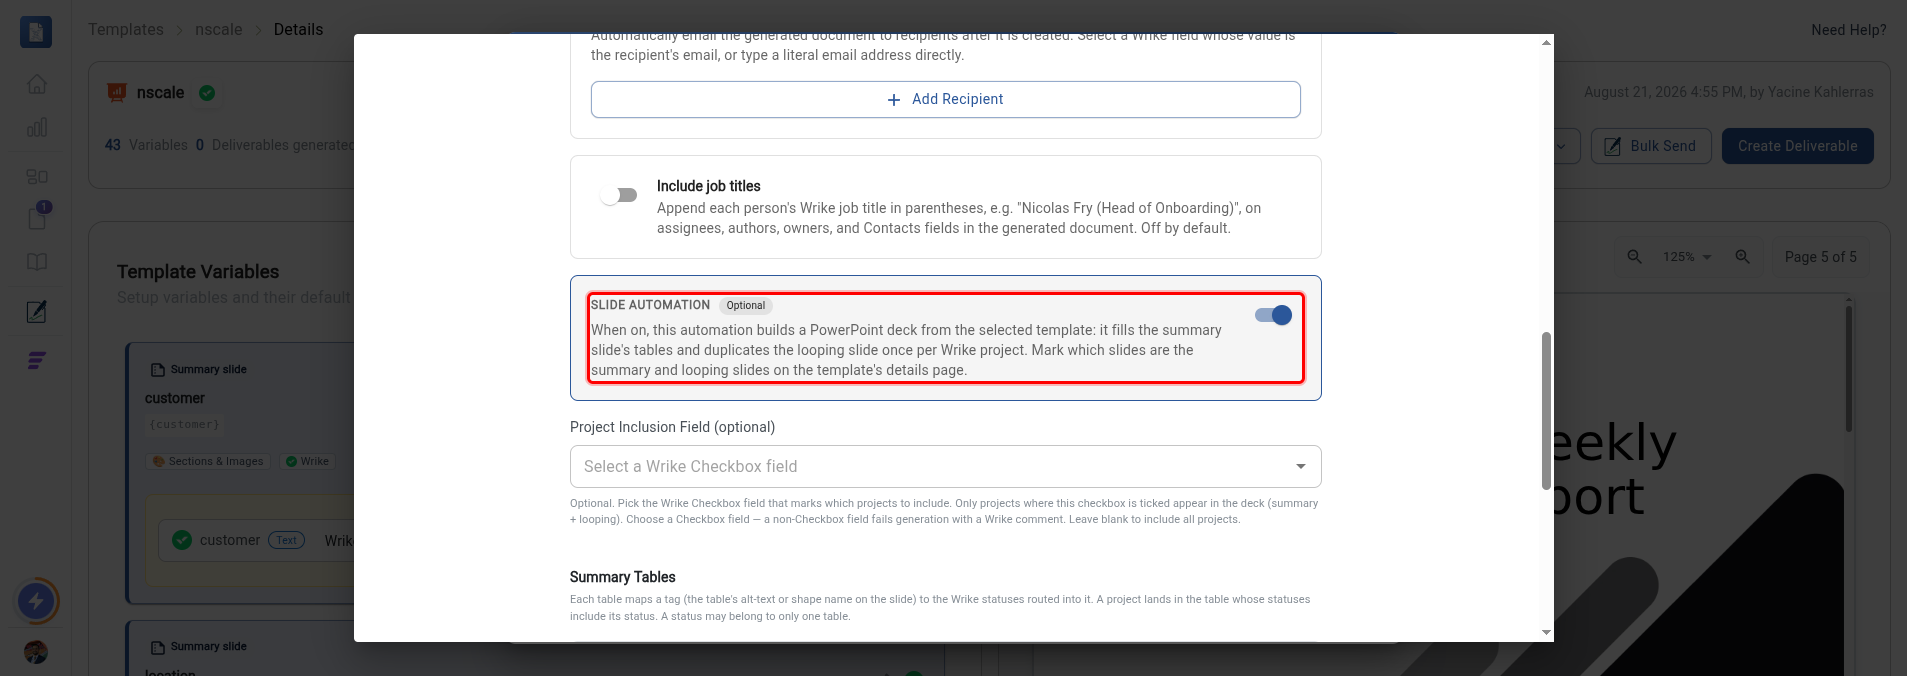
Turning this on reveals the settings in the rest of this guide. Leave it off and the automation generates a normal document, ignoring any slide roles you marked.
Part 3: Choose which projects appear
Step 6: (Optional) Filter projects with a checkbox field
By default, every project inside the triggering folder goes into the deck. If you'd rather choose them, pick a Wrike Checkbox custom field here — then only projects with that box ticked are included.
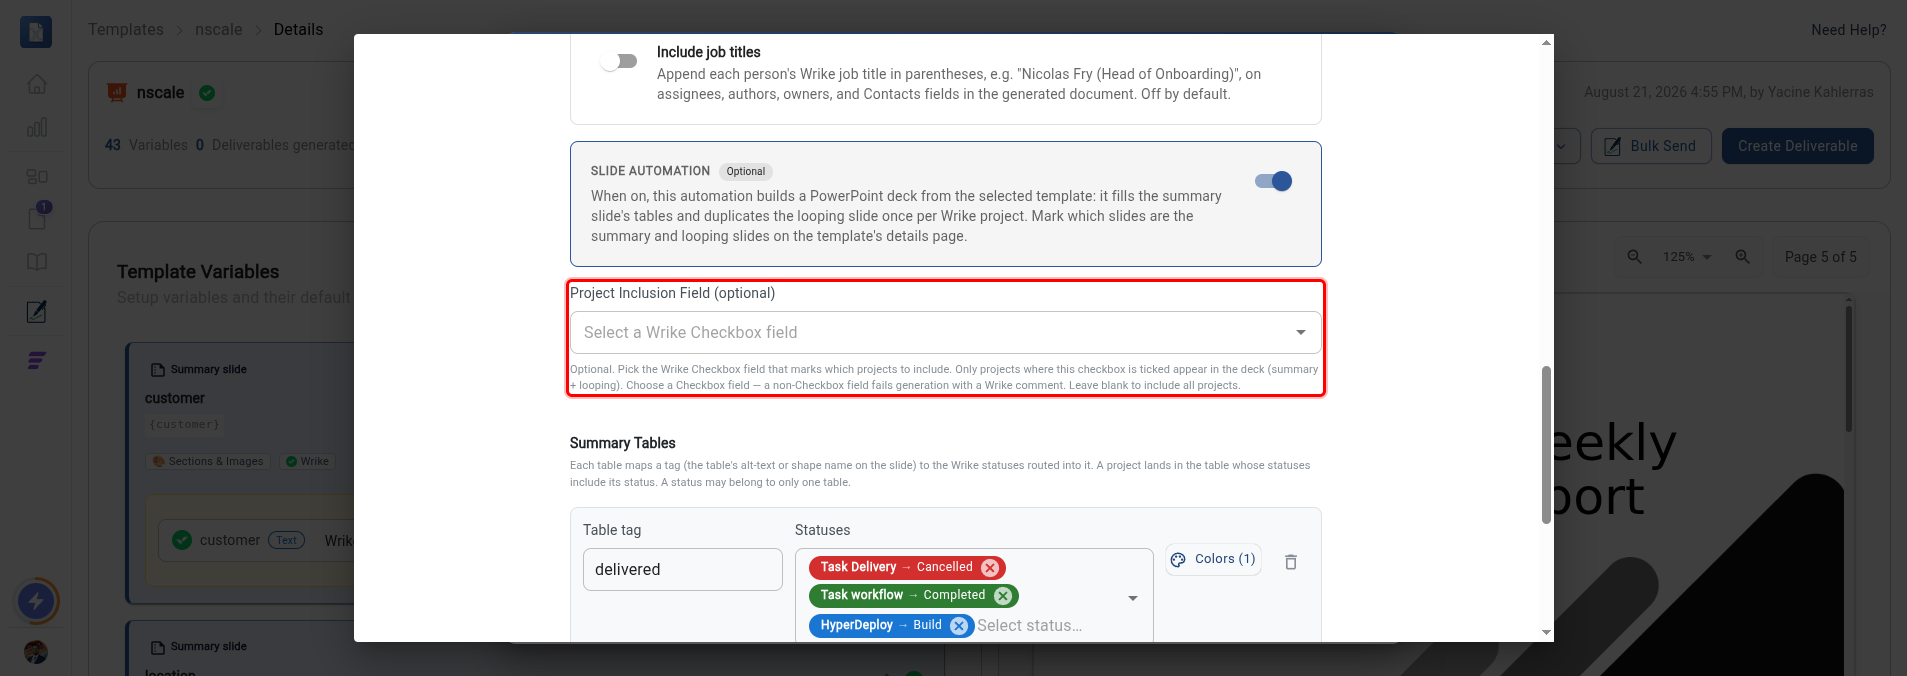
This field is optional. Leave it blank to include everything, which is what most teams want to start with.
If you do pick a field, it must be a Checkbox field. Picking another type — or picking a field that is later deleted in Wrike — stops the deck being generated, and TurboDocx posts a comment on the Wrike task explaining why.
Part 4: Set up the summary tables
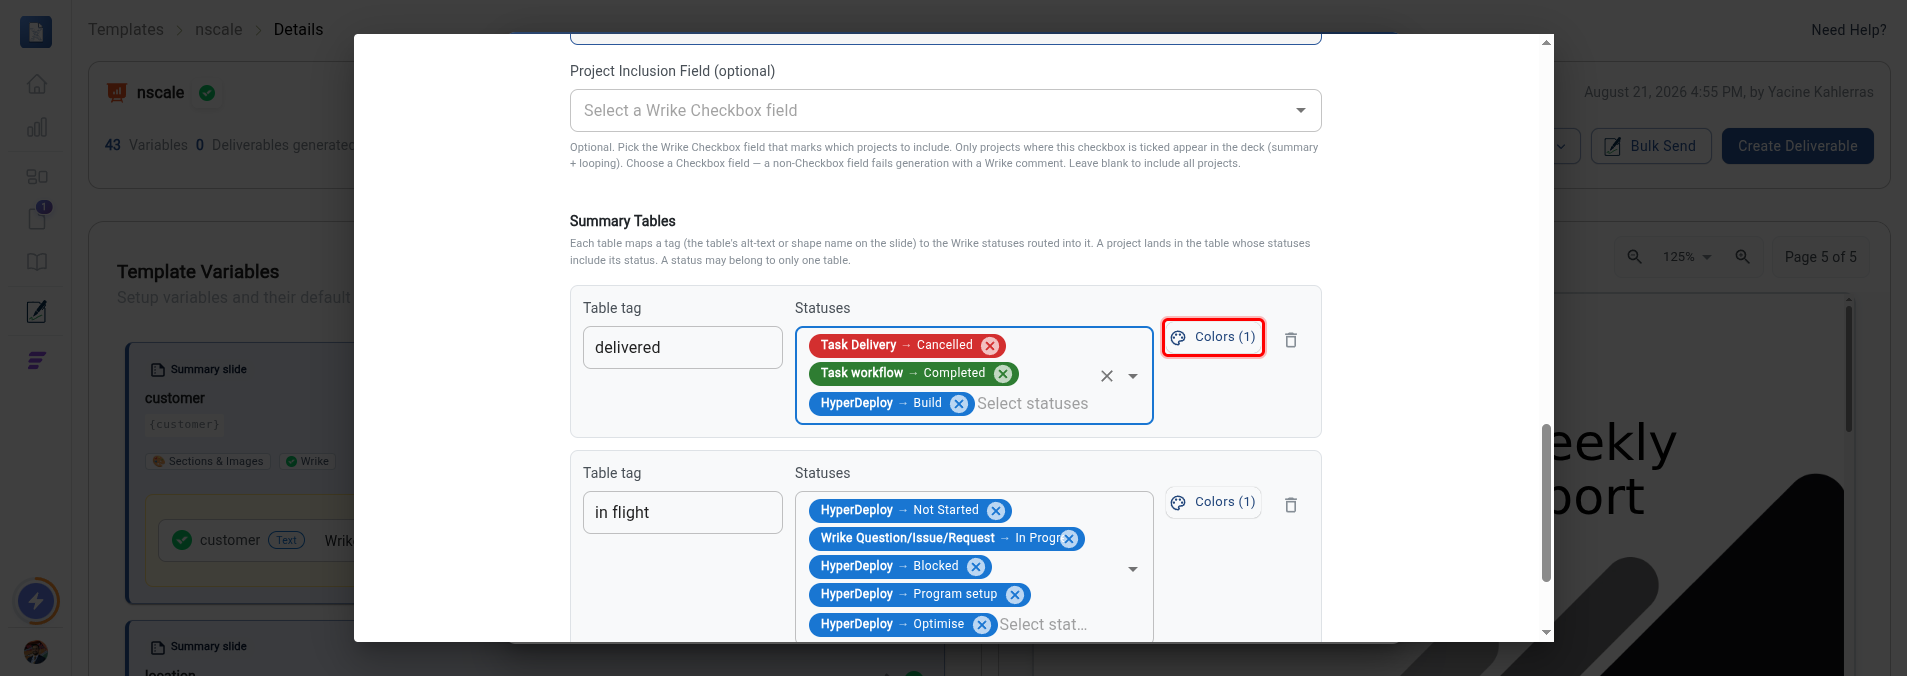
The summary slide can hold several tables — for example one for delivered work and one for work in flight. Each table collects projects by their Wrike status.
Step 7: Tag a table and choose its statuses
Each row here is one table on your summary slide:
- Table tag — the table's name on the slide. Set this as the table's alt-text (or its shape name) in PowerPoint, so TurboDocx knows which table to fill.
- Statuses — the Wrike statuses that route a project into this table.
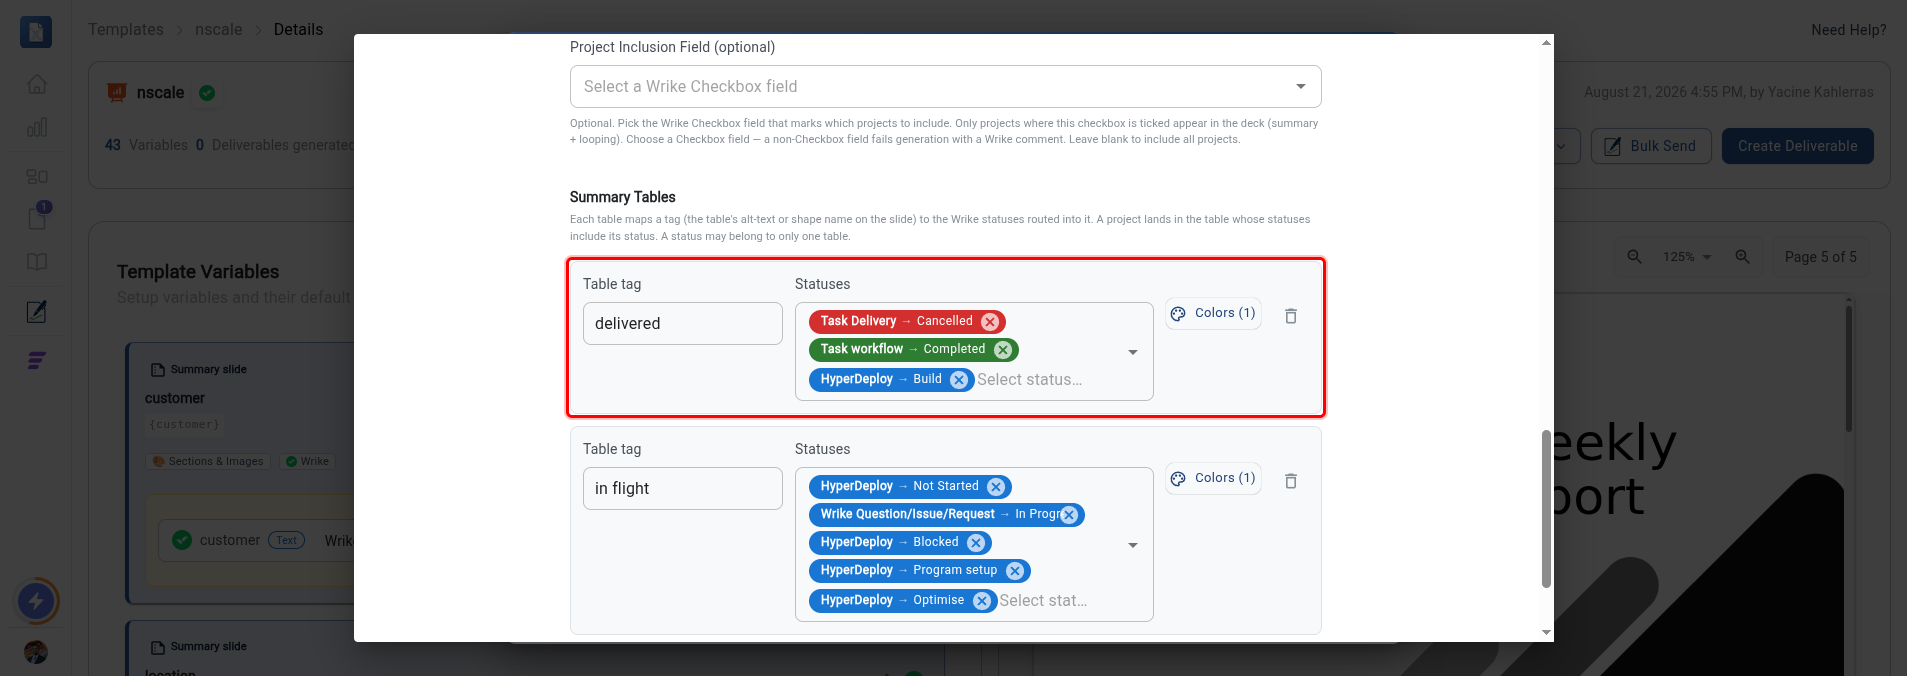
Click Add table for each additional table on the slide.
Step 8: Pick the statuses
Click the Statuses box to open the list. Statuses are grouped by their Wrike workflow, so you can tell similarly-named ones apart.
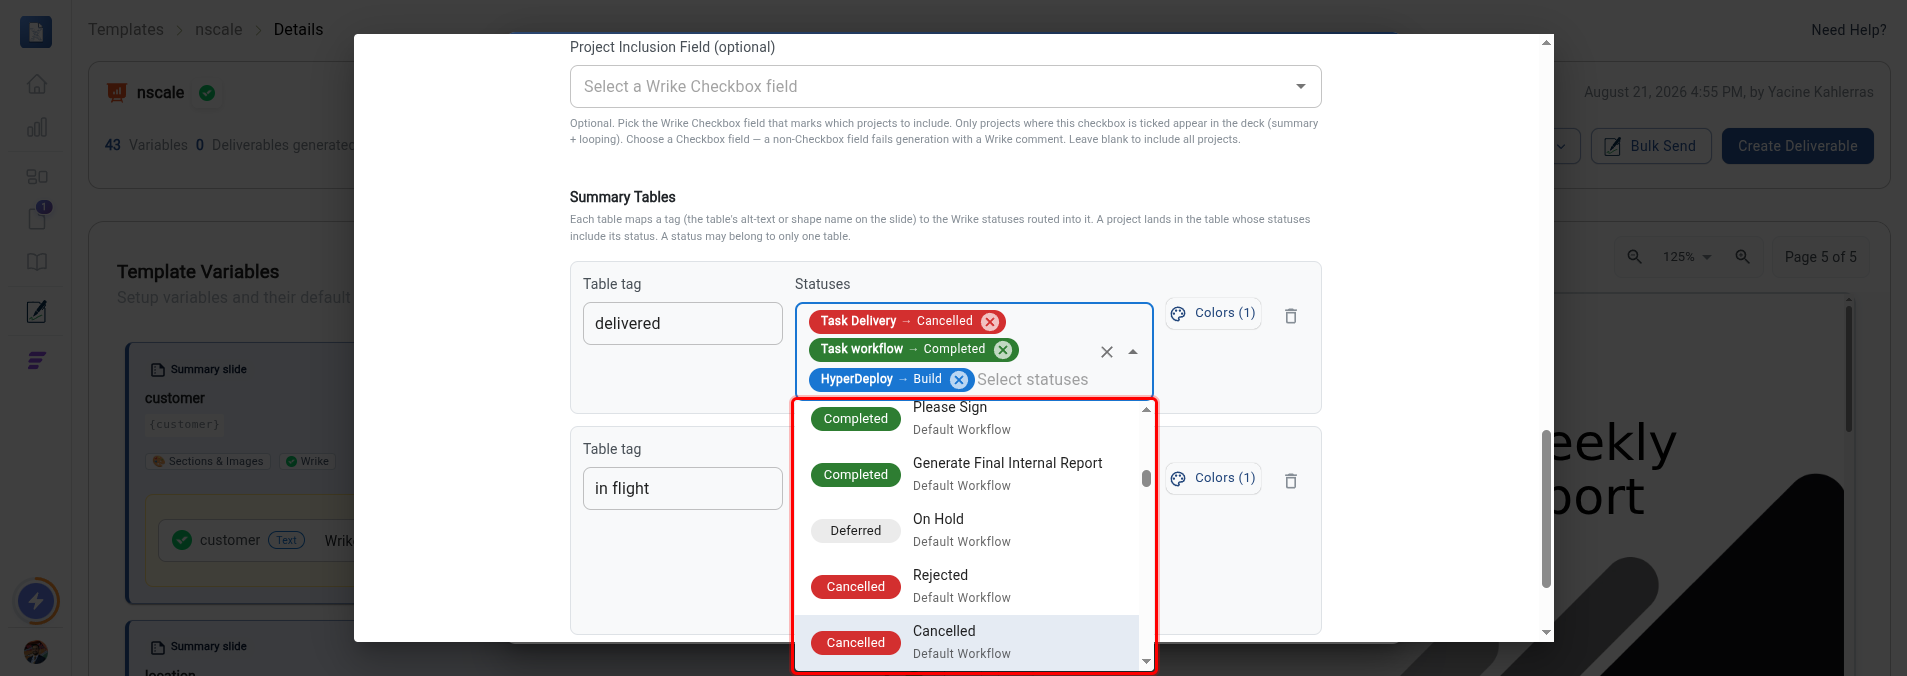
The list stays open as you pick, so you can select several statuses in one go. Click anywhere outside it when you're finished.
A status can belong to only one table — otherwise a project could land in two tables at once. If a project's status isn't in any table, it is left out of the summary, and TurboDocx tells you how many were skipped in its Wrike comment.
Part 5: Colour the cells by value (optional)
You can colour a table's cells based on what they say — for example green for completed work and red for cancelled.
Step 9: Open Color Setup
On the table row, click Color Setup (it shows a count once you've added rules).
Step 10: Map values to colours
Choose the field you want to colour by, then map each of its values to a colour.
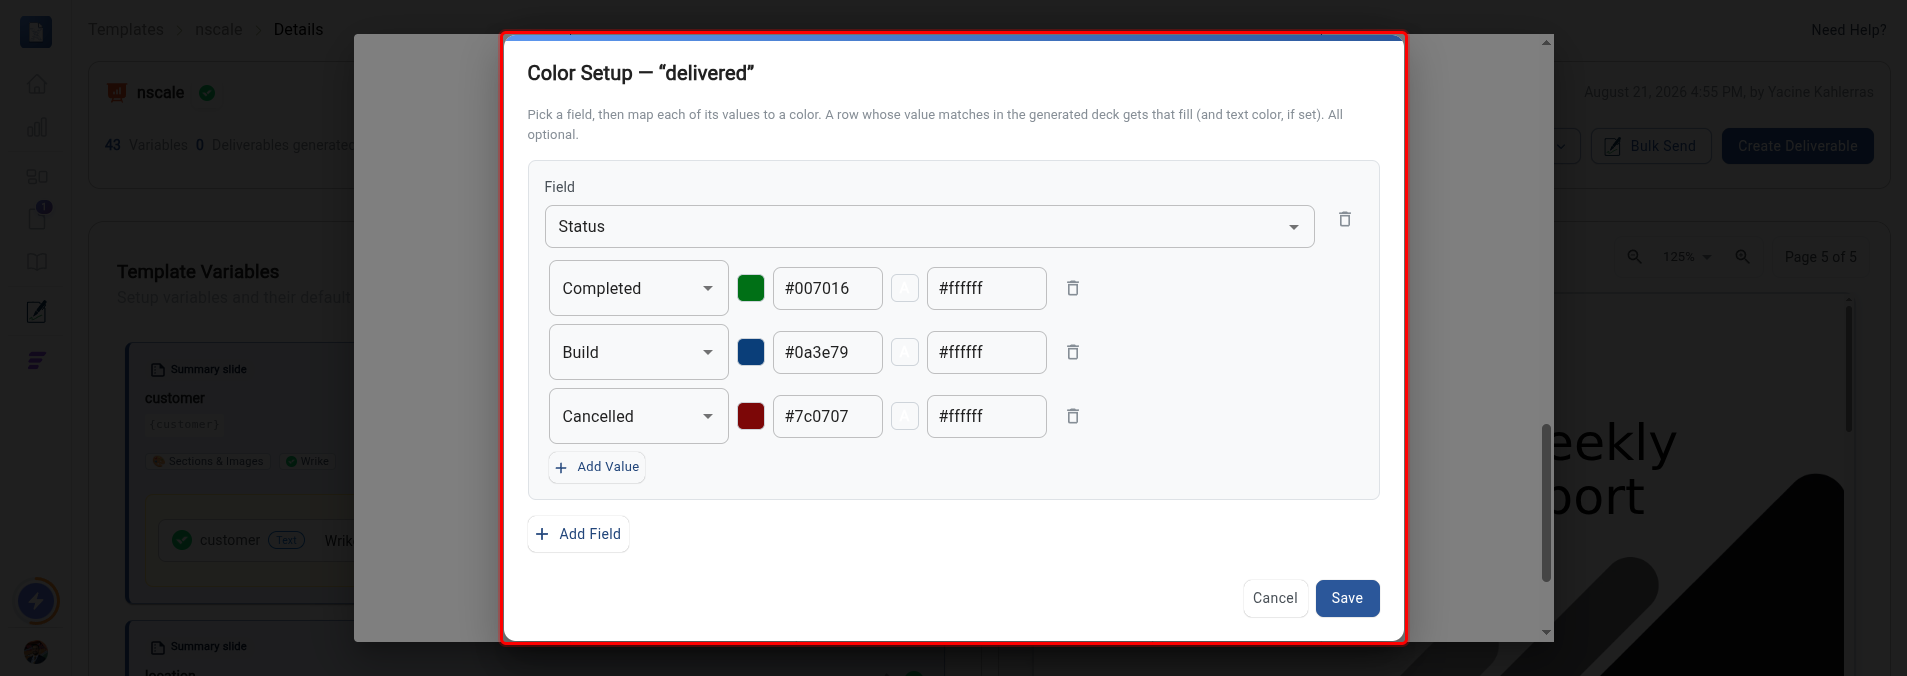
For each row:
- Pick a value from the dropdown. It offers the statuses you routed into this table, so the value always matches something real.
- Click the colour square to set the cell's background, or type a hex code such as
#007016. - Optionally set a text colour so the writing stays readable on a dark fill.
Click Add Value for each value you want to colour, then Save.
Step 11: Save the automation
Click Next through the remaining steps, then Save Configuration.
Your automation is live. The next time a project moves into the trigger status, TurboDocx builds the deck — summary tables filled, looping slides repeated per project — and attaches it to the Wrike item.
Troubleshooting
The deck was not generated, and Wrike shows a comment about the inclusion field. The Checkbox field chosen in Step 6 no longer works — it may have been deleted in Wrike, or changed to another field type. Pick a valid Checkbox field, or clear the field to include every project.
Some projects are missing from the summary. Their Wrike status isn't listed in any of your tables. Add it to the right table's Statuses in Step 8.
A summary table stayed empty. The Table tag doesn't match the table on the slide. Check the table's alt-text (or shape name) in PowerPoint and make it match the tag exactly.
The looping slide didn't repeat. Check the slide is still marked as a Looping slide in Part 1, and that Slide Automation is switched on in Step 5.
For anything else, see Wrike Integration Troubleshooting & FAQ.